
Brownies Petite Portion : Votre Dose Parfaite de Chocolat
Vous avez déjà eu une envie irrésistible d’un brownie fondant et chaud, mais sans vouloir un grand plat qui vous taquine pendant des jours ? C’est mon cas, et souvent ! C’est exactement pourquoi j’ai créé cette recette de Brownies Petite Portion. C’est la solution idéale pour une soirée cocooning, un petit plaisir après le dîner, ou quand vous avez juste besoin d’un peu d’amour chocolaté sans engagement. Croyez-moi, ces petites portions révolutionnent la vie des gourmands qui pensent que les meilleures choses viennent en petits formats.
Un Petit Morceau d’Histoire du Brownie
Le brownie est une invention merveilleusement américaine, issue d’un heureux accident de cuisine. La légende dit qu’une cuisinière astucieuse, à la fin du XIXe siècle, a oublié d’ajouter la levure à son gâteau au chocolat. Le résultat fut une barre dense et riche dont on ne peut plus se passer aujourd’hui ! Les recettes traditionnelles font une grande quantité pour une foule, mais la version moderne des Brownies Petite Portion adapte ce classique aux ménages plus petits et aux envies spontanées. C’est la même saveur nostalgique, juste dans une taille parfaitement personnelle.
Pourquoi Vous Adorerez Cette Recette de Brownie Miniature
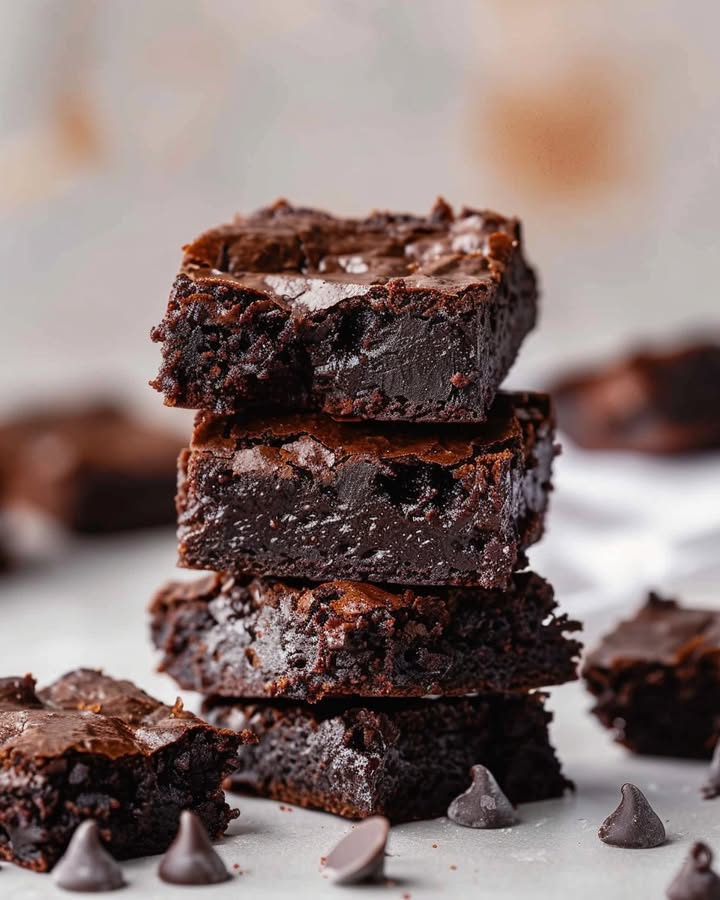
Vous allez adorer cette recette parce qu’elle est rapide, infaillible et incroyablement délicieuse. En environ 30 minutes, vous passez de l’envie à la dégustation. La pâte se prépare dans deux bols avec juste un fouet. Vous obtenez cette croûte craquelée classique et un centre délicieusement dense et fondant. Le meilleur ? Cela fait juste la quantité pour vous et un ami (ou juste pour vous, sur deux jours… sans jugement !). C’est le dessert parfaitement adapté ultime.
Occasions Parfaites pour votre Petite Portion
Ces brownies brillent dans tant de petits moments gourmands. Ils sont idéaux pour un dessert de soirée romantique pour deux. Ils sont salvateurs pour une urgence chocolatée de milieu de semaine. J’adore glisser un dans la lunchbox de mon enfant comme surprise spéciale. Ils sont aussi fantastiques pour un petit club de lecture ou un plaisir pour votre marathon ciné du weekend. À chaque fois que vous voulez un dessert maison sans une montagne de restes, c’est votre recette.
Rassembler Vos Ingrédients pour les Brownies Petite Portion
Des ingrédients simples font la magie ici. Voici ce dont vous aurez besoin :
- 1/2 tasse de sucre granulé
- 1/4 tasse de beurre non salé, fondu
- 1 gros œuf
- 1 cuillère à café d’extrait de vanille
- 1/4 tasse de farine tout usage
- 1/4 tasse de cacao en poudre non sucré
- 1/4 cuillère à café de sel
- 1/4 cuillère à café de levure chimique
- 1/4 tasse de pépites de chocolat mi-sucré
Substitutions Faciles d’Ingrédients (Pas de Stress !)
Vous manquez de quelque chose ? Pas de panique ! Voici des substitutions simples :
- Beurre: Vous pouvez utiliser du beurre salé. Il suffit alors de omettre le sel ajouté dans la recette.
- Cacao en poudre: Le cacao Dutch-processed fonctionne parfaitement ici.
- Pépites de chocolat: Vous pouvez utiliser des morceaux de chocolat noir, des pépites de chocolat blanc, ou même des noix hachées comme des noix ou des pécan.
- Farine: Pour une version sans gluten, une farine sans gluten à substitution 1:1 fonctionne bien.
C’est parti pour la Cuisson ! votre Guide étape par étape
Étape 1 : Préparer votre Plaque & Four
Premièrement, préchauffez votre four à 350°F (175°C). Cela lui donne le temps de chauffer uniformément. Prenez un petit plat de cuisson, environ 6×6 pouces. Graissez-le légèrement avec du beurre ou de l’huile. Pour un nettoyage absolument plus facile, tapissez-le avec un morceau de papier sulfurisé, en laissant un excédent sur deux côtés. Cela crée des petites « poignées » pour soulever la plaque de brownie entière ensuite ! Astuce pro : Un four correctement préchauffé est essentiel pour cette texture et montée parfaites.
Étape 2 : mélanger les Ingrédients Liquides
Dans un bol moyen, versez votre beurre fondu et le sucre granulé. Fouettez-les ensemble vigoureusement. Vous verrez la mixture passer de granuleuse à une belle consistance pale et légèrement brillante. Maintenant, cassez l’œuf et ajoutez la vanille. Fouettez encore jusqu’à ce que tout soit magnifiquement homogène. L’arôme chaud de la vanille commencera à se mêler à la senteur sucrée du beurre. Ça sent déjà le dessert !
Étape 3 : Fouetter l’Équipe des Ingrédients Secs
Dans un autre bol plus petit, c’est le moment pour les ingrédients secs. Prenez la farine, le cacao en poudre, le sel et la levure chimique. Je préfère tamiser ensemble directement dans le bol. Ce n’est pas juste pour être méticuleux ! Tamiser casse les mottes de cacao et farine, et aère le mélange pour une texture plus légère. Cela assure aussi que la levure chimique et le sel sont distribués uniformément, pour que chaque bouchée soit parfaitement équilibrée.
Étape 4 : Combiner & incorporer Doucement
Maintenant, versez vos ingrédients secs tamisés dans le bol avec la mixture liquide. Utilisez une spatule ou une cuillère en bois pour incorporer doucement ensemble. Mélangez juste jusqu’à que vous ne voyez plus de traces de farine. La pâte sera épaisse et délicieuse. Voici le secret : Ne mélangez PAS trop ! Trop mélanger développe le gluten dans la farine et peut rendre vos brownies durs au lieu de tendres. Quelques mottes sont totalement acceptables. Finalement, incorporez doucement les pépites de chocolat jusqu’à qu’elles soient dispersées dans la pâte foncée.
Étape 5 : Cuire à la perfection
Versez cette magnifique pâte garnie de pépites de chocolat dans votre plat préparé. Utilisez votre spatule pour l’étaler en une couche uniforme, l’amenant dans les coins. Placez le plat au centre de votre four préchauffé. Cuisez pendant 20 à 25 minutes. Le vrai test ? Un cure-dent placé au centre doit ressortir avec quelques miettes humides attachées—pas de pâte liquide, mais pas complètement sec. C’est le signe d’un centre parfaitement fondant. Astuce du chef : Pour des brownies super fondants, penchez vers la marque de 20 minutes. Pour des versions plus cake-like, allez vers 25.
Étape 6 : le Refroidissement Crucial
C’est la partie la plus difficile : attendre ! Laissez les brownies refroidir complètement dans le plat sur une grille. Je sais que c’est tentant de couper directement, mais si vous le faites, ils seront trop gluants et tomberont en morceaux. En refroidissant, ils continuent de prendre grâce à la chaleur résiduelle. Quand ils sont à température ambiante, utilisez un couteau tranchant pour les découper en carrés. Pour des coupes très nettes, vous pouvez même les mettre au frigo 15 minutes d’abord. Puis, servez et savourez cette riche récompense chocolatée !
Votre Budget temps pour les Brownies
Cette recette est merveilleusement rapide du début à la fin.
- Temps de Préparation: 10 minutes
- Temps de Cuisson: 25 minutes
- Temps de Refroidissement: 30 minutes
- Temps Total: Environ 1 heure 5 minutes (incluant le refroidissement)
Mon secret Astuce du Chef
Pour une saveur chocolatée plus intense, faites « fleurer » votre cacao. Comment ? Après avoir fait fondre le beurre pour les ingrédients liquides, fouettez le cacao en poudre directement dans le beurre fondu et chaud environ 30 secondes avant d’ajouter le sucre. Ce petit traitement thermique « fleure » le cacao, libérant ses saveurs les plus profondes et complexes directement dans le gras. Cela fait une différence notable dans la richesse de vos Brownies Petite Portion.
Un fun fait sur le Chocolat
Saviez-vous que le type de cacao en poudre que vous utilisez change la personnalité de votre brownie ? Le cacao naturel non sucré (comme les marques communes) est acide et donne une saveur chocolatée classique et légèrement acidulée. Le cacao Dutch-processed est traité avec un alcali pour neutraliser l’acide. Il est plus foncé, plus doux, et donne souvent un brownie plus foncé et plus moelleux. Les deux fonctionnent dans cette recette, donc n’hésitez pas à expérimenter avec ce que vous avez !
Équipement que Vous aurez besoin
Vous n’avez besoin d’aucun gadget fancy pour ça. Un ensemble basique de cuisine suffira :
- Un plat de cuisson 6×6 pouces (ou un moule à pain 8×4 pouces en dernier recours)
- Deux bols pour mélanger (un moyen, un petit)
- Un fouet et une spatule
- Mesures pour les tasses et cuillères
- Une grille pour le refroidissement
Conservation de vos Brownies Petite Portion
Après refroidissement complet, conservez vos brownies dans un contenant hermétique. Ils resteront frais et délicieux à température ambiante jusqu’à 3 jours. Placez un morceau de papier sulfurisé entre les étages si vous les superposez.
Pour une conservation plus longue, vous pouvez les réfrigérer. La température froide les rendra encore plus denses et fondants. Ils se garderont bien jusqu’à 5 jours dans le frigo. Laissez-les revenir à température ambiante pour la meilleure texture avant service.
Oui, vous pouvez aussi les congeler ! Emballez les carrés individuellement dans du film plastique, puis placez-les dans un sac de congélation. Ils se garderont jusqu’à 3 mois. Faites-les décongeler à température ambiante ou passez un carré au micro-ondes quelques secondes pour un plaisir warm et fondant instantané.
Astuces & conseils pour un Brownie Succès
- Utilisez des œufs à température ambiante pour un mélange plus facile et une pâte plus homogène.
- Faites fondre votre beurre juste jusqu’à liquide. Laissez-le légèrement refroidir pour qu’il ne cuise pas l’œuf lors du mélange.
- Pour des carrés jolis, nettoyez votre couteau entre chaque coupe.
- Ne zappez pas le sel ! Il accentue la saveur chocolatée et équilibre le sucré.
Idées de Présentation jolie
Même un simple brownie peut être embelli ! Essayez ces idées :
- Saupoudrez d’une légère neige de sucre en poudre juste avant service.
- Ajoutez une petite boule de glace vanille sur le dessus quand le brownie est encore légèrement warm.
- Arrosez avec une ganache chocolat simple ou un sauce caramel.
- Servez avec quelques framboises ou fraises fraîches pour une touche de couleur et un contraste acidulé.
Plus d’Inspirations de Desserts Délicieux
Si vous avez aimé cette petite portion, j’ai tant d’autres douceurs que vous pourriez aimer ! La période des fêtes appelle des choses comme mes Grahams Chocolat-Menthe faciles et festifs. Pour une expérience vraiment indulgent et crémeuse, vous devez essayer le classique Gooey Butter Cake avec sa topping cheesecake luxurieuse. Si une expérience méga-chocolatée est votre désir, mon Gateau Brownie Fudge décadent de Nanny combine deux favoris en un. Et pour une autre twist festive sur les brownies, ces Brownies Menthe avec une topping chocolat blanc plaisent toujours.
erreurs Courantes à éviter
Erreur 1 : Trop mélanger la Pâte
C’est la plus grande cause des brownies durs et cake-like. Quand vous mélangez la farine trop vigoureusement ou trop longtemps, vous développez le gluten. Le gluten est super pour le pain, mais il rend les desserts chewy de manière peu agréable. Quand vous ajoutez les ingrédients secs, passez à une spatule et incorporez doucement. Stop dès que la farine disparaît. Quelques petites mottes sont totalement ok et promettent une bouchée plus tendre.
Erreur 2 : Trop cuire les Brownies
Nous voulons fondant, pas sec ! Trop cuire évapore l’humidité, vous donnant une texture friable et cake-like. Rappelez-vous, les brownies continuent de cuire via la chaleur résiduelle en refroidissant. Le test de cuisson parfait est un cure-dent avec quelques miettes humides attachées, pas un cure-dent complètement clean. Réglez un timer et vérifiez dès la marque de 20 minutes. Si vous êtes incertain, mieux vaut underdo.
Erreur 3 : Utiliser des Ingrédients froids
Utiliser un œuf cold du frigo peut faire se figer votre beurre fondu et créer une pâte lumpy. Cela peut aussi rendre plus difficile l’émulsification correcte des ingrédients. Pour une pâte plus smooth et homogène, laissez votre œuf sur le comptoir 15-20 minutes avant début. Cette petite étape rend le mélange beaucoup easier et crée une texture meilleure.
Erreur 4 : Couper les Brownies quand ils sont Hot
Je sais que l’attente est pénible, mais couper des brownies hot est une recette pour un désastre gluey et messy. La structure n’est pas encore prise. Laissez-les refroidir complet dans le plat sur une grille. Cela leur permet de durcir pour avoir des carrés clean et jolis. Pour les coupes plus sharp, vous pouvez même mettre le plat entier au frigo 30 minutes après refroidissement à température ambiante.
vos Questions sur les Brownies Petite Portion, Répondues
Je peux doubler cette recette de brownies petite portion ?
Absolument ! Si vous avez besoin de servir un peu plus de personnes, vous pouvez facilement doubler tous les ingrédients. Utilisez simplement un plat carré standard de 8×8 ou 9×9 pouces. Surveillez attentivement le temps de cuisson, il pourrait nécessiter quelques minutes supplémentaires. Utilisez toujours le test cure-dent pour vérifier la cuisson. Doubler est un super moyen de faire un plat classique quand vous êtes d’avis de partager (ou pas!).
Qu’utiliser si j’ai pas un plat 6×6 pouces ?
Pas de souci ! Un moule à pain standard (environ 8×4 pouces) est une super substitution. La pâte sera un peu thinner et cuira probablement plus vite, donc vérifiez après 18 minutes. Vous pouvez aussi utiliser un petit moule à cake rond ou même une grande ramequin oven-safe pour un single, giant brownie. Juste ajustez le temps de cuisson downward pour des vessels plus petits et plus épais.
Pourquoi mes brownies sont devenus cake-like au lieu de fondants ?
Une texture cake-like indique généralement quelques choses. La plus commune est de trop mélanger la pâte après ajout de la farine, comme mentionné. Une autre raison peut être trop de farine. Assurez-vous de spoon la farine dans la tasse de mesure et de level avec un couteau, ne scoop directement du sac. Finalement, trop cuire expulse toujours l’humidité et crée un résultat plus dry et cake-like.
Je peux faire ces brownies sans œufs ?
Cette recette spécifique dépend de l’œuf pour la structure et binding. Pour une version sans œuf, vous devriez utiliser un substitut comme un « œuf de lin » (1 tbsp flaxseed moulu mélangé à 2.5 tbsp water, laissez reposer 5 mins). Cependant, la texture sera différente— souvent plus dense et moins montée. Je recommande chercher une recette de brownie spécifiquement conçue pour être sans œuf pour des résultats plus fiables.
Est-ce mieux utiliser du beurre ou de l’huile dans les brownies ?
Le beurre et l’huile donnent différents résultats. Le beurre, utilisé ici, donne une saveur riche et aide créer cette topping craquelée lovely. L’huile tend rendre les brownies plus moist et fondants avec une texture plus chewy, et le flavour est purement chocolat. Pour le meilleur des deux mondes, certains cuisiniers utilisent un mix des deux ! Si vous voulez essayer, vous pouvez substituer half le beurre fondu avec une huile neutre.
Comment rendre mes brownies plus gooey ?
Pour un centre extra-gooey, essayez ces tricks : Utilisez un extra yolk d’œuf avec le œuf entier pour plus de fat et richesse. Réduisez la farine d’une tablespoon. Underbake them légèrement— sortez-les quand le cure-dent a wet crumbs, pas moist crumbs. Vous pouvez aussi ajouter une handful de pépites de chocolat extra dans la pâte, car les chips fondues créent des pockets délicieuses de goo.
Je peux ajouter des noix ou autres mix-ins ?
Veuillez faire ! Cette recette est une base merveilleuse. Avec les pépites de chocolat, feel free d’incorporer 1/4 tasse de walnuts, pecans, ou même peanuts hachés. D’autres additions greats incluent une handful de shredded coconut, cherries séchées hachées, ou une swirl de peanut butter ajoutée sur la pâte avant cuisson. Gardez juste les add-ins total à environ 1/2 tasse pour que la pâte puisse encore hold together.
Pourquoi tamiser les ingrédients secs ? C’est vraiment nécessaire ?
Tamiser est highly recommandé, surtout pour le cacao en poudre qui adore lumping. Cela sert trois purposes: cela enlève lumps pour une pâte smooth, cela aère la farine pour une texture légèrement lighter, et plus importantly, cela distribue evenly la levure chimique et le sel throughout le mix. Cela assure chaque bite est flavored consistently et monte evenly. Cela prend seulement un moment et fait la différence.
Mes brownies sont trop sweet. Comment réduire le sucre ?
Vous pouvez réduire le sucre légèrement, mais soyez aware cela affecte texture. Le sucre ajoute moistness et tenderness. Si vous le coupez de plus qu’un quart, vos brownies peuvent devenir dry et crumbly. Je suggère try une reduction de 1-2 tablespoons premièrement. Vous pouvez aussi équilibrer le sucré par utiliser des chips chocolat plus dark ou un peu moins chips. Rappelez-vous, un peu de sel aide contrecarrer le sucré aussi.
Ces brownies sont friendly au freezer ?
Oui, ils congèlent beautifully ! Après refroidissement complet, coupez en carrés. Emballez chaque carré tightly dans du film plastique, puis placez-les tous dans un sac freezer heavy-duty ou contenant hermétique. Ils se garderont jusqu’à 3 mois. Pour savourer, thaw à température ambiante une heure ou microwave a frozen carré 20-30 seconds pour un instant warm,fondant treat. C’est un super moyen d’avoir toujours un dessert maison disponible.
Pour plus idees great sur équilibrer indulgence et quotidien eating, resources comme nutrition au quotidien offrent perspectives helpfuls sur savourer food mindfully.
J’espère que cette recette de Brownies Petite Portion devient votre nouveau quick fix favori. C’est une preuve que vous n’avez pas besoin d’un big project pour savourer quelque chose vraiment homemade et satisfaisant. Si vous cherchez plus de projet baking delicious, explorez surement tous les gateaux et patisseries wonderfuls dans ma collection dessert. Maintenant, allez préchauffez ce four et treat yourself à une Brownie Petite Portion perfect. Happy baking!
Equipment
- Moule à gâteau de 15x15 cm
- Deux bols mélangeurs (un moyen, un petit)
- Fouet et spatule
- Tasses et cuillères à mesurer
- Grille pour refroidir
Ingrédients
- 1/2 tasse sucre cristallisé
- 1/4 tasse beurre non salé, fondu
- 1 gros œuf
- 1 c.s. extrait de vanille
- 1/4 tasse farine tout usage
- 1/4 tasse cacao en poudre non sucré
- 1/4 c. c. sel
- 1/4 c. c. levure chimique
- 1/4 tasse pépites de chocolat mi-sucré
Instructions
- Préchauffez votre four à 175°C (350°F) et graissez légèrement un moule de 15x15 cm ou tapissez-le de papier sulfurisé.
- Dans un bol moyen, mélangez le beurre fondu et le sucre jusqu'à obtenir une consistance lisse.
- Ajoutez l'œuf et l'extrait de vanille, puis fouettez jusqu'à homogénéité.
- Dans un petit bol, tamisez la farine, le cacao, le sel et la levure chimique, puis incorporez-les au mélange humide en pliant délicatement.
- Incorporez les pépites de chocolat dans la pâte.
- Versez la pâte dans le moule préparé, en lissant la surface.
- Faites cuire au four pendant 20 à 25 minutes, jusqu'à ce qu'un cure-dent inséré au centre en ressorte avec quelques miettes humides.
- Laissez refroidir complètement sur une grille avant de couper en carrés.
Notes
Nutrition

Je suis Céline, une véritable passionnée d’ustensiles et de matériel de cuisine ! J’adore tester, comparer et découvrir les meilleurs équipements pour rendre la cuisine plus efficace et agréable. Que ce soit un bon couteau, un robot performant ou une poêle incontournable, je suis toujours à la recherche des outils qui feront la différence. Mon but est de vous guider dans vos choix pour que vous ayez le bon matériel adapté à vos besoins.