
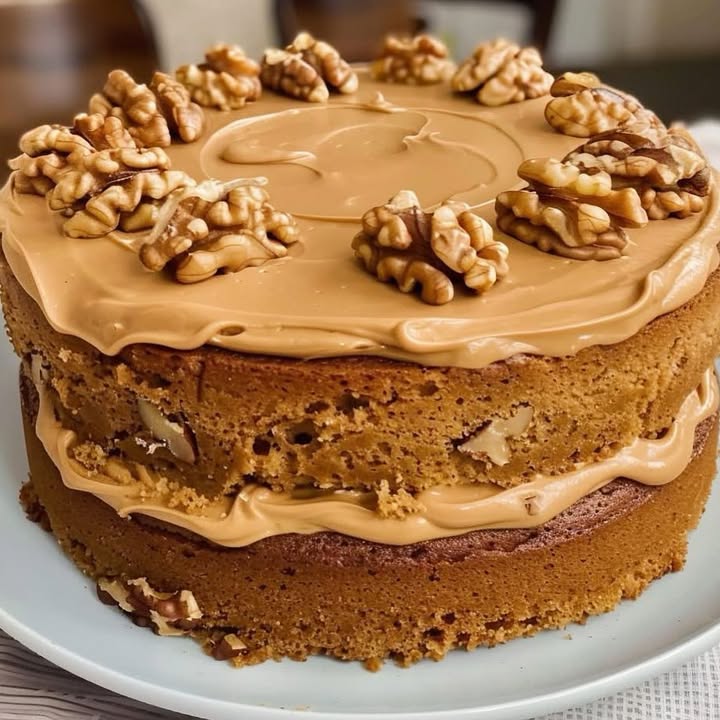
Gâteau Café Noix : Le Coup de Pouce Parfait
Vous connaissez ces après-midi ? Celles qui se glissent entre le déjeuner et le dîner, quand la lumière est douce et que tout semble un peu endormi. C’est exactement à ce moment-là que mon grand-père me faisait un clin d’œil, mettait la bouilloire à chauffer et murmurait : « Et si on se coupait une tranche de mon remontant spécial ? » Il parlait de ce gâteau. Cette génoise riche et beurrée, vibrante de saveur de café, le craquant irrésistible des noix, et ce glaçage incroyablement léger… Ce n’était pas juste un dessert. C’était un bouton pause, un moment de douceur pure, partagé sur une assiette en porcelaine. Ma version de ce classique, le Gâteau Café Noix, est ma lettre d’amour à ces après-midi, et j’ai hâte que vous vous l’appropriiez.
Des Débuts Simples à un Grand Classique Intemporel
L’histoire du Coffee & Walnut Cake est merveilleusement britannique, comme le rituel du thé de mon grand-père. On pense qu’il a gagné en popularité après la Seconde Guerre mondiale, quand des ingrédients comme le café sont devenus plus accessibles. Il est vite devenu un pilier de la pâtisserie familiale et des salons de thé à travers le pays. Le génie de cette recette réside dans sa belle simplicité : deux saveurs familières et robustes qui se soutiennent à la perfection. Les noix apportent une profondeur terreuse et légèrement amère qui équilibre la douceur, tandis que le café ajoute une chaleur aromatique et sophistiquée qui donne au gâteau un air résolument adulte. Vous en verrez des versions partout, de la classique génoise à deux étages aux pains givrés plus élaborés, mais le cœur d’un bon Gâteau Café et Noix est toujours le même : une mie moelleuse et fondante, et une crème au beurre parfumée au café qui fond sur la langue.
Pourquoi Vous Allez Tomber Sous le Charme de ce Gâteau Café Noix
D’abord, il est incroyablement indulgent. Même si vous êtes un pâtissier timoré, cette recette veut vous réussir. Ensuite, l’odeur qui envahit votre cuisine pendant la cuisson, c’est le bonheur pur – chaleureuse, grillée et invitante. Mais la vraie magie, c’est à la dégustation. Ce contraste entre la génoise moelleuse, les noix croquantes et le glaçage velouté crée une symphonie de textures. Il est assez consistant pour être une vraie gourmandise, mais assez léger pour ne pas vous alourdir après une part. C’est le gâteau dont vous serez fier de régaler vos invités, et encore plus heureux de garder pour vous avec un bon livre.
Quand Préparer Votre Gâteau Café et Noix Parfait
Ce gâteau est un véritable couteau-suisse. C’est le champion incontesté du goûter et du tea time, trônant fièrement à côté des scones et des sandwiches. Mais ses talents ne s’arrêtent pas là. C’est un dessert réconfortant parfait après un rôti du dimanche. Il fait un cadeau maison plein de pensée pour un nouveau voisin ou un ami qui a besoin de réconfort. J’adore le préparer pour les clubs de lecture – il rend la conversation plus riche, on dirait ! En vérité, toute occasion qui mérite un sourire et une boisson chaude est embellie par une part de ce gâteau café noix.
Réunir Vos Ingrédients pour Réussir
Voici tout ce dont vous aurez besoin pour créer ce chef-d’œuvre. Sortons tout sur le plan de travail d’abord – cela rend le processus tellement plus fluide !
Pour la Génoise :
- 50g de cerneaux de noix
- 225g de sucre en poudre
- 225g de beurre doux, ramolli, plus un peu pour le beurrage
- 200g de farine tout usage
- 4 cuillères à café de poudre d’espresso instantané
- 2 cuillères à café de levure chimique
- 1 cuillère à café de bicarbonate de soude
- 4 gros œufs
- 1-2 cuillères à soupe de lait (pour ajuster la consistance)
Pour le Glaçage & la Décoration :
- 350g de sucre glace
- 175g de beurre doux, ramolli
- 2 cuillères à café de poudre d’espresso instantané dissoutes dans 1 c.à.s d’eau chaude
- Environ 10 moitiés de noix, pour la décoration
Pas de Noix ? Pas de Problème ! Des Substitutions Faciles
Il vous manque un ingrédient ? Pas d’inquiétude, voici quelques substitutions simples pour continuer à pâtisser.
- Noix : Les pacanes fonctionnent à merveille pour un croquant légèrement plus sucré et riche. Les noisettes seraient aussi délicieuses, évoquant une saveur moka.
- Poudre d’Espresso Instantané : C’est ce qui donne le meilleur goût de café, pur et intense. En dépannage, vous pouvez utiliser 2-3 cuillères à soupe de café infusé très fort et refroidi. Réduisez alors le lait dans la pâte d’une cuillère à soupe.
- Sucre en Poudre : Du sucre granulé classique fera très bien l’affaire dans la génoise.
- Beurre dans le Glaçage : Pour une version sans lait, un beurre végétal de bonne qualité (en bloc) fonctionne étonnamment bien dans la crème au beurre.
Préparer Votre Gâteau Café Noix, Étape par Étape
Étape 1 : Préchauffez et Préparez
D’abord, faisons chauffer notre four. Préchauffez-le à 180°C (160°C pour les fours à chaleur tournante)/Th. 6. Pendant qu’il chauffe, prenez vos deux moules à gâteau ronds de 20 cm de diamètre. Beurrez-les légèrement, en n’oubliant pas les coins. Découpez ensuite deux cercles de papier sulfurisé pour chemiser le fond – c’est mon secret pour des gâteaux qui ne collent jamais, jamais. Les poser dans les moules, c’est comme les border, prêts à accueillir la pâte.
Étape 2 : Créez la Pâte Magique
Maintenant, place à la partie amusante ! Prenez votre robot culinaire. Versez-y les morceaux de noix et le sucre en poudre. Mixez par impulsions jusqu’à ce que les noix soient finement moulues et que le mélange ressemble à une chapelure sableuse et parfumée. Ajoutez ensuite le beurre ramolli, la farine, la poudre d’espresso, la levure, le bicarbonate et les œufs. Mixez le tout jusqu’à obtenir une pâte lisse et homogène. Astuce de pro : Arrêtez une fois pour racler les bords et vous assurer que tout est incorporé. La pâte doit avoir une belle couleur café clair et tomber facilement de la cuillère. Si elle semble un peu épaisse, ajoutez une cuillère à soupe de lait pour la détendre.
Étape 3 : Cuisez jusqu’à la Perfection Dorée
Divisez soigneusement la pâte de manière égale entre vos deux moules préparés. J’aime utiliser une spatule pour lisser le dessus afin qu’ils cuisent de niveau. Glissez-les au centre de votre four préchauffé. Laissez cuire environ 25 minutes. Vous saurez qu’ils sont prêts quand ils seront dorés, se seront légèrement détachés des bords et reprendront leur forme quand vous appuierez doucement le centre. L’odeur sera divine. Laissez refroidir les gâteaux dans leurs moules 10 minutes – cela les aide à se tenir. Puis, démoulez-les sur une grille, retirez le papier sulfurisé et laissez-les refroidir complètement. La patience est la clé ici !
Étape 4 : Préparez le Glaçage Rêvé
Pendant que les gâteaux refroidissent, préparez la crème au beurre. D’abord, tamisez votre sucre glace dans un bol. Cela peut sembler fastidieux, mais cela évite les grumeaux et vous donne un glaçage lisse comme de la soie. Dans un autre bol, fouettez le beurre ramolli avec un batteur électrique jusqu’à ce qu’il soit très pâle, crémeux et mousseux. Cela peut prendre 3-4 minutes. Dissolvez vos 2 cuillères à café de poudre d’espresso dans l’eau chaude pour obtenir une pâte de café forte. Incorporez graduellement cette pâte au beurre crémeux, suivi du sucre glace tamisé, petit à petit. Continuez de battre jusqu’à ce que tout soit combiné, léger et tartinable.
Étape 5 : Le Grand Assemblage
C’est l’heure du final ! Placez une de vos couches de gâteau complètement refroidie à l’envers sur votre assiette de service. Cela vous donne une belle surface plane pour travailler. Déposez environ la moitié de votre crème au beurre café au centre et étalez-la uniformément jusqu’aux bords avec une spatule coudée. Posez délicatement la seconde couche de gâteau dessus, à l’endroit cette fois. Maintenant, recouvrez le dessus et les côtés avec le reste du glaçage. Ne cherchez pas la perfection lisse – quelques volutes rustiques sont magnifiques. Enfin, pressez doucement les moitiés de noix tout autour du bord supérieur pour une finition sublime et professionnelle. Astuce du chef : Pour une touche supplémentaire, faites légèrement griller les moitiés de noix pour la décoration à sec dans une poêle une minute avant de les poser. Cela intensifie leur saveur !
Votre Chronologie pour le Gâteau
Détaillons le timing pour que vous puissiez planifier votre session pâtisserie en toute sérénité.
- Temps de Préparation : 25 minutes
- Temps de Cuisson : 25 minutes
- Temps de Refroidissement : 1 heure (essentiel pour un glaçage facile !)
- Glaçage & Assemblage : 15 minutes
- Temps Total : Environ 2 heures 05 minutes
Un Petit Secret en Plus de Ma Cuisine
Pour une saveur de café encore plus intense qui chante vraiment, essayez de badigeonner les couches de gâteau refroidies avec un sirop de café simple avant de glacer. Mélangez simplement 1 cuillère à soupe d’eau chaude avec 1 cuillère à café de poudre d’espresso et 1 cuillère à café de sucre en poudre. Remuez jusqu’à dissolution, puis badigeonnez légèrement sur les génoises. Cela ajoute une incroyable humidité et une profondeur de goût magnifique.
Un Fait Amusant sur Vos Ingrédients
Saviez-vous que les noix sont l’un des plus anciens aliments d’arbre connus de l’humanité, remontant à plus de 10 000 ans ? Elles ont été des symboles d’intellect (parce qu’elles ressemblent à de petits cerveaux !) et de fertilité à travers l’histoire. Alors quand vous hachez vos noix pour votre Gâteau Café Noix, vous vous connectez à une tradition culinaire millénaire. Plutôt chouette pour un humble ingrédient de gâteau !
Le Matériel de Cuisine Dont Vous Aurez Besoin
Pas besoin d’ustensiles sophistiqués ! Voici la liste courte :
- Deux moules à gâteau ronds de 20 cm de diamètre
- Robot culinaire (ou un bon couteau pour hacher les noix et un batteur manuel)
- Batteur électrique manuel ou robot de cuisine
- Bol à mélanger
- Grille de refroidissement
- Spatule et spatule coudée (palette)
- Papier sulfurisé
Conserver Votre Gâteau Café Noix Frais
Si vous avez des restes (ce qui est rare chez moi !), conservez le gâteau dans un contenant hermétique à température ambiante. La crème au beurre préfère ne pas aller au frigo, ce qui peut assécher la génoise. Il restera délicieusement frais et moelleux jusqu’à 3 jours.
Pour une conservation plus longue, vous pouvez le garder au réfrigérateur jusqu’à 5 jours. Assurez-vous simplement de le sortir environ une heure avant de servir pour qu’il revienne à température ambiante. Cela permet au glaçage de s’assouplir et aux saveurs de s’exprimer pleinement.
Vous pouvez aussi congeler très facilement les couches de gâteau non glacées. Enveloppez-les individuellement dans une couche de film alimentaire, puis d’aluminium, et congelez jusqu’à 3 mois. Décongelez à température ambiante avant de glacer et de servir.
Mes Meilleurs Conseils pour Réussir le Gâteau
- La température ambiante est reine : Assurez-vous que votre beurre et vos œufs soient à température ambiante avant de commencer. Cela aide à tout émulsionner en une pâte lisse et aérée.
- Ne pas trop mélanger : Une fois la farine ajoutée, mélangez juste jusqu’à ce que vous ne voyiez plus de traces sèches. Trop mélanger peut donner une génoise compacte.
- Refroidir complètement : Je sais, c’est tentant, mais glacer un gâteau tiède est une garantie de glaçage fondu et glissant. Attendez !
- Goûtez votre glaçage : Vous aimez un goût café plus prononcé ? Ajoutez une demi-cuillère à café supplémentaire d’espresso dissous dans la crème au beurre et battez.
Faites-le paraître aussi Bon qu’Il l’Est
La présentation, c’est la touche finale ! Essayez ces idées :
- Hachez finement des noix supplémentaires et pressez-les sur les côtés du gâteau pour un look texturé et élégant.
- Saupoudrez légèrement le dessus d’un peu de cacao en poudre ou de poudre d’espresso à travers un tamis fin.
- Servez chaque part avec une petite tasse d’espresso serré ou une quenelle de crème fouettée légèrement sucrée.
- Pour une occasion spéciale, arrosez le dessus d’un peu de sauce caramel salé juste avant de servir – croyez-moi, c’est incroyable.
Vous Aimez Ça ? Essayez Ces Délicieuses Variations !
Si l’alliance réconfortante des fruits et du chocolat vous appelle, vous devez explorer le monde des gâteaux et pâtisseries sur mon site. Par exemple, si vous adorez notre Gâteau Café Noix, vous pourriez craquer pour un gâteau orange frais et ensoleillé, parsemé de pépites de chocolat. À la recherche de l’ultime indulgence chocolatée ? La magie profonde et sombre d’un Gâteau du Diable (Devil’s Food Cake) est une expérience que tout pâtissier devrait vivre. Pour un dessert de fête spectaculaire, les élégantes couches d’un Gâteau Mousse Chocolat Framboise Céleste sont une pure joie. Et pour un classique qui ne rate jamais, le fameux et délicieux Gâteau au Chocolat de Matilda est toujours la bonne réponse.
Erreurs Courantes à Éviter pour un Gâteau Parfait
Erreur 1 : Utiliser du Beurre Froid et Dur
C’est la raison numéro un d’un gâteau dense et lourd ou d’un glaçage granuleux. Le beurre sorti directement du frigo ne pourra pas être bien crémeux avec le sucre, ce qui signifie que moins d’air sera emprisonné dans la pâte. Votre gâteau ne montera pas aussi bien. Pour un résultat moelleux et parfait, sortez votre beurre au moins une heure à l’avance. Il doit être assez mou pour qu’on laisse une empreinte nette en appuyant légèrement avec le doigt.
Erreur 2 : Zapper le Papier Sulfurisé
Beurrer le moule, c’est bien. Beurrer et chemiser de papier sulfurisé, c’être infaillible. J’ai vu trop de beaux gâteaux perdre un morceau de leur fond parce que je pensais pouvoir sauter cette étape. Le papier garantit un démoulage parfait à chaque fois. Ce sont deux minutes de travail qui évitent bien des regrets (et des miettes de gâteau !).
Erreur 3 : Glacer un Gâteau Encore Tiède
L’impatience est l’ennemie d’une belle finition au beurre. Si les couches de gâteau sont même légèrement tièdes, la chaleur fera fondre le beurre du glaçage. Cela le fera glisser, devenir gras et s’imbiber dans la génoise. Laissez les couches refroidir complètement sur une grille. Cela permet à la mie de se fixer et assure que votre glaçage restera léger, mousseux et exactement là où vous l’avez mis.
Erreur 4 : Trop Mixer la Pâte aux Noix
Quand vous mixez les noix avec le sucre au début, utilisez de courtes impulsions, juste assez pour les moudre finement. Si vous mixez trop longtemps, les huiles des noix peuvent commencer à être libérées, et vous vous retrouverez avec une pâte plus dense et légèrement grasse. Nous voulons la saveur et la texture des noix, pas que leurs huiles dominent la pâte. Quelques impulsions courtes au robot culinaire suffisent.
Pour le Rendre Encore Meilleur : Un Mot sur la Qualité
La saveur de ce gâteau rayonne vraiment quand on utilise des ingrédients de qualité. Un sachet de noix fraîches et une poudre d’espresso instantané pure font toute la différence. Pour plus de conseils sur le choix et la conservation des ingrédients pour tirer le meilleur de votre cuisine, des organismes comme l’Anses fournissent d’excellents guides sur la sécurité et la qualité des aliments qui peuvent vous aider dans toutes vos aventures culinaires.
Vos Questions sur le Gâteau Café Noix, Répondues
Puis-je faire ce gâteau sans robot culinaire ?
Absolument ! Hachez simplement les noix aussi finement que possible avec un couteau bien aiguisé. Ensuite, dans un grand bol, battez le beurre ramolli et le sucre avec un batteur électrique manuel jusqu’à ce que le mélange soit pâle et mousseux. Incorporez les œufs un à un, puis ajoutez à la spatule les ingrédients secs (farine, levure, etc.) et vos noix finement hachées. Ajoutez le lait à la fin pour obtenir la bonne consistance. Cela fonctionne parfaitement.
Puis-je utiliser du café infusé frais à la place de la poudre d’espresso ?
Vous pouvez, mais cela change un peu la texture. Pour la génoise, utilisez 2-3 cuillères à soupe de café infusé très fort et refroidi, et réduisez la quantité de lait dans la recette d’autant. Pour le glaçage, c’est plus délicat car le liquide peut faire trancher la crème au beurre. Je recommanderais de rester sur la poudre d’espresso dissoute pour le glaçage, ou d’utiliser un café réduit, presque sirupeux et très épais.
Ma crème au beurre a tronché ou s’est séparée ! Que faire ?
Pas de panique ! Cela arrive généralement si le beurre était un peu trop froid ou si vous avez ajouté le liquide trop vite. La solution est simple : continuez de battre. Laissez votre batteur tourner à vitesse moyenne. La friction et le mélange continu vont généralement tout réunifier en une crème lisse. Si c’est vraiment récalcitrant, réchauffez doucement le bol quelques secondes avec un sèche-cheveux (pas trop près !) et battez à nouveau.
Combien de temps à l’avance puis-je préparer ce gâteau ?
Les couches de gâteau non glacées peuvent être cuites la veille. Une fois complètement refroidies, enveloppez-les bien dans du film alimentaire et conservez-les à température ambiante. Glacez le gâteau le jour où vous prévoyez de le servir pour un goût optimal et la meilleure texture. Le gâteau assemblé reste délicieux 2-3 jours après, conservé dans un contenant hermétique.
Puis-je congeler le gâteau entier avec son glaçage ?
Congeler le gâteau entièrement glacé n’est pas idéal, car la crème au beurre peut devenir un peu granuleuse à la décongélation. Il est bien mieux de congeler les couches de gâteau non glacées séparément, comme mentionné dans les conseils de conservation. Assemblez et glacez-les une fois qu’elles sont complètement décongelées à température ambiante.
Y a-t-il un moyen de faire une version moins sucrée ?
La poudre d’espresso et les noix équilibrent naturellement la douceur. Pour un glaçage moins sucré, vous pouvez réduire le sucre glace de 50g. Notez que cela rendra le glaçage plus mou. Vous pourriez aussi essayer un glaçage au fromage frais parfumé au café, plus acidulé et moins franchement sucré.
Mes gâteaux ont formé un dôme au centre. Pourquoi ?
Un léger dôme est normal, mais un gros dôme signifie souvent que votre four était un peu trop chaud, faisant que les bords figent avant que le centre n’ait fini de monter. Essayez de baisser la température de votre four de 10°C la prochaine fois. Vous pouvez aussi couper délicatement le dessus bombé avec un couteau à pain pour créer une surface plane pour l’empilage – un secret de pâtissier !
Quelle est la meilleure façon de diviser la pâte équitablement ?
Pour des couches parfaites et égales, je ne jure que par la balance de cuisine digitale. Posez votre premier moule préparé sur la balance, remettez à zéro, et versez la moitié de la pâte. Faites de même pour le second moule. C’est le seul moyen d’être absolument sûr qu’ils sont identiques et cuiront de manière uniforme.
Puis-je ajouter d’autres saveurs à ce gâteau ?
Bien sûr ! Une cuillère à café de cannelle dans la génoise ajoute une chaleur délicieuse. Une goutte d’extrait de vanille dans le glaçage est toujours la bienvenue. Pour un vrai régal, vous pourriez même incorporer une poignée de pépites de chocolat noir dans la pâte avec les noix.
Mon gâteau est un peu sec. Que s’est-il passé ?
Le coupable le plus courant est une surcuisson. Les températures de four peuvent varier, alors commencez à vérifier votre gâteau quelques minutes avant que le minuteur ne sonne. Assurez-vous aussi d’avoir mesuré votre farine correctement – la verser dans la tasse avec une cuillère et la niveler est mieux que de la prélever en plongeant la tasse, ce qui peut en tasser trop. Enfin, cette cuillère à soupe de lait dans la pâte est importante pour l’humidité, alors ne la zappez pas si votre mélange semble épais.
La Dernière Part
Et voilà – la recette de cœur pour le Gâteau Café Noix le plus réconfortant et délicieux qui soit. C’est plus qu’une simple liste d’ingrédients et d’étapes ; c’est une invitation à créer un moment de joie simple. Que vous le partagiez avec vos proches ou que vous savouriez une part seul(e) avec une tasse de thé, j’espère que ce Gâteau Café Noix deviendra un chapitre chéri de votre propre histoire. Maintenant, allez préchauffer ce four. Votre gourmandise d’après-midi parfaite n’attend que d’être préparée.
Equipment
- Robot culinaire
- Moules ronds de 20 cm
- Mixeur électrique
- Spatule et couteau palette
- Grille de refroidissement
Ingrédients
- 50 g cerneaux de noix
- 225 g sucre semoule
- 225 g beurre doux, ramolli plus un peu pour graisser
- 200 g farine blanche
- 4 cuillères à café café expresso instantané
- 2 cuillères à café levure chimique
- 1 cuillère à café bicarbonate de soude
- 4 gros œufs
- 1-2 cuillères à soupe lait pour ajuster la consistance
Instructions
- Préchauffez le four à 180°C (160°C pour les fours à convection) et graissez deux moules ronds de 20 cm.
- Dans un robot culinaire, mélangez les noix et le sucre jusqu'à obtenir une texture de chapelure.
- Ajoutez le beurre, la farine, l'espresso, la levure, le bicarbonate et les œufs, puis mixez jusqu'à obtenir une pâte lisse.
- Répartissez la pâte dans les moules préparés et lissez le dessus.
- Faites cuire au four pendant environ 25 minutes, puis laissez refroidir dans les moules.
- Pour le glaçage, tamisez le sucre glace et battez le beurre ramolli jusqu'à ce qu'il soit crémeux.
- Dissolvez le café dans de l'eau chaude et incorporez-le au beurre, suivi du sucre glace.
- Assemblez les gâteaux en mettant une couche de glaçage entre les deux et recouvrez le dessus et les côtés avec le reste du glaçage.
- Derrière, décorez avec les moitiés de noix.
Notes
Nutrition

Je suis Céline, une véritable passionnée d’ustensiles et de matériel de cuisine ! J’adore tester, comparer et découvrir les meilleurs équipements pour rendre la cuisine plus efficace et agréable. Que ce soit un bon couteau, un robot performant ou une poêle incontournable, je suis toujours à la recherche des outils qui feront la différence. Mon but est de vous guider dans vos choix pour que vous ayez le bon matériel adapté à vos besoins.