
Oh, le doux et crémeux bonheur du fudge maison au beurre de cacahuète !
Vous savez, ces jours où on a juste besoin d’un petit quelque chose de sucré ? C’était un de ces après-midis pour moi, les enfants faisaient enfin la sieste, et je voulais une gourmandise qui fasse sensation sans nécessiter mille étapes. C’est là que la recette facile de fudge au beurre de cacahuète de ma grand-mère m’est revenue en tête. Je l’ai un peu adaptée pour la rendre encore plus crémeuse et plus rapide. Le résultat ? Ce Fudge Crémeux au Beurre de Cacahuète fondant, qui est devenu ma solution pour satisfaire une envie de sucre en moins de 15 minutes de travail. C’est de la joie pure, en carré.
Un petit bout d’histoire du fudge
Le fudge a une histoire presque accidentelle et très amusante. On raconte qu’il a été inventé à la fin du 19ème siècle lorsqu’un lot de caramel a été « raté ». Le résultat fut cette délicieuse confiserie crémeuse et granuleuse que nous adorons aujourd’hui. Le fudge traditionnel peut être un peu capricieux, exigeant des températures précises et beaucoup de remuage. Ma version de ce Fudge Crémeux au Beurre de Cacahuète est l’adaptation moderne et sans prise de tête. On troque le thermomètre à sucre contre de fiables guimauves, qui garantissent une texture lisse et qui prend à tous les coups. C’est le mélange parfait entre le réconfort d’antan et le besoin de simplicité d’aujourd’hui.
Pourquoi vous allez absolument adorer ce fudge au beurre de cacahuète
Laissez-moi vous compter les raisons ! Premièrement, c’est incroyablement facile. Si vous savez faire bouillir du lait et remuer, vous pouvez le faire. Deuxièmement, il est extrêmement crémeux et riche, avec cette saveur profonde de cacahuète grillée dont on raffole tous. C’est le genre de dessert qui donne l’impression que vous y avez passé des heures. De plus, c’est une recette fantastique à faire avec des petits assistants en cuisine. Ils adorent ajouter les guimauves et regarder la magie opérer. C’est un succès assuré pour les buffets, les ventes de pâtisseries, ou simplement pour garder dans une boîte en métal et se resservir discrètement après le dîner.
</-section>
Les moments parfaits pour ce Fudge Crémeux Cacahuète
Ce fudge n’est pas que pour les fêtes ! C’est votre arme secrète pour plein d’occasions. Glissez quelques carrés dans les boîtes à déjeuner pour une douce surprise. Apportez un grand plateau à un club de lecture ou à une soirée filles improvisée — il disparaît toujours à toute vitesse. C’est un merveilleux cadeau maison pendant les fêtes, bien plus personnel que tout ce qu’on peut acheter. J’en fais même un lot à avoir sous la main quand des amis passent prendre un café. C’est une façon délicieuse de dire « Je suis contente que tu sois là ».
Rassembler les ingrédients de votre fudge
Voici la ligne simple des ingrédients pour votre fudge crémeux au beurre de cacahuète. Utiliser des ingrédients de qualité fait la différence, surtout pour le beurre de cacahuète !
- 1 tasse (240 ml) de Lait
- 1 tasse et demie de Beurre de cacahuète crémeux (pas le genre naturel avec l’huile qui se sépare)
- 4 tasses de Sucre en poudre
- 1/2 tasse (115 g) de Beurre
- 280 g de Mini Guimauves
Des substitutions d’ingrédients sans problème
Il vous manque quelque chose ? Ne vous inquiétez pas ! Voici des échanges faciles :
- Lait : N’importe quel lait fera l’affaire — entier, demi-écrémé, ou même un lait végétal nature non sucré comme l’amande ou l’avoine.
- Beurre de cacahuète : Utilisez du crémeux ou du crunchy selon votre préférence de texture. Évitez juste les versions « naturelles » où l’huile se sépare, car elles peuvent rendre le fudge gras.
- Beurre : Beurre salé ou non, c’est bon. Avec du salé, vous obtenez un joli contraste sucré-salé.
- Mini guimauves : Si vous n’avez que des grandes, coupez-les grossièrement avant de les ajouter. Elles fondront de la même façon.
Cuisinons ce Fudge Crémeux au Beurre de Cacahuète de rêve !
Préparez-vous pour les 20 minutes les plus faciles et les plus gratifiantes de votre semaine. L’odeur seule est divine !
Étape 1 : La base sucrée
Prenez votre plus grande casserole à fond épais. C’est important pour éviter que ça accroche. Mélangez le sucre, le lait et le beurre directement dans la casserole. Remuez doucement pour les combiner. Placez-la maintenant sur feu moyen. Ne soyez pas pressée en augmentant le feu ! Nous voulons que le sucre se dissolve complètement et que le beurre fonde lentement, créant un liquide lisse et brillant. Vous verrez de petites bulles se former sur les bords.
Étape 2 : L’ébullition patiente
Une fois que le mélange atteint une ébullition franche, démarrez votre minuteur. Laissez-le bouillonner pendant 8 minutes complètes, en remuant de temps en temps avec une cuillère en bois. Vous remarquerez qu’il épaissit légèrement et prend une belle couleur dorée pâle. Cette étape permet d’évaporer une partie de l’eau et de concentrer les saveurs. Astuce de pro : programmez un minuteur ! C’est facile de se laisser distraire et de trop le faire bouillir.
Étape 3 : La fonte magique
C’est la partie amusante ! Retirez immédiatement la casserole du feu. Versez rapidement tout le beurre de cacahuète et les mini guimauves. Maintenant, remuez avec vigueur ! La chaleur résiduelle va tout faire fondre en une rivière de fudge lisse, luxueuse et magnifiquement épaisse. Continuez à remuer jusqu’à ce que la dernière guimauve ait disparu et que le mélange soit parfaitement homogène. L’arôme de cacahuète grillée et de sucre est absolument enivrant.
Étape 4 : Préparer la prise
Beurrez légèrement ou vaporisez d’un peu d’huile un moule rectangulaire de 23×33 cm (environ 9×13 pouces). Versez votre mélange de fudge chaud dans le moule. Utilisez une spatule pour l’étaler en une couche régulière, en le poussant doucement dans les coins. Vous pouvez tapoter un peu le moule sur le plan de travail pour le tasser et libérer les bulles d’air. À ce stade, essayez de résister à l’envie d’y plonger une cuillère !
Étape 5 : L’attente (la plus difficile)
Laissez maintenant votre fudge refroidir et prendre. Je trouve que le laisser refroidir à température ambiante pendant 1 à 2 heures donne la texture parfaite — ferme mais toujours crémeuse. Vous pouvez le mettre au frigo pour accélérer les choses, mais je préfère la prise à température ambiante. Une fois qu’il est complètement ferme, passez un couteau tranchant sur les bords. Démoulez toute la plaque sur une planche à découper et coupez-la en jolis petits carrés.
Astuce du chef
Pour des carrés ultra-nets et éviter qu’ils ne fendent, entamez légèrement le dessus du fudge avec votre couteau environ 20 minutes après l’avoir versé dans le moule, quand il commence juste à prendre en surface. Ensuite, terminez la découpe le long de ces marques une fois qu’il est complètement ferme.
Votre chronologie pour le fudge
| Temps de préparation | 5 minutes |
| Temps de cuisson | 10 minutes |
| Temps de refroidissement | 2 heures |
| Temps total | 2 heures 15 minutes |
| Nombre de parts | Environ 36 carrés |
Un petit secret sucré
Vous voulez élever votre fudge crémeux cacahuète au rang de gourmandise ? Après l’avoir versé dans le moule, alors qu’il est encore chaud, parsemez légèrement le dessus de quelques cristaux de sel de mer ou de cacahuètes grillées concassées. Le sel amplifie la saveur de cacahuète et crée un équilibre sucré-salé incroyable dont tout le monde raffole.
Un fait amusant sur le fudge
Saviez-vous que la plus grande plaque de fudge au beurre de cacahuète jamais réalisée pesait plus de 2 200 kg ? Elle a été créée en 2010 ! Bien que nous ne visons pas un record, cela montre à quel point cette confiserie simple est universellement aimée. Le préparer à la maison vous connecte à une longue et douce tradition de partage et de joie.
Ce dont vous aurez besoin pour le réaliser
- Une grande casserole à fond épais
- Une cuillère en bois robuste ou une spatule résistante à la chaleur
- Un moule rectangulaire de 23×33 cm (9×13 pouces)
- Des verres et cuillères doseurs
- Un couteau bien aiguisé pour la découpe
Conserver votre fudge frais & délicieux
Une fois coupé, conservez votre fudge crémeux au beurre de cacahuète dans un contenant hermétique à température ambiante. Intercalez les carrés avec du papier sulfurisé pour qu’ils ne collent pas. Il restera parfaitement moelleux et délicieux jusqu’à 2 semaines de cette façon. Honnêtement, il ne tient jamais aussi longtemps chez moi !
Si votre cuisine est très chaude, vous pouvez le conserver au réfrigérateur. Laissez les carrés revenir à température ambiante environ 15 minutes avant de servir pour une texture crémeuse optimale. Le froid du frigo peut le rendre un peu plus ferme.
Ce fudge se congèle aussi à merveille ! Disposez les carrés en une seule couche sur une plaque pour les congeler rapidement, puis transférez-les dans un sac ou un contenant pour le congélateur. Ils se conserveront jusqu’à 3 mois. Décongelez-les à température ambiante pendant une heure environ avant de les déguster.
Mes meilleurs conseils pour un fudge parfait
- Utilisez une grande casserole. Le mélange monte pendant l’ébullition, et vous ne voulez pas d’un débordement de sucre sur votre plaque de cuisson.
- Ne lésinez pas sur le remuage après avoir ajouté les guimauves. Remuez jusqu’à ce que ce soit parfaitement lisse. Tout morceau de guimauve non fondu créera des zones caoutchouteuses.
- Pour des découpes nettes, passez votre couteau sous l’eau chaude et essuyez-le entre chaque tranche.
- Expérimentez avec des ajouts ! Après avoir incorporé le beurre de cacahuète et les guimauves, vous pouvez mélanger une tasse de bretzels concassés, de pépites de chocolat, ou même de céréales de riz soufflé pour une touche différente.
Donner un air sophistiqué à votre fudge
La présentation, c’est la moitié du plaisir ! Voici quelques idées faciles :
- Empilez les carrés sur un présentoir à gâteau vintage pour une touche charmante.
- Emballez-les dans de petits sachets de cellophane fermés par un ruban pour en faire de jolis cadeaux maison.
- Disposez-les sur un plateau avec d’autres douceurs comme des scones aux fruits rouges pour un beau buffet de desserts.
- Versez un filet de chocolat noir ou blanc fondu sur le dessus du fudge avant de le couper pour une finition décorative.
Vous aimez ça ? Essayez ces variations plus saines et amusantes !
Cette recette facile de fudge est une base merveilleuse pour la créativité. Si vous cherchez quelque chose d’un peu différent, voici six délicieuses variantes à tester :
- Fudge Marbré au Chocolat Noir : Après avoir versé le fudge dans le moule, déposez des cuillerées de chocolat noir fondu sur le dessus et marbreez avec un couteau.
- Fudge Protéiné : Remplacez 1/2 tasse de beurre de cacahuète par votre poudre de protéine vanille ou chocolat préférée pour un en-cas plus rassasiant.
- Fudge sans Noix au « SunButter » : Pour les allergies, utilisez du beurre de tournesol à la place du beurre de cacahuète. Il a une texture crémeuse similaire et un goût délicieux.
- Option sans Sucre : Utilisez un substitut de sucre en poudre qui se dose 1:1 (vérifiez le paquet pour les résultats en cuisine) et des guimauves sans sucre.
- Fudge au Speculoos : Remplacez le beurre de cacahuète par du beurre de spéculoos ou de biscuit Biscoff. La saveur épicée et chaude est incroyable.
- Fudge Croquant aux Bonbons : Incorporez 1 tasse de barres chocolatées concassées (comme Snickers ou Butterfinger) à la fin pour plus de croquant et d’éclats de saveur.
Et si vous avez envie d’autres délices à base de pâte, vous devez explorer notre collection de gâteaux et pâtisseries. Vous pourriez tomber amoureux des élégants mini cheesecakes mûre et lavande, ou vous laisser tenter par de luxueux donuts au chocolat blanc et mascarpone. Pour un petit-déjeuner ou un encas réconfortant, le pain au goût de donut et à la cannelle change complètement la donne.
Les erreurs courantes à éviter pour un fudge parfait
Erreur 1 : Utiliser le mauvais beurre de cacahuète
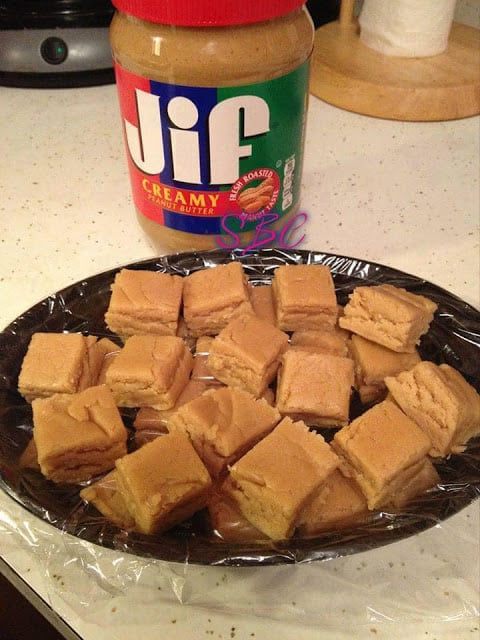
Le type de beurre de cacahuète que vous utilisez est crucial. Les beurres de cacahuète naturels, où l’huile se sépare et remonte, peuvent rendre votre fudge gras et l’empêcher de bien prendre. Les huiles peuvent se séparer pendant la cuisson. Choisissez toujours un beurre de cacahuète crémeux standard et stable, comme Jif ou Skippy. Ceux-ci contiennent des stabilisants qui créent la texture parfaite et crémeuse que nous recherchons. Astuce de pro : remuez bien le pot avant de mesurer, juste pour être sûre !
Erreur 2 : Ne pas faire bouillir assez longtemps (ou trop longtemps)
Ces 8 minutes d’ébullition ne sont pas une suggestion — elles sont clés pour la texture du fudge. Si vous ne le faites pas bouillir assez longtemps, le fudge risque de ne pas prendre et d’être trop mou. Si vous le faites bouillir trop longtemps, il peut devenir friable, granuleux ou trop dur. Le mélange a besoin de ce temps pour évaporer assez de liquide et atteindre la bonne concentration. Utilisez un minuteur et gardez le feu à un niveau moyen régulier. Vous voulez une ébullition régulière et franche, pas une ébullition furieuse qui éclabousse.
Erreur 3 : Un remuage trop faible après l’ajout des guimauves
Une fois que vous avez retiré la casserole du feu et ajouté le beurre de cacahuète et les guimauves, vous devez remuer vigoureusement et sans arrêt. La chaleur résiduelle est ce qui fait tout fondre. Si vous vous arrêtez trop tôt, vous aurez des poches de guimauve non fondues qui créent des filaments étranges et caoutchouteux dans votre fudge fini. Armez-vous d’une solide cuillère en bois et remuez jusqu’à ce que le mélange soit parfaitement lisse, brillant et uniforme en couleur. Cela prend généralement une bonne minute ou deux de travail constant.
Erreur 4 : Couper le fudge quand il est encore tiède
La patience est une vertu avec le fudge ! Le couper alors qu’il est encore même légèrement tiède est une recette pour obtenir des carrés brouillons et écrasés. Le centre a besoin de temps pour durcir complètement. Laissez-le refroidir à température ambiante jusqu’à ce que le moule soit froid au toucher. Si vous êtes impatiente, vous pouvez le mettre au frigo, mais laissez-le revenir à température ambiante avant de couper pour des tranches plus nettes. Cette période d’attente garantit des petits blocs de bonheur parfaits et soignés.
Vos questions sur le fudge au beurre de cacahuète, répondues !
Puis-je utiliser du beurre de cacahuète crunchy ?
Absolument ! Utiliser du beurre de cacahuète crunchy donnera une texture fantastique avec des petits morceaux de cacahuète. Cela ajoute un contraste agréable à la base crémeuse du fudge. Assurez-vous simplement que c’est toujours le type standard, non naturel, pour éviter le problème de séparation de l’huile. Le résultat final sera tout aussi délicieux et pourrait même devenir votre nouvelle façon préférée de le faire.
Pourquoi mon fudge est-il devenu granuleux ?
Une texture granuleuse signifie généralement que le sucre a cristallisé pendant la cuisson. Cela peut arriver si vous remuez trop le mélange pendant l’ébullition, ou si des cristaux de sucre éclaboussent les parois de la casserole et retombent dedans. Pour prévenir cela, remuez simplement occasionnellement pendant l’ébullition au lieu de constamment. Vous pouvez aussi utiliser un pinceau de pâtisserie mouillé pour nettoyer les cristaux de sucre sur les parois de la casserole pendant les premières minutes de chauffage. Commencer avec un sucre complètement dissout est la clé.
Puis-je faire ce fudge sans guimauves ?
Les guimauves dans cette recette sont l’ingrédient magique qui lui donne une prise fiable et crémeuse sans avoir besoin d’un thermomètre à sucre. Si vous les omettez, vous faites essentiellement un fudge traditionnel bouilli, qui nécessite un contrôle précis de la température pour atteindre le « stade de la petite boule molle » (environ 113°C). Pour cette recette facile en particulier, je ne recommande pas de les omettre, car elles garantissent le succès pour les cuisiniers de tous niveaux.
Comment puis-je rendre mon fudge plus ferme ?
Si vous préférez une texture plus ferme, la solution la plus simple est de le laisser prendre au réfrigérateur. L’environnement froid le durcira plus qu’un refroidissement à température ambiante. Vous pouvez aussi prolonger le temps d’ébullition d’une minute seulement, mais faites attention à ne pas en faire trop. Inversement, si votre fudge est trop ferme, il a probablement bouilli un peu trop longtemps. La prochaine fois, réduisez le temps d’ébullition de 30 à 60 secondes.
Puis-je doubler les proportions de la recette ?
Je vous déconseillerais de doubler la recette dans la même casserole. Le volume du mélange devient très important et peut facilement déborder, créant un gros gâchis. Il peut aussi être plus difficile de chauffer uniformément. Si vous avez besoin d’une plus grande quantité, il est préférable de faire deux lots séparés. Cela garantit que chacun cuit parfaitement et que vous obtenez cette texture crémeuse et constante à chaque fois.
Quelle est la meilleure façon de couper le fudge proprement ?
Pour des carrés dignes d’une photo, utilisez un grand couteau de chef bien aiguisé. Passez la lame sous l’eau très chaude, essuyez-la, et effectuez votre coupe d’un seul mouvement sûr et direct. Essuyez la lame et réchauffez-la entre chaque coupe. Le couteau chaud glisse à travers le fudge sans le traîner ou le faire craquer. Pour une touche amusante, vous pouvez aussi utiliser de petits emporte-pièces pour faire des formes !
Puis-je ajouter d’autres saveurs à ce fudge ?
Bien sûr ! C’est une merveilleuse recette de base. Essayez d’incorporer une cuillère à café d’extrait de vanille avec le beurre de cacahuète. Pour une version chocolat-beurre de cacahuète, marbreez avec 1/2 tasse de pépites de chocolat fondues après avoir versé le fudge dans le moule. Une pincée de cannelle ou même un peu de poudre de café instantané peut ajouter une profondeur de saveur agréable. Faites preuve de créativité !
Combien de temps se conserve le fudge maison ?
Bien conservé dans un contenant hermétique à température ambiante, votre fudge crémeux au beurre de cacahuète restera frais et délicieux jusqu’à deux semaines. Il peut durer encore plus longtemps au frigo (3 semaines) ou au congélateur (3 mois). Comme il est très riche en sucre et pauvre en humidité, il se conserve très bien. Évitez juste la chaleur directe ou la lumière du soleil.
Mon fudge est trop mou. Puis-je le rattraper ?
Si votre fudge n’a pas pris après le temps de refroidissement complet, il avait probablement besoin d’une ébullition plus longue. Ne vous inquiétez pas, il est toujours comestible et délicieux ! Vous pouvez le déguster en le versant sur de la glace comme une sauce. Pour le rattraper en tant que fudge, vous pouvez essayer de le refaire fondre doucement dans une casserole, le porter à ébullition à nouveau pendant 2-3 minutes, puis le laisser reprendre. C’est un peu contraignant mais ça peut parfois fonctionner.
Le beurre de cacahuète est-il un ingrédient nutritif ?
Le beurre de cacahuète peut faire partie d’une alimentation équilibrée ! Il apporte des protéines, des bonnes graisses et des vitamines. Pour un coup de pouce nutritionnel, cherchez des beurres de cacahuète naturels sans sucre ajouté ni huiles hydrogénées. Souvenez-vous, les gourmandises comme ce fudge sont faites pour le plaisir, mais les associer à une alimentation globalement riche en fibres est une excellente approche pour le bien-être général. Appréciez simplement ce fudge crémeux au beurre de cacahuète avec modération, dans le cadre d’une vie heureuse et équilibrée.
Equipment
- Grande casserole à fond épais
- Cuillère en bois ou spatule résistante à la chaleur
- Moule de 9x13 pouces
- Tasses et cuillères à mesurer
- Couteau bien aiguisé pour couper
Ingrédients
- 1 Tasse Lait
- 1.5 Tasses Beurre de Cacahuète Crémeux non naturel et huileux
- 4 Tasses Sucre Granulé
- 0.5 Tasse Beurre
- 10 oz Mini Marshmallows
Instructions
- Dans une grande casserole, combinez le sucre, le lait et le beurre puis remuez doucement.
- Placez la casserole sur feu moyen et laissez le mélange atteindre une ébullition complète, en remuant occasionnellement.
- Lorsque le mélange bout, démarrez un minuteur et laissez bouillir pendant 8 minutes, en remuant de temps à autre.
- Retirez la casserole du feu et ajoutez le beurre de cacahuète et les mini marshmallows. Remuez vigoureusement jusqu'à obtenir un mélange lisse.
- Graissez légèrement un moule de 9x13 pouces et versez le mélange de fudge dedans, en lissant bien la surface.
- Laissez le fudge refroidir à température ambiante pendant 1 à 2 heures, puis coupez-le en carrés.
Notes
Nutrition

Je suis Céline, une véritable passionnée d’ustensiles et de matériel de cuisine ! J’adore tester, comparer et découvrir les meilleurs équipements pour rendre la cuisine plus efficace et agréable. Que ce soit un bon couteau, un robot performant ou une poêle incontournable, je suis toujours à la recherche des outils qui feront la différence. Mon but est de vous guider dans vos choix pour que vous ayez le bon matériel adapté à vos besoins.