
Ce Gâteau Fou a Changé Ma Façon de Pâtisser à Vie !
Avez-vous déjà eu un de ces moments où « il me faut du gâteau, MAINTENANT » ? Moi, certainement ! Un après-midi pluvieux, avec mes enfants qui grimpaient aux murs, j’ai découvert la magie du Nega Crazy Cake. La promesse d’un gâteau au chocolat riche et moelleux fait entièrement au blender semblait trop belle pour être vraie. Alerte spoiler : elle l’était. Ce n’était pas juste de la pâtisserie ; c’était une aventure joyeuse et folle qui s’est terminée par la plus délicieuse des douceurs au chocolat. C’est l’ultime « combinaison secrète » pour un dessert parfait, et aujourd’hui, je partage tous mes secrets avec vous !
Une Histoire Tourbillonnante : La Révolution du Gâteau au Blender
La beauté de ce « Crazy Cake » ou « Gâteau au Blender », c’est son origine merveilleusement simple et sans chichis. C’est un classique moderne né de la praticité et de l’amour du chocolat. Voyez-le comme le cousin malin du gâteau traditionnel à étages. D’habitude, les gâteaux demandent de blanchir le beurre et le sucre, de tamiser les ingrédients secs et d’incorporer délicatement. Cette recette, elle, jette toutes ces règles par la fenêtre ! En utilisant de l’huile et la puissance du blender, elle crée une mie incroyablement moelleuse en un temps record. Ma version, le « Nega » (un clin d’œil amusant signifiant « noir » pour sa couleur chocolat intense), est devenue la favorite de ma famille après que je l’ai testée pour un repas improvisé. Ce fut un succès fou, et je la fais depuis !
Pourquoi Vous Allez Tomber Amoureux de Ce Gâteau au Chocolat au Blender
Vous allez adorer cette recette pour tant de raisons. Premièrement, la texture est incroyablement douce et moelleuse, grâce à l’huile et à la méthode du blender qui incorpore tout si bien. Deuxièmement, c’est incroyablement rapide. De zéro à la cuisson en moins de 10 minutes ! Pas de gros bols, pas de batteur électrique à nettoyer. Juste le bol du blender. Troisièmement, le goût est un pur bonheur chocolaté, surtout avec cette couverture maison soyeuse. C’est l’équilibre parfait entre simple et spectaculaire.
Les Occasions Parfaites pour Votre Gâteau Crazy Blender
Ce gâteau sera votre nouveau réflexe pour presque tous les événements ! Il est assez simple pour un goûter en famille le weekend mais, habillé de sa couverture et de ses pépites, il est élégant pour un anniversaire ou un dîner entre amis. C’est un super-héros pour les ventes de gâteaux à l’école (il voyage bien !) et une bouée de sauvetage quand des amis débarquent à l’improviste. Tout jour qui appelle un sourire et une part de chocolat est le bon jour pour ce gâteau.
Rassembler Vos Ingrédients pour un Gâteau au Blender Réussi
Préparons tout ! La beauté réside dans la simplicité. Voilà ce dont vous aurez besoin pour votre Gâteau Crazy Blender :
Pour le Gâteau :
- 3 gros œufs
- 1 tasse (200g) de sucre en poudre
- 1 tasse (240ml) d’huile neutre (tournesol ou colza)
- 1 tasse (240ml) de lait tiède
- 1/2 tasse (50g) de cacao non sucré en poudre OU 1 tasse de poudre chocolatée type Nescau
- 2 tasses (250g) de farine de blé tout usage (type T55)
- 1 cuillère à soupe de levure chimique
Pour la Couverture Chocolat :
- 1 boîte (395g) de lait concentré sucré
- 1 brique (200g) de crème liquide entière (type crème fraîche fluide)
- 2 cuillères à soupe de cacao en poudre OU 4 cuillères à soupe de poudre chocolatée
Substitutions Astucieuses Selon Votre Placard
Pas d’inquiétude si il vous manque un ingrédient ! Voici des échanges faciles :
- Huile : Vous pouvez utiliser du beurre fondu ou même du yaourt nature pour une texture légèrement différente.
- Lait : Tous les laits fonctionnent—entier, demi-écrémé, ou même une alternative végétale comme le lait d’amande ou d’avoine.
- Poudre Chocolatée : Utiliser du Nescau ou une poudre chocolatée similaire donne un goût plus doux et sucré. Le cacao en poudre donne une saveur chocolat plus riche et intense. Choisissez votre préféré !
- Crème pour la Couverture : Si vous n’avez pas de crème, vous pouvez utiliser du lait entier, mais la couverture sera moins riche et onctueuse.
Réaliser Votre Magique Gâteau au Chocolat au Blender : Étape par Étape
Étape 1 : Mixez le Trio Gagnant des Ingrédients Liquides
D’abord, branchez votre blender ! Cassez les trois œufs dans le bol du blender. Écoutez ce plouf satisfaisant. Ajoutez la tasse de sucre et la tasse d’huile. L’huile va glouglouter, promettant un moelleux incroyable. Maintenant, mettez le couvercle bien en place et mixez à pleine vitesse pendant environ une minute. Vous verrez le mélange devenir pâle, épais et crémeux. Ça commence déjà à ressembler à de la magie ! Astuce de pro : Utiliser des œufs à température ambiante les aide à s’incorporer plus facilement pour une pâte plus lisse.
Étape 2 : Créez l’Élixir au Chocolat
Alors que le blender tourne toujours à vitesse basse, ouvrez prudemment le petit bouchon du couvercle (le « passage ingrédients »). Versez lentement le lait tiède—il va tourbillonner joliment avec le mélange aux œufs. Ensuite, ajoutez votre poudre de cacao ou Nescau. Regardez le mélange pâle se transformer en un magnifique liquide chocolaté foncé. L’arôme commencera à emplir votre cuisine. Laissez mixer encore 30 secondes jusqu’à ce que ce soit parfaitement lisse et homogène.
Étape 3 : Incorporez la Farine & la Levure
Gardez ce blender en marche à basse vitesse ! C’est la clé pour une pâte sans grumeaux. Ajoutez graduellement les deux tasses de farine par l’ouverture du couvercle. Elle va gonfler dans le mélange chocolaté, l’épaississant instantanément. Enfin, saupoudrez la cuillère à soupe de levure chimique. Mixez pendant seulement 10-15 secondes de plus jusqu’à ce que vous ne voyiez plus de traînées de farine. Ne pas trop mixer ! Dès que c’est combiné, arrêtez le blender. Votre pâte est prête—elle doit être coulante et soyeuse.
Étape 4 : Cuisez à la Perfection
Préchauffez votre four à 180°C (thermostat 6). Prenez votre moule à gâteau préféré—un rond ou rectangulaire fonctionne très bien—et beurrez-le bien ou huilez-le. Versez votre magnifique pâte brune dans le moule. Elle va s’étaler de façon uniforme. Tapotez doucement le moule sur le plan de travail pour libérer les bulles d’air. Placez-le au centre du four préchauffé. Maintenant, la partie difficile : attendez ! Cuisez pendant environ 30 minutes. Votre cuisine sentira divinement bon. Le gâteau est cuit quand la lame d’un couteau ou un cure-dent inséré au centre en ressort propre.
Étape 5 : Préparez la Couverture Irrésistible
Pendant que le gâteau cuit et refroidit, faites la couverture. Dans une casserole moyenne, mélangez toute la boîte de lait concentré, la brique de crème et la poudre de cacao. Fouettez sur feu moyen. Vous verrez la poudre sombre se dissoudre dans le mélange blanc et crémeux. Continuez à remuer constamment avec une cuillère en bois. Après environ 5-7 minutes, elle commencera à épaissir et à bouillonner doucement. Astuce de chef : La couverture doit napper le dos de votre cuillère mais ne doit pas être trop ferme. Souvenez-vous, elle épaissit beaucoup en refroidissant ! Versez-la sur le gâteau complètement refroidi.
Étape 6 : La Grande Finale & la Décoration
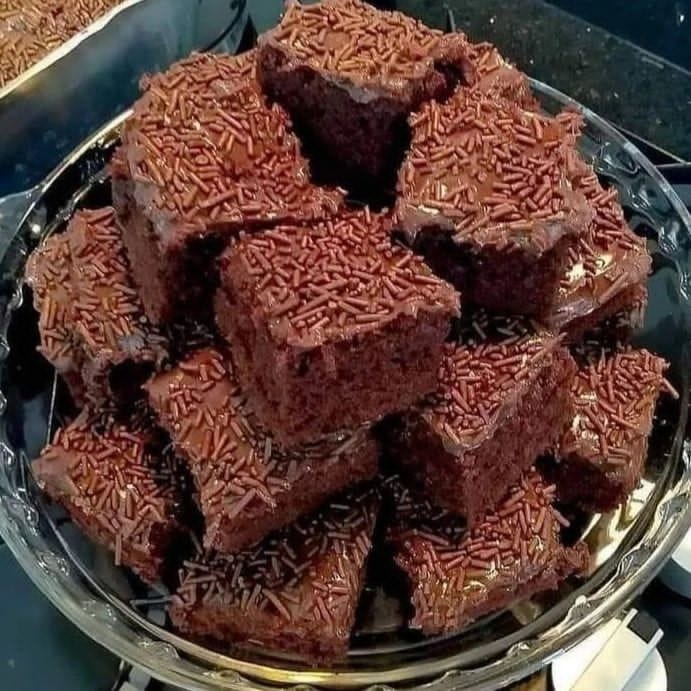
Une fois votre gâteau complètement froid, versez la couverture chocolatée tiède (et non chaude) sur le dessus. Utilisez une spatule pour l’étaler jusqu’aux bords, en la laissant couler joliment sur les côtés. Maintenant, la partie amusante : la décoration ! Saupoudrez une poignée généreuse de pépites de chocolat ou vermicelles sur le dessus avant que la couverture ne prenne. Cela ajoute un délicieux croquant et le rend absolument irrésistible. Laissez prendre 30 minutes avant de découper.
Le Planning de Votre Gâteau Crazy Blender
- Temps de Préparation : 10 minutes
- Temps de Cuisson : 30 minutes
- Temps de Refroidissement & Prise : 1 heure
- Temps Total : Environ 1 heure 40 minutes
Mon Secret Numéro Un pour le Gâteau le Plus Moelleux
Voici mon arme secrète : le lait tiède. C’est l’astuce simple qui fait toute la différence. Utiliser du lait tiède (et non brûlant) aide à « réveiller » la poudre de cacao, libérant toute sa saveur dans la pâte. Cela encourage aussi le gluten de la farine à se développer juste ce qu’il faut, garantissant une mie tendre qui reste moelleuse pendant des jours. Ne zappez jamais le réchauffage du lait !
Un Fait Amusant sur les Gâteaux à Partager
Saviez-vous que les « gâteaux au blender » sont devenus extrêmement populaires au milieu du 20ème siècle avec l’essor des blenders domestiques ? Les marques d’électroménager les présentaient comme l’ultime en matière de pâtisserie moderne et pratique. Notre Nega Crazy Cake est un délicieux témoignage de cette innovation maline, prouvant que parfois la méthode la plus simple est vraiment la meilleure !
De Quoi Avez-Vous Besoin pour le Préparer
- Un blender de bonne qualité
- Un moule à gâteau (20-24 cm de diamètre)
- Des tasses et cuillères à mesurer
- Une casserole et une cuillère en bois pour la couverture
- Une grille de refroidissement
Conserver Votre Chef-d’Œuvre Chocolaté
À température ambiante : Si vous prévoyez de manger le gâteau dans les 24 heures, vous pouvez le laisser couvert d’une cloche ou dans un contenant hermétique sur le comptoir. La couverture restera souple et le gâteau moelleux.
Au réfrigérateur : Pour une conservation plus longue, jusqu’à 4-5 jours, gardez-le au frigo. Le froid rendra la couverture plus ferme, presque comme du fudge. Laissez les parts à température ambiante 15 minutes avant de servir pour les attendrir légèrement.
Peut-on le congeler ? Absolument ! Congelez le gâteau (sans les pépites) avant d’ajouter la couverture. Emballez le gâteau refroidi et nu dans du film alimentaire puis du papier alu. Il se conservera jusqu’à 2 mois. Décongelez une nuit au frigo et préparez une couverture fraîche avant de servir pour la meilleure texture.
Mes Meilleurs Conseils pour un Gâteau au Blender Réussi
- Assurez-vous toujours que votre levure chimique est fraîche pour une bonne levée.
- N’ouvrez pas la porte du four pendant les 25 premières minutes de cuisson.
- Pour un boost de saveur, ajoutez une cuillère à café de café instantané aux ingrédients liquides.
- Laissez le gâteau refroidir complètement avant d’ajouter la couverture, sinon elle va fondre et imbiber le gâteau.
Présenter Votre Gâteau Crazy Blender Comme un Pro
- Saupoudrez de sucre glace et ajoutez des baies fraîches pour un contraste élégant.
- Décorez avec des rosettes de crème chantilly et des copeaux de chocolat.
- Servez avec une boule de glace à la vanille pour le dessert ultime.
- Coupez en petits carrés pour un buffet de fête.
Vous Avez l’Âme Aventureuse ? Essayez Ces Versions Plus Légères !
Vous adorez cette méthode au blender ? Vous pouvez l’adapter de tant de façons ! Pour une version complète, remplacez simplement la moitié de la farine par de la farine complète. Vous pouvez aussi réduire le sucre d’1/4 de tasse—la couverture le rendra toujours sucré. Vous voulez un gâteau sans lactose ? Utilisez du lait végétal et de l’huile. La méthode du blender est si versatile.
Si vous êtes à la recherche d’autres idées de desserts faciles ou sans cuisson incroyables, vous devez explorer notre collection. Par exemple, si vous aimez la combinaison de crémeux et de croquant, vous allez adorer ce sublime Flan et Gâteau au Chocolat avec des Biscuits. Une envie de fruit ? Ce Gâteau à la Goyave avec son glaçage brillant est une sensation. Pour un dessert réconfort classique, ces Dumplings aux Pommes Divins avec Sauce Cannelle sont un pur bonheur. Et pour un dessert festif et coloré, ce Gâteau Rêve Menthe-Chocolat avec M&Ms fait toujours fureur en soirée !
Erreurs Courantes à Éviter Avec Votre Gâteau au Blender
Erreur 1 : Trop Mixer la Pâte
C’est facile de penser « plus de mixage = gâteau plus lisse ». Mais c’est faux ! Trop mixer après avoir ajouté la farine développe trop de gluten. Cela peut rendre votre gâteau caoutchouteux et dense au lieu d’être tendre et moelleux. La clé est de mixer uniquement jusqu’à ce que les dernières traînées de farine disparaissent. Dès que vous avez une pâte lisse et uniforme, arrêtez la machine. Utilisez une spatule pour un dernier tour de mélange doux à la main si besoin.
Erreur 2 : Utiliser des Ingrédients Froids
Jeter des œufs et du lait tout droit sortis du frigo dans le blender peut faire « figer » l’huile légèrement, conduisant à une pâte moins bien émulsionnée. Cela peut affecter la texture finale du gâteau. Pour éviter cela, laissez simplement vos œufs et votre lait reposer 20-30 minutes avant de commencer. Utiliser du lait tiède, comme la recette le suggère, est non-négociable pour un mixage et une saveur parfaits.
Erreur 3 : Trop Cuire la Couverture au Chocolat
Cette couverture, on a tellement envie de la cuire jusqu’à ce qu’elle soit très épaisse ! Mais souvenez-vous, elle continue d’épaissir en refroidissant. Si vous la cuisez jusqu’à ce qu’elle forme une boule ferme dans la casserole, elle deviendra trop dure à étaler une fois froide, comme une brique de chocolat. Vous voulez qu’elle ait la consistance d’une sauce épaisse ou d’une crème anglaise quand elle est chaude—elle doit bien napper le dos d’une cuillère. En cas de doute, retirez-la du feu une minute plus tôt.
Erreur 4 : Glacer un Gâteau Encore Tiède
La patience est une vertu en pâtisserie ! Verser cette jolie couverture sur un gâteau encore tiède est une recette pour un désastre. La chaleur fera fondre les graisses, faisant glisser la couverture et l’imbiber dans le gâteau, le rendant détrempé. Laissez toujours, toujours votre gâteau refroidir complètement sur une grille. Cela assure une surface ferme pour que la couverture repose dessus magnifiquement.
Quand on manipule des produits laitiers et des œufs, pratiquer de bonnes pratiques d’hygiène alimentaire est essentiel pour que vos délicieuses créations restent sûres et que tout le monde puisse en profiter.
Ce Nega Crazy Cake n’est qu’une des nombreuses merveilles dans notre monde de desserts faciles. Si vous avez envie de plus de pâtisseries simples et spectaculaires, je vous invite à parcourir notre collection complète de gâteaux et pâtisseries juste ici.
Vos Questions sur le Gâteau Crazy Blender, Répondues !
Puis-je faire ce gâteau sans blender ?
Oui, vous pouvez ! Le blender est pour la praticité ultime, mais un bon vieux bol et un fouet fonctionnent aussi. Battez simplement les œufs et le sucre jusqu’à ce qu’ils soient mousseux, puis fouettez l’huile et le lait tiède. Tamisez les ingrédients secs et incorporez-les délicatement jusqu’à homogénéité. La texture pourrait être légèrement différente, mais ce sera toujours délicieux. La clé est d’éviter de trop travailler la pâte après l’ajout de la farine.
Pourquoi mon gâteau est trop compact et n’a pas gonflé ?
Un gâteau dense pointe généralement vers deux problèmes. D’abord, votre levure chimique est peut-être vieille et a perdu son pouvoir. Vérifiez toujours la date de péremption. Ensuite, vous avez peut-être trop mixé la pâte après avoir ajouté la farine, ce qui la rend dure. Aussi, assurez-vous que votre four était bien préchauffé. Un four froid ne donne pas le « coup de chaud » initial nécessaire pour une bonne levée.
Quelle est la différence entre le cacao en poudre et le Nescau ?
C’est une excellente question ! Le cacao non sucré en poudre est du pur cacao moulu. Il donne une saveur chocolat intense, riche et légèrement amère. Le Nescau ou les poudres chocolatées similaires sont un mélange de cacao, de sucre, et souvent de lait en poudre et d’arômes. Ils donnent un goût chocolat plus doux et sucré. Pour un gâteau plus intense type « chocolat noir », utilisez du cacao. Pour un gâteau plus doux et familial, utilisez la poudre chocolatée.
Puis-je doubler cette recette ?
Absolument, mais procédez avec prudence ! La plupart des blenders domestiques ont une ligne de remplissage maximale. Doubler les ingrédients pourrait dépasser cette limite et causer un débordement. Il est plus sûr de faire deux préparations de pâte séparément. Vous pouvez les cuire comme deux gâteaux séparés ou les superposer pour un gâteau plus haut. Assurez-vous simplement de doubler aussi la recette de la couverture si vous faites deux gâteaux.
Ma couverture est devenue granuleuse. Que s’est-il passé ?
Une couverture granuleuse signifie généralement que la poudre de cacao ne s’est pas complètement dissoute avant que le mélange ne chauffe et n’épaississe. Pour éviter cela, mélangez le lait concentré, la crème et la poudre de cacao dans une casserole froide d’abord. Utilisez un fouet pour éliminer tous les grumeaux jusqu’à ce que ce soit parfaitement lisse. Ce n’est qu’ensuite que vous le mettez sur le feu, en remuant constamment. Cela garantit un résultat soyeux et sans grumeaux.
Comment savoir exactement quand le gâteau est cuit ?
Le test du cure-dent est votre meilleur ami. Vers les 30 minutes, insérez un cure-dent propre ou un couteau fin au centre du gâteau. S’il en ressort avec quelques miettes humides attachées, c’est parfait. S’il ressort avec de la pâte liquide, il a besoin de plus de temps. Aussi, les bords du gâteau commenceront à se décoller des parois du moule, et le dessus rebondira légèrement quand on le touche.
Puis-je utiliser cette pâte pour faire des muffins ?
Oui, cette pâte fonctionne à merveille pour des muffins ! Garnissez simplement un moule à muffins de caissettes en papier et remplissez chacune aux 2/3. Cuisez à la même température (180°C) pendant environ 18-22 minutes. Faites le test du cure-dent pour vérifier. Ils sont parfaits pour le goûter à l’école ou pour les fêtes. Vous pouvez pocher la couverture chocolat sur chaque muffin refroidi.
Est-il possible de faire une version vegan de ce gâteau ?
Vous pouvez certainement essayer ! Pour un Gâteau Crazy Blender vegan, remplacez les œufs par des « œufs de lin » (1 c.à.s de graines de lin moulues mélangées à 3 c.à.s d’eau par œuf). Utilisez du lait végétal et une crème sans lactose pour la couverture. La texture sera différente—un peu plus dense et fondante—mais cela peut être un excellent dessert vegan au chocolat. Veillez à bien graisser votre moule.
Le gâteau a collé au moule ! Comment l’éviter ?
Oh non, le cauchemar du pâtissier ! Pour éviter que ça colle, ne vous contentez pas de beurrer le moule—farinez-le aussi. Après avoir beurré ou huilé, ajoutez une cuillère à soupe de farine et secouez jusqu’à ce que toute la surface soit enrobée. Tapotez pour enlever l’excédent. Vous pouvez aussi chemiser le fond avec un cercle de papier sulfurisé pour un démoulage garanti. Laissez le gâteau refroidir dans le moule 10 minutes avant de tenter de le démouler.
Combien de temps à l’avance puis-je faire ce gâteau ?
Ce gâteau est un dessert génial à préparer à l’avance. Vous pouvez cuire le gâteau 1-2 jours à l’avance. Laissez-le refroidir complètement, puis enveloppez-le bien dans du film alimentaire et conservez-le à température ambiante. Préparez la couverture le jour où vous prévoyez de le servir. Assemblez le gâteau quelques heures avant votre événement. Cela permet aux saveurs de se mélanger tout en gardant la couverture fraîche et brillante.
Prêt(e) à Devenir une Légende du Gâteau au Blender ?
Voilà, ma chère amie—le guide complet du gâteau au chocolat le plus follement facile et délicieux. Ce Nega Crazy Cake prouve que vous n’avez pas besoin de talents de chef ou d’heures de temps pour créer quelque chose de vraiment spécial. C’est la joie de jeter des ingrédients dans un blender et de créer de la magie pure. J’espère que cette recette apportera autant de bonheur à votre table qu’à la mienne. Maintenant, allez préchauffer ce four, attrapez votre blender, et préparez-vous pour les acclamations chocolatées ! Bonne pâtisserie !
Equipment
- Blender
- Moule à gâteau (20-24 cm)
- Petite casserole
- Spatule
- Pinceau de cuisine
Ingrédients
- 3 gros œufs œufs
- 200 g sucre en poudre
- 240 ml huile neutre comme de l'huile de tournesol ou de colza
- 240 ml lait tiède
- 50 g cacao en poudre non sucré ou 1 tasse de poudre de chocolat comme Nescau
- 250 g farine de blé tout usage
- 1 cuillère à soupe levure chimique
- 395 g lait concentré sucré
- 200 g crème (crème fraîche ou crème épaisse)
- 2 cuillères à soupe cacao en poudre ou 4 cuillères à soupe de poudre de chocolat
Instructions
- Branchez votre blender et incorporez les œufs, le sucre et l'huile. Mixez à haute vitesse pendant environ une minute.
- Tout en mixant, ajoutez le lait tiède et le cacao en poudre ou Nescau. Continuez à mixer jusqu'à obtention d'un mélange lisse.
- Ajoutez progressivement la farine et la levure chimique tout en mixant à basse vitesse, puis mixez juste assez pour combiner.
- Préchauffez le four à 180°C (350°F) et graissez votre moule à gâteau. Versez la pâte dans le moule et tapez-le pour enlever les bulles d'air. Enfournez pendant environ 30 minutes.
- Pendant que le gâteau cuit, préparez la couverture en mélangeant le lait concentré, la crème et le cacao dans une casserole à feu moyen. Remuez jusqu'à ce que le mélange épaississe.
- Une fois le gâteau refroidi, versez la couverture sur le dessus et décorez avec des vermicelles en chocolat. Laissez reposer 30 minutes avant de couper.
Notes
Nutrition

Je suis Céline, une véritable passionnée d’ustensiles et de matériel de cuisine ! J’adore tester, comparer et découvrir les meilleurs équipements pour rendre la cuisine plus efficace et agréable. Que ce soit un bon couteau, un robot performant ou une poêle incontournable, je suis toujours à la recherche des outils qui feront la différence. Mon but est de vous guider dans vos choix pour que vous ayez le bon matériel adapté à vos besoins.