
Y a-t-il quelque chose de plus réconfortant que l’odeur d’un Gâteau Chocolat Chaud qui cuit au four ? C’est comme un câlin chaud pour l’âme. Ma famille sait que lorsqu’elle me voit attraper la poudre de cacao, un petit morceau de bonheur est en route. Cette recette en particulier a une place spéciale dans mon cahier de recettes, car c’est celle que j’ai préparée pour le tout premier anniversaire de ma fille. Il était un peu de travers, mais la joie sur son visage était magique. Le secret ? Une simple tasse d’eau tiède qui rend la mie incroyablement moelleuse et fait pleinement s’exprimer la saveur du chocolat. Laissez-moi partager avec vous ce petit morceau de ma cuisine.
L’histoire derrière ce délice au chocolat réconfortant
Chaque grande recette a une histoire. Cette recette de Gâteau Chocolat Chaud est ma version d’un classique. J’ai grandi en regardant ma grand-mère préparer son fameux gâteau au chocolat, mais elle utilisait toujours du café. Un après-midi pluvieux, je n’avais plus de café et j’ai essayé de l’eau tiède à la place. À ma grande surprise, le gâteau était encore plus moelleux et le goût du chocolat était plus net et plus intense. C’était un heureux accident devenu un incontournable familial. Aujourd’hui, c’est le gâteau que je sors pour chaque repas-partagé et vente de pâtisseries à l’école. C’est une version moderne d’un favori traditionnel, qui prouve que parfois le changement le plus simple fait la plus grande différence.
Pourquoi vous allez adorer ce gâteau au chocolat
Vous allez adorer ce gâteau pour tant de raisons ! D’abord, il est incroyablement facile. On mélange, on remue et on cuit. Pas besoin d’équipement sophistiqué ou d’ingrédients difficiles à trouver. Ensuite, la texture est absolument rêvée – moelleuse, tendre et légère, grâce à cette astuce de l’eau tiède. La saveur du chocolat est profonde et réconfortante, sans être trop sucrée. Et ce sirop de chocolat brillant sur le dessus ? C’est la finition parfaite, brillante et délicieuse, qui lui donne l’air de sortir d’une pâtisserie chic. C’est une recette infaillible qui garantit des sourires à chaque fois.
Les occasions parfaites pour votre gâteau au chocolat
Ce gâteau est votre arme secrète pour n’importe quel événement. Il est parfait pour une petite douceur du week-end avec une tasse de thé. Il brille lors des anniversaires, surtout pour les enfants qui ne veulent que du pur plaisir chocolaté. Apportez-le à un dîner-partagé et regardez-le disparaître en premier. C’est aussi un dessert parfaitement douillet pour une soirée cinéma en famille. Honnêtement, toute journée qui se termine par une part de ce gâteau au chocolat réconfortant est une bonne journée. Il transforme les moments ordinaires en doux souvenirs.
De quoi vous aurez besoin : la liste des ingrédients
Rassemblons nos ingrédients. Utiliser une poudre de cacao de bonne qualité fait une grande différence ici !
Pour le gâteau :
- 500 g de farine tout usage
- 120 g de poudre de cacao (50% de cacao)
- 125 ml d’huile neutre (type tournesol ou colza)
- 250 ml d’eau tiède
- 300 g de sucre en poudre
- 1 sachet de levure chimique
- 3 gros œufs
Pour le sirop au chocolat :
- 200 g de sucre
- 3 cuillères à soupe de beurre doux ou de margarine
- 60 g de poudre de chocolat au lait ou de cacao sucré pour boisson
- 250 ml de lait (ou d’eau)
- Vermicelles ou pépites de chocolat (facultatif, pour la décoration)
Substitutions pratiques d’ingrédients
Aucun souci s’il vous manque quelque chose ! Voici quelques échanges faciles :
- Huile : Vous pouvez utiliser la même quantité de beurre fondu ou de compote de pommes pour une saveur et une texture légèrement différentes.
- Lait dans le sirop : L’eau marche très bien et permet même à la saveur du chocolat de mieux ressortir.
- Poudre de chocolat : Si vous n’avez que du cacao sucré pour boisson, réduisez le sucre dans le gâteau d’environ 50 g.
- Farine de blé : Un bon mélange de farine tout usage sans gluten peut être utilisé en substitution 1:1.
C’est parti pour la cuisson ! La méthode étape par étape
Étape 1 : Mélanger les ingrédients liquides
Commencez par préchauffer votre four à 180°C (thermostat 6). Maintenant, mettons-nous à mixer ! Cassez les trois œufs dans votre mixeur/blender. Versez l’eau tiède, l’huile, le sucre et cette riche poudre de cacao. L’eau tiède aidera le cacao à « fleurir », libérant ses arômes les plus profonds. Mixez le tout à haute vitesse pendant deux bonnes minutes. Vous devez obtenir un liquide lisse, mousseux et absolument chocolaté. Il doit ressembler à un milk-shake au chocolat épais et foncé. Astuce de pro : Assurez-vous que votre eau est tiède, et non chaude, pour éviter de faire cuire les œufs dans le mixeur.
Étape 2 : Incorporer les ingrédients secs
Versez ce magnifique mélange chocolaté dans un grand saladier. Prenez votre fouet ou une maryse. Maintenant, ajoutez la farine progressivement. J’aime l’ajouter en trois fois, en soulevant délicatement la pâte du bas vers le haut après chaque ajout. Cela garde la pâte aérée et évite de trop mélanger, ce qui peut rendre le gâteau caoutchouteux. Observez la pâte se transformer d’un liquide en une pâte épaisse, onctueuse et brun foncé. L’arôme est déjà incroyable !
Étape 3 : Ajouter la touche finale – la levure
Une fois la farine pleinement incorporée et qu’il ne reste plus de poches sèches, c’est le moment de l’agent magique : la levure chimique. Saupoudrez-la uniformément sur la pâte. Incorporez-la délicatement mais complètement jusqu’à ce qu’elle disparaisse. Vous ne devez plus voir de traînées blanches. Cette étape assure à votre Gâteau Chocolat Chaud une belle levée au four, pour vous offrir cette mie parfaite et moelleuse.
Étape 4 : Préparer le moule et cuire
Prenez votre moule à gâteau préféré. Beurrez-le généreusement, puis farinez-le légèrement en tapotant pour enlever l’excédent. C’est votre assurance pour un démoulage parfait. Versez toute la pâte dans le moule préparé, et donnez-lui une petite secousse pour la niveler. Placez-le au centre de votre four préchauffé. Maintenant vient la partie difficile : attendre 40 minutes. Votre cuisine se remplira de l’odeur divine du chocolat. Le gâteau est cuit lorsqu’il est doré sur le dessus et qu’un cure-dent inséré au centre en ressort propre.
Étape 5 : Préparer le sirop de chocolat soyeux
Pendant que le gâteau refroidit, préparons ce sirop irrésistible. Dans une casserole, combinez le lait, le sucre, le beurre et le chocolat. Placez à feu moyen. Remuez constamment avec un fouet pendant que le beurre fond et que le mélange s’unifie. Dès qu’il commence à frémir doucement, réduisez immédiatement le feu à doux. Laissez mijoter pendant environ 8 minutes, en remuant fréquemment. Vous le verrez épaissir lentement en une sauce au chocolat brillante et nappante. Astuce de chef : Pour une finition encore plus brillante, ajoutez une toute petite pincée de sel au sirop – cela fait ressortir la saveur du chocolat !
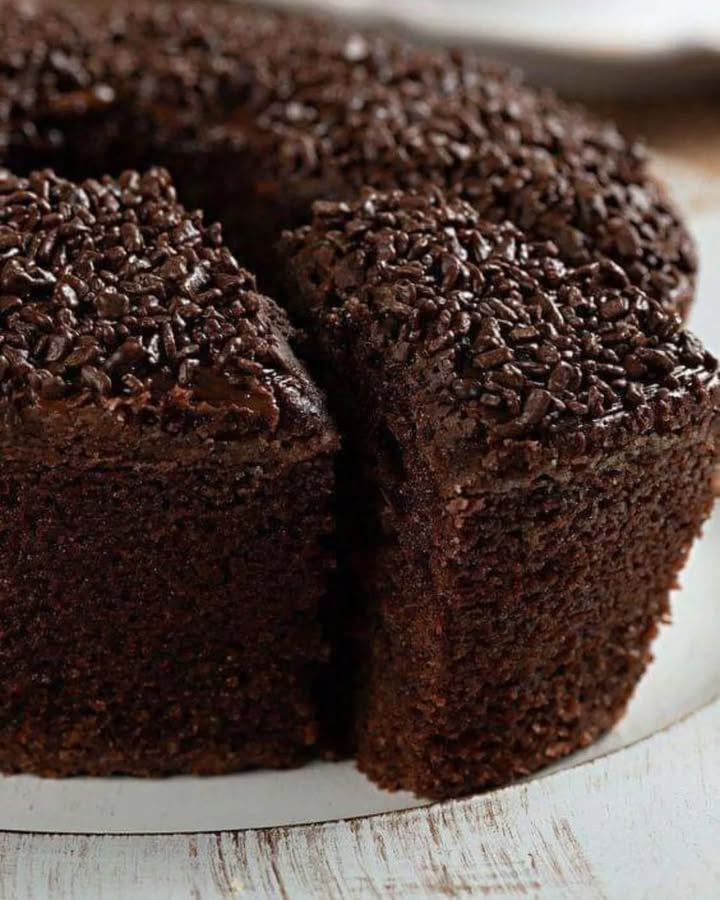
Étape 6 : Le grand final – Assemblage et décoration
Votre gâteau doit être complètement refroidi maintenant. Passez un couteau autour des bords et démoulez-le sur une assiette de service. Versez lentement le sirop de chocolat encore tiède sur le dessus. Utilisez une spatule pour le guider, laissant couler cette bonté brillante sur les côtés. Pour une touche finale festive, saupoudrez le dessus avec vos vermicelles chocolat préférées pendant que le sirop est encore collant. Et voilà – un splendide et délicieux Gâteau Chocolat Chaud prêt à émerveiller tout le monde !
Votre chronologie de préparation
- Temps de préparation : 20 minutes
- Temps de cuisson : 40 minutes
- Temps de refroidissement & sirop : 30 minutes
- Temps total : Environ 1 heure 30
Mon secret pour le gâteau ultime
Mon petit secret, c’est le timing du sirop. Je verse toujours le sirop tiède sur le gâteau refroidi. Cela permet au gâteau d’absorber le sirop juste assez pour devenir incroyablement moelleux, sans devenir détrempé. Cela crée un parfait contraste entre le gâteau tendre et la couche de chocolat légèrement plus ferme et brillante sur le dessus.
Une anecdote amusante sur le chocolat
Saviez-vous qu’ajouter un liquide chaud comme notre eau tiède à la poudre de cacao s’appelle « faire fleurir » le cacao ? Cela aide à ouvrir les particules de cacao, libérant plus de ses arômes et saveurs complexes directement dans votre pâte. C’est une astuce simple qui donne à votre gâteau maison un goût profond et professionnel !
Le matériel de cuisine dont vous aurez besoin
- Blender/mixeur ou batteur électrique
- Grand saladier
- Fouet et maryse (spatule)
- Moule à gâteau rond de 24 cm
- Casserole moyenne
- Verres et cuillères doseurs
Comment conserver votre chef-d’œuvre au chocolat
Par miracle, s’il vous en reste, vous voudrez les garder frais. La meilleure façon est de couvrir le gâteau légèrement avec du film alimentaire ou de le placer dans une boîte à gâteau. Conservez-le à température ambiante pendant 2 jours maximum. Le nappage au sirop restera parfaitement brillant.
Pour une conservation plus longue, vous pouvez le placer au réfrigérateur jusqu’à 5 jours. Laissez-le revenir à température ambiante pendant environ une heure avant de servir. Cela redonnera la texture moelleuse et tendre que nous aimons tous.
Vous pouvez aussi congeler ce gâteau. Emballez des parts individuelles ou le gâteau entier (sans les décorations) hermétiquement dans du film alimentaire, puis dans du papier alu. Il se conservera jusqu’à 3 mois. Décongelez-le une nuit au réfrigérateur et ajoutez de fraîches décorations avant de servir.
Astuces utiles pour une cuisson réussie
- Préchauffez toujours votre four. Un four froid ne donnera pas à la levure la chaleur instantanée dont elle a besoin pour agir correctement.
- N’ouvrez pas la porte du four pendant les 30 premières minutes de cuisson. Une chute soudaine de température peut faire retomber le gâteau.
- Pour vérifier la cuisson, utilisez un cure-dent ou une pique en bois propre. S’il ressort avec quelques miettes humides, c’est parfait. Il ne doit pas y avoir de pâte liquide dessus.
- Laissez le gâteau refroidir dans son moule pendant 10-15 minutes avant de le démouler. Cela lui donne le temps de se raffermir légèrement.
Idées de présentation pour impressionner
- Servez chaque part avec un nuage de crème fouettée fraîche ou une boule de glace à la vanille.
- Saupoudrez l’assiette d’un peu de sucre glace ou de cacao en plus pour un effet café.
- Ajoutez des fruits rouges frais comme des framboises ou des fraises sur le côté. Leur acidité s’accorde parfaitement avec le chocolat sucré.
- Pour une fête, décorez avec des paillettes comestibles dorées ou des fleurs comestibles pour une pièce maîtresse vraiment spectaculaire.
6 délicieuses variantes à essayer
Une fois ce classique maîtrisé, le plaisir commence ! Voici six variantes pour garder vos cuissons excitantes :
- Gâteau Chocolat-Orange : Ajoutez le zeste d’une orange à la pâte et une cuillère à soupe de jus d’orange au sirop pour une touche vive et citronnée.
- Gâteau Moka : Remplacez l’eau tiède par du café chaud et fort. Il rehausse incroyablement la saveur du chocolat, un peu comme dans ma recette préférée de gâteau moka fondant.
- Gâteau au chocolat avec une couche cachée : Avant de verser la pâte, saupoudrez une couche de pépites de chocolat ou de noix concassées dans le moule pour une surprise croquante à chaque bouchée.
- Gâteau Chocolat-Fruits Rouges : Après avoir démoulé le gâteau, recouvrez-le d’une couche de crème fouettée et de fruits rouges frais avant d’ajouter le sirop au chocolat pour une version fruitée et crémeuse.
- Gâteau au chocolat épicé : Ajoutez une cuillère à café de cannelle et une pincée de piment en poudre aux ingrédients secs pour une profondeur de saveur chaude et légèrement épicée.
- Ajout de fruits simple : Pour un mariage classique, essayez ce gâteau avec un accompagnement fruité. Il s’accorde merveilleusement bien avec les saveurs de ce gâteau aux fruits facile, ou vous pourriez le servir aux côtés d’une part rafraîchissante de tarte aux fraises à l’ancienne. Pour une table de desserts vraiment décadente, pourquoi ne pas offrir aussi une part de ce cheesecake red velvet aux noix ?
Les erreurs courantes à éviter
Erreur 1 : Utiliser de l’eau chaude, bouillante
C’est une erreur fréquente. Si votre eau est trop chaude, elle peut commencer à cuire les œufs lorsque vous les mixez, créant de petits morceaux d’œufs cuits dans votre pâte. Cela peut aussi faire que la farine forme des grumeaux lors du mélange. Le résultat est un gâteau à la texture étrange. Comment l’éviter : Utilisez de l’eau tiède du robinet, ou chauffez l’eau jusqu’à ce qu’elle soit juste agréablement chaude au toucher, pas brûlante.
Erreur 2 : Trop mélanger la pâte après avoir ajouté la farine
Nous y sommes tous passés – on veut une pâte lisse, alors on continue à remuer. Mais trop mélanger développe le gluten de la farine, rendant votre gâteau caoutchouteux au lieu de moelleux et tendre. Vous pourriez même voir de gros trous ou des tunnels à l’intérieur du gâteau cuit. Comment l’éviter : Remuez juste jusqu’à ce que vous ne voyiez plus de traînées de farine. Quelques petits grumeaux sont parfaitement acceptables ; ils se dissoudront pendant la cuisson.
Erreur 3 : Ne pas laisser le gâteau refroidir avant d’ajouter le sirop
C’est tentant de verser ce magnifique sirop chaud sur un gâteau encore tiède. Mais c’est la garantie d’un résultat détrempé. Le gâteau chaud absorbera trop de liquide, rendant le fond pâteux et le sirop s’infiltrera au lieu de former cette belle couche brillante sur le dessus. Comment l’éviter : La patience est la clé. Laissez le gâteau refroidir complètement dans le moule, puis sur une grille. L’attente en vaut la peine pour une texture et une présentation parfaites.
Erreur 4 : Cuire le sirop à feu trop vif
Si vous précipitez le sirop en montant trop le feu, vous risquez de brûler le sucre et le beurre. Cela donne au sirop un goût amer et désagréable. Vous pourriez aussi vous retrouver avec un sirop trop liquide ou, au contraire, qui se transforme en caramel dur si vous le cuisez trop longtemps. Comment l’éviter : Gardez le feu à moyen pour l’amener à ébullition, puis réduisez immédiatement à un léger frémissement. Remuez constamment pour une cuisson uniforme et une épaisseur parfaite.
Note sur le plaisir équilibré
Cuire et partager des douceurs comme ce Gâteau Chocolat Chaud est l’une des grandes joies de la vie. C’est merveilleux de savourer ces moments de douceur dans le cadre d’une approche équilibrée de l’alimentation. Pour plus d’informations sur le fait de bien profiter de la nourriture, vous pouvez trouver d’excellentes ressources sur des sujets comme l’équilibre nutritionnel et la qualité des aliments auprès de sources fiables.
Si ce gâteau a éveillé votre passion pour la pâtisserie, vous trouverez tout un monde d’idées sucrées qui vous attendent dans notre collection principale de recettes de gâteaux et pâtisseries.
Questions fréquemment posées
Puis-je faire ce gâteau au chocolat sans blender ?
Absolument ! Vous pouvez utiliser un batteur électrique ou même un bon vieux fouet et un saladier. Assurez-vous simplement de bien fouetter les œufs, l’eau tiède, l’huile, le sucre et la poudre de cacao ensemble jusqu’à obtenir un mélange parfaitement homogène. Ensuite, suivez les mêmes étapes pour ajouter la farine et la levure. Ça demandera peut-être un peu plus d’huile de coude, mais le résultat sera tout aussi délicieux.
Pourquoi mon gâteau s’est-il affaissé au milieu après la cuisson ?
Un gâteau qui s’affaisse est souvent dû à quelques problèmes clés. Le four n’a peut-être pas été complètement préchauffé, donc le gâteau n’a pas eu la montée en chaleur initiale nécessaire pour bien lever. Une autre cause courante est d’ouvrir la porte du four trop tôt pendant la cuisson, ce qui laisse s’échapper la chaleur et peut faire s’effondrer les bulles d’air délicates. Enfin, vérifiez votre levure chimique – si elle est vieille, elle peut avoir perdu son pouvoir et ne fera pas lever le gâteau comme il se doit.
Comment savoir si le gâteau est parfaitement cuit ?
Utilisez le test du cure-dent ! Insérez un cure-dent propre ou une fine pique en bois au centre même du gâteau. S’il ressort propre ou avec juste quelques miettes sèches, le gâteau est cuit. Si vous voyez de la pâte liquide et collante, il a besoin de plus de temps. Regardez aussi les bords – ils doivent commencer à se détacher légèrement des parois du moule, et le dessus doit reprendre sa forme doucement quand vous le touchez.
Mon sirop est trop épais. Que puis-je faire ?
Pas d’inquiétude, c’est facile à réparer ! Il suffit de remettre le sirop trop épais dans la casserole à feu très doux. Ajoutez un filet de lait ou d’eau supplémentaire, une cuillère à soupe à la fois, et fouettez constamment jusqu’à ce qu’il retrouve une consistance lisse et nappante. Laissez-le refroidir une minute avant de le verser sur votre gâteau. Souvenez-vous, il continuera à épaissir un peu en refroidissant sur le gâteau.
Puis-je utiliser du cacao en poudre à la place de la poudre de chocolat ?
Oui, mais il faut ajuster. Le cacao non sucré en poudre est plus concentré que la poudre de chocolat sucrée. Si vous utilisez du cacao non sucré, vous voudrez peut-être augmenter le sucre dans le gâteau d’environ 50 g pour équilibrer l’amertume. La saveur sera plus intense et moins sucrée, ce que beaucoup d’amateurs de chocolat préfèrent !
Est-il possible de faire cette recette dans un moule différent, comme un moule à couronne ?
Oui, un moule à couronne/à bundt fonctionne très bien ! Assurez-vous de le beurrer et le fariner très soigneusement, en couvrant tous les recoins. Le temps de cuisson pourrait être légèrement réduit, alors commencez à vérifier la cuisson aux alentours de 35 minutes. La forme élégante permet une présentation magnifique avec le glaçage qui coule sur les côtés.
Combien de temps à l’avance puis-je cuire le gâteau avant de le servir ?
Vous pouvez cuire le gâteau jusqu’à un jour à l’avance. Laissez-le refroidir complètement, emballez-le bien dans du film alimentaire et conservez-le à température ambiante. Préparez le sirop le jour où vous prévoyez de le servir pour un goût plus frais et un aspect plus brillant. C’est une excellente stratégie pour les fêtes.
Puis-je congeler le gâteau avec le sirop déjà dessus ?
Il est préférable de congeler le gâteau nature, sans sirop. Le sirop peut devenir collant et perdre sa texture une fois congelé et décongelé. Emballez bien le gâteau refroidi et congelez-le. Lorsque vous êtes prêt à servir, décongelez-le une nuit au réfrigérateur, laissez-le revenir à température ambiante et préparez une nouvelle portion de sirop à verser dessus. Il aura vraiment le goût d’un gâteau fraîchement cuit !
Quel est le rôle de l’eau tiède dans la recette ?
L’eau tiède a deux fonctions merveilleuses. D’abord, elle fait « fleurir » la poudre de cacao, l’aidant à se dissoudre complètement et à libérer sa saveur chocolatée maximale dans la pâte. Ensuite, elle aide le sucre à se dissoudre plus facilement, créant une pâte plus lisse et une mie plus fine dans le gâteau final. C’est une astuce simple avec un grand impact sur la texture et le goût.
Ma famille n’aime pas les desserts très sucrés. Puis-je réduire le sucre ?
Vous pouvez certainement réduire le sucre selon votre goût. Je recommanderais de commencer par réduire le sucre dans le gâteau de 50 g. Le sirop est assez sucré, donc vous pouvez aussi réduire le sucre dedans de la même quantité, ou simplement utiliser moins de sirop sur le gâteau fini. La saveur du chocolat deviendra plus prononcée, ce qui est souvent un changement très agréable.
Votre aventure chocolatée vous attend
Et voilà – tout ce dont vous avez besoin pour créer le plus réconfortant et délicieux des Gâteaux Chocolat Chaud. Ce gâteau est plus qu’un simple dessert ; c’est un rituel de bonheur. De la première odeur de chocolat qui cuit à la dernière miette dans l’assiette, c’est de la joie pure. J’espère que cette recette trouvera sa place dans votre cuisine et deviendra une tradition chérie pour votre famille, tout comme pour la mienne. Allez, préchauffez ce four et préparez-vous à recevoir les compliments. Bonne cuisine !
Equipment
- Mixeur ou batteur électrique
- Moule à gâteau rond de 9 pouces
- Casserole moyenne
- Fouet et spatule
- Tasses et cuillères à mesurer
Ingrédients
- 240 g farine tout usage
- 100 g poudre de chocolat 50% cacao
- 125 ml huile neutre comme l'huile de colza ou de tournesol
- 240 ml eau tiède
- 300 g sucre granulé
- 15 g levure chimique
- 3 gros œufs
Instructions
- Préchauffez votre four à 180°C (350°F).
- Dans un mixeur, mélangez les œufs, l'eau tiède, l'huile, le sucre et la poudre de chocolat pendant 2 minutes.
- Versez le mélange de chocolat dans un grand bol et incorporez la farine progressivement en pliant légèrement pour éviter le surmixage.
- Ajoutez la levure chimique et mélangez délicatement jusqu'à ce qu'elle soit incorporée.
- Graissez un moule à gâteau et saupoudrez-le de farine, puis versez la pâte.
- Faites cuire au four pendant 40 minutes jusqu'à ce qu'un cure-dent en ressorte propre.
- Pendant ce temps, préparez le sirop en combinant le lait, le sucre, le beurre et le chocolat dans une casserole, puis faites chauffer à feu moyen jusqu'à ébullition.
- Réduisez le feu et laissez mijoter pendant 8 minutes en remuant fréquemment jusqu'à obtenir une consistance épaisse.
- Une fois le gâteau refroidi, versez le sirop chaud sur le dessus et décorez avec des paillettes de chocolat.
Notes
Nutrition

Je suis Céline, une véritable passionnée d’ustensiles et de matériel de cuisine ! J’adore tester, comparer et découvrir les meilleurs équipements pour rendre la cuisine plus efficace et agréable. Que ce soit un bon couteau, un robot performant ou une poêle incontournable, je suis toujours à la recherche des outils qui feront la différence. Mon but est de vous guider dans vos choix pour que vous ayez le bon matériel adapté à vos besoins.