
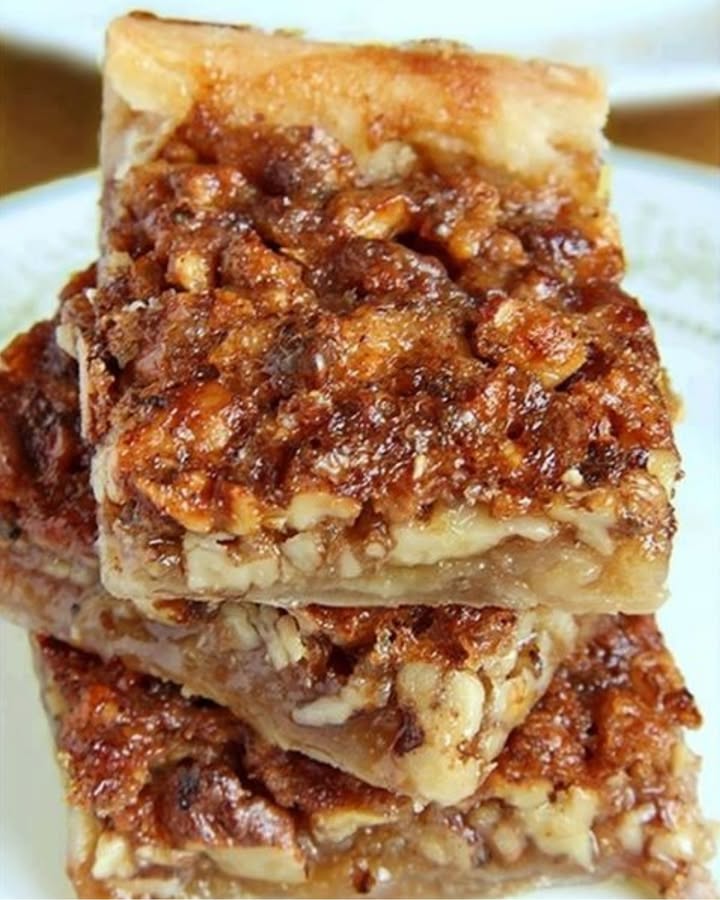
Oh là là ! Vous DEVEZ essayer ces barres aux pacanes les plus faciles du monde !
Vous connaissez ce moment ? Vous cherchez quelque chose de sucré, d’impressionnant, mais votre énergie est au plus bas. Je suis passée par là plus souvent que je ne voudrais l’admettre, surtout avant un rassemblement familial. C’est pourquoi cette recette des barres aux pacanes les plus faciles est mon petit tour de magie. Elle offre toute la richesse et la joie fondante d’une tarte aux pacanes classique, mais sans les tracas d’une croûte capricieuse. La première fois que je les ai faites, mon mari a demandé : « Tu les as achetées en pâtisserie ? » — le plus beau compliment qui soit !
Une douce tranche d’histoire : L’histoire des barres aux pacanes
Ces barres pécan délicieuses sont la cousine astucieuse et sans chichi de la tarte aux pacanes du Sud. La tarte classique est un pilier des tables de fête américaines, surtout dans le Sud où les pacanes abondent. Mais soyons honnêtes, étaler une pâte à tarte peut être intimidant. Un jour, quelqu’un a eu un éclair de génie : « Et si on pressait la croûte dans un moule ? » Et la barre aux pacanes est née. C’est une touche moderne qui respecte la tradition mais qui chérit votre précieux temps. Ma version utilise une base simple de sablé — solide, beurrée, et qui fond littéralement dans la bouche, un écran parfait pour cette garniture luxueuse aux pacanes.
Pourquoi vous allez tomber follement amoureux de cette recette
Écoutez, si vous aimez ce croquant riche et caramelisé de la tarte aux pacanes mais que vous voulez éviter le stress, c’est votre recette. La croûte se prépare en quelques minutes au robot culinaire (ou même avec un coupe-pâte). La garniture est un jeu d’enfant dans une seule casserole. Elles voyagent parfaitement, nourrissent une foule, et vous font passer pour une rock-star des desserts avec un minimum d’effort. Le contraste entre le sablé croustillant et fondant et la garniture moelleuse et noisetée est un pur bonheur.
Les occasions parfaites pour vos barres aux pacanes
Ces barres sont parfaites pour ravir une foule à n’importe quel événement. Je fais toujours une double fournée pour notre table de desserts de Thanksgiving — elles ont un succès fou à côté de la tarte à la citrouille. Elles sont parfaites pour les ventes de pâtisseries, les buffets, ou simplement comme gourmandise spéciale du week-end avec une tasse de café. Je les ai même emballées joliment comme cadeaux comestibles pendant les fêtes. Honnêtement, tout jour qui mérite un peu de douceur est le bon jour pour ces barres pécan faciles.
Ce dont vous aurez besoin : la liste des ingrédients
Rassembler des ingrédients simples et de qualité est la première clé du succès. Voici ce dont vous aurez besoin :
Pour la croûte sablée :
- 2 tasses de farine tout-usage de qualité
- 1/2 tasse de sucre glace pour une touche de douceur
- 1/4 c.à.c de sel de mer fin pour l’équilibre
- 12 c.à.s (170 g) de beurre non salé bien froid, coupé en petits dés
Pour la garniture luxueuse aux pacanes :
- 3/4 tasse de sucre brun clair tassé
- 1/2 tasse de miel parfumé
- 12 c.à.s (170 g) de beurre non salé
- 1/4 tasse de crème liquide entière gourmande
- Une pincée (1/4 c.à.c) de sel de mer fin
- 1 c.à.c d’extrait de vanille pur
- 3 tasses et demi (environ 400 g) de pacanes grossièrement concassées
Substitutions astucieuses selon votre placard
Il vous manque quelque chose ? Ne vous inquiétez pas. Vous pouvez adapter. Utilisez du sucre brun foncé pour une saveur mélasse plus prononcée. Le sirop d’érable peut remplacer le miel, offrant un goût différent mais tout aussi merveilleux. Pour une garniture un peu moins riche, la crème à café (half-and-half) peut dépanner en remplacement de la crème liquide. Et si vous servez quelqu’un allergique aux fruits à coque, essayez de la noix de coco toastée en gros copeaux pour une barre complètement différente mais délicieuse.
Créer vos barres aux pacanes les plus faciles : guide étape par étape
Étape 1 : Préparer le moule et le four
Première chose, préchauffez votre four à 175°C. Maintenant, préparons-nous pour un nettoyage facile et un démoulage encore plus simple. Prenez un moule à gâteau rectangulaire de 23×33 cm et tapissez-le de papier sulfurisé ou d’aluminium. Laissez dépasser le papier sur deux côtés opposés — pensez-y comme à créer des poignées. Vaporisez rapidement le papier avec un spray antiadhésif. Cette astuce simple garantit que vous pourrez soulever des barres parfaites et entières sans qu’elles s’émiettent.
Étape 2 : Préparer la croûte sablée
Prenez votre robot culinaire. Ajoutez la farine, le sucre glace et le sel. Mixez par à-coups quelques secondes jusqu’à ce qu’ils soient juste combinés. Maintenant, ajoutez votre beurre froid coupé en dés. Mixez à nouveau par à-coups jusqu’à ce que le mélange ressemble à du sable grossier et granuleux. Vous devriez voir de petits morceaux de beurre partout. C’est bon ! Cela rend la croûte tendre. Versez ce mélange sablonneux dans votre moule préparé. Avec vos doigts ou le fond d’un verre doseur, tassez-le fermement et uniformément sur le fond du moule. Enfournez pour 18-20 minutes. Vous cherchez à ce que les bords commencent tout juste à dorer légèrement. La cuisine commencera à sentir délicieusement le beurre.
Astuce de pro : Si vous n’avez pas de robot, vous pouvez utiliser un coupe-pâte ou même deux fourchettes pour couper le beurre dans les ingrédients secs jusqu’à obtenir un mélange semblable à de la chapelure grossière.
Étape 3 : Préparer la garniture aux pacanes
Pendant que la croûte cuit, commencez la garniture. Dans une casserole moyenne, mélangez le sucre brun, le miel, le beurre, la crème liquide et le sel. Placez à feu moyen. Remuez constamment jusqu’à ce que le beurre fonde et que le mélange arrive à ébullition douce. Une fois à ébullition, laissez frémir pendant 2 bonnes minutes. Vous verrez le mélange épaissir légèrement et devenir délicieusement parfumé. Retirez immédiatement du feu. Maintenant, incorporez la vanille et les pacanes concassées. Continuez à remuer jusqu’à ce que chaque pacane brille et soit enrobée de cette riche sauce caramel.
Étape 4 : Assemblage et cuisson finale
Votre croûte devrait être sortie du four maintenant et encore tiède. C’est parfait ! Versez la garniture aux pacanes encore chaude directement sur la croûte tiède. Utilisez une spatule pour l’étaler uniformément, en poussant les pacanes pour former une seule couche. Très soigneusement, replacez le moule au four. Enfournez pour 20-25 minutes. La garniture bouillonnera vigoureusement sur toute la surface, et le dessus deviendra d’un brun caramel profond. C’est le signe de la perfection.
Étape 5 : Refroidissement et découpe pour un résultat parfait
C’est la partie la plus difficile — attendre. Vous devez laisser le moule refroidir complètement sur une grille. Si vous coupez dans des barres encore tièdes, la garniture coulera partout (tentant, mais salissant !). Laissez reposer au moins 2-3 heures, ou encore mieux, toute une nuit. Une fois complètement refroidi, utilisez les « poignées » de papier sulfurisé pour soulever toute la plaque hors du moule sur une planche à découper. Utilisez un couteau bien aiguisé pour découper des carrés élégants. Je trouve que des carrés de 5 cm sont la taille parfaite et décadente.
Astuce du chef : Pour des coupes ultra nettes, passez votre couteau sous l’eau chaude et essuyez-le entre chaque tranche. La chaleur glisse à travers les couches beurrées comme par magie.
Votre chronologie de préparation
- Temps de préparation : 20 minutes
- Temps de cuisson : 45 minutes
- Temps de refroidissement : 3 heures (crucial !)
- Temps total : 4 heures 5 minutes
- Portions : Environ 24 belles barres
Mon secret pour la meilleure texture
Mon arme secrète pour ces barres aux pacanes est d’utiliser des pacanes concassées grossièrement. Ne les hachez pas trop fin ! Vous voulez des morceaux consistants et croquants pour la texture. Les tailles variées créent de petites poches de pacane pure et d’autres où le caramel peut briller, offrant une bouchée plus intéressante.
Une anecdote sur notre ingrédient star
Saviez-vous que la pacane est le seul fruit à coque majeur originaire d’Amérique du Nord ? Elle a été une source alimentaire précieuse pour les peuples autochtones pendant des siècles. Le nom « pacane » vient d’un mot algonquin signifiant « une noix qui nécessite une pierre pour être cassée ». Heureusement, nos épiceries les vendent déjà décortiquées et prêtes pour nos aventures culinaires !
L’équipement dont vous aurez besoin
- Moule rectangulaire 23×33 cm
- Papier sulfurisé ou aluminium
- Robot culinaire (ou un coupe-pâte)
- Casserole moyenne
- Grille de refroidissement
- Couteau de chef bien aiguisé pour la découpe
Conserver votre délicieuse création
Une fois complètement refroidies et découpées, ces barres se conservent très bien. Superposez-les dans un contenant hermétique en intercalant du papier sulfurisé pour éviter qu’elles ne collent. Elles se conserveront parfaitement à température ambiante jusqu’à 3 jours. La croûte sablée reste étonnamment croustillante, et la garniture reste moelleuse et fondante.
Pour une conservation plus longue, vous pouvez les congeler. Emballez chaque barre individuellement dans du film alimentaire, puis placez-les toutes dans un grand sac de congélation. Elles se congèlent jusqu’à 2 mois. Décongelez simplement à température ambiante pendant une heure ou deux avant de servir. Elles ont le goût du frais !
Si vous préférez un dessert frais, vous pouvez les conserver au réfrigérateur. La garniture deviendra un peu plus ferme, offrant une texture différente, tout aussi délicieuse. Laissez-les reposer 15 minutes à température ambiante avant de servir pour qu’elles se réchauffent un peu.
Astuces pour la perfection des barres pécan
- Pour vos autres projets de pâtisserie, utilisez toujours des œufs à température ambiante, mais pour cette croûte, le beurre froid est non négociable. Il crée une base feuilletée et tendre.
- Ne sautez pas le temps de frémissement de la garniture. Ces 2 minutes garantissent que le sucre se dissout complètement et que le mélange épaissit suffisamment pour une bonne tenue.
- Pour un démoulage facile et des tranches nettes, la surlongueur de papier sulfurisé est votre meilleure amie. Ne sautez pas cette étape !
Comment présenter votre chef-d’œuvre
La présentation est la touche finale ! Saupoudrez légèrement les barres de sucre glace pour un look neigeux et élégant. Disposez-les sur un présentoir à gâteau vintage pour une ambiance rustique. Pour des portions individuelles, placez chaque carré sur un petit caisson en papier sulfurisé. Une petite touche de crème fouettée ou une boule de glace à la vanille à côté en fait un véritable dessert assiette. Pour une touche festive, déposez une seule pacane confite sur chaque barre.
D’autres inspirations dessert que vous pourriez adorer
Si vous adorez ces barres pécan délicieuses, ma cuisine a d’autres trésors qui pourraient vous plaire. Pour l’ultime amateur de chocolat, mon Gâteau Tuxedo multicouche est un pur délice. Quand les baies sont de saison, le mélange chocolat et fraise dans ce Gâteau Sensation fait toujours un tabac. Mon classique Gâteau au Chocolat Ganache est une recette intemporelle qui ne rate jamais. Et pour une touche amusante sur des saveurs classiques, vous devez essayer ce Cheesecake aux Cinnamon Rolls — c’est aussi délicieux que ça en a l’air !
Erreurs courantes à éviter avec les barres aux pacanes
Erreur 1 : Sauter l’étape du tapissage du moule
Il est tentant de juste beurrer le moule et d’espérer le meilleur. Mais la garniture caramel est incroyablement collante. Sans papier sulfurisé ou aluminium, vous vous retrouverez probablement avec des barres cassées collées au moule. Le simple fait de créer une surlongueur vous donne des barres parfaites et faciles à soulever à chaque fois. C’est une étape de préparation mineure qui évite une frustration majeure.
Erreur 2 : Couper les barres alors qu’elles sont encore tièdes
L’arôme est irrésistible et la vue de ce caramel qui bouillonne est un pur supplice. Je comprends. Mais couper trop tôt est la principale raison des barres baveuses et salissantes. La garniture a besoin de temps pour refroidir et prendre complètement. Cela permet au caramel de durcir pour atteindre cette texture parfaite, moelleuse mais qui se tranche bien. La patience est ici votre ingrédient secret.
Erreur 3 : Trop travailler la pâte de la croûte
Lorsque vous préparez la croûte sablée au robot, moins c’est plus. Vous ne voulez mixer que jusqu’à ce que le mélange ressemble à de la chapelure grossière. Si vous mixez jusqu’à former une boule ou une pâte, vous développerez le gluten de la farine. Cela conduit à une croûte dure et compacte au lieu du sablé tendre et friable désiré. Arrêtez de mixer dès que vous ne voyez plus de gros morceaux de beurre.
Erreur 4 : Brûler la garniture aux pacanes
La frontière entre parfaitement caramélisé et brûlé est mince. Une fois que votre mélange sucre-beurre arrive à ébullition, maintenir un léger frémissement est essentiel. Baissez un peu le feu s’il bouillonne trop vigoureusement. Surveillez-le de près pendant les 2 minutes de frémissement. Remuez constamment pour éviter que des points chauds au fond de la casserole ne brûlent votre précieux caramel.
Vos questions sur les barres aux pacanes, répondues !
Puis-je utiliser des pacanes déjà concassées du commerce ?
Absolument ! Les pacanes pré-concassées sont un gain de temps fantastique. Je les utilise souvent moi-même. Assurez-vous simplement de vérifier rapidement. Parfois les morceaux peuvent être un peu plus petits que « grossièrement concassés ». S’ils semblent trop fins, vous pourriez ajouter une demi-tasse de pacanes entières au mélange avant de les concasser pour obtenir cette texture grumeleuse idéale que nous recherchons. La texture est clé dans ces barres aux pacanes.
Ma garniture semble trop liquide après cuisson. Qu’est-ce qui n’a pas marché ?
Cela pointe généralement vers deux problèmes possibles. Premièrement, assurez-vous d’avoir laissé frémir la garniture pendant 2 bonnes minutes après l’ébullition. Ce temps de cuisson permet au sucre d’atteindre la bonne température pour prendre. Deuxièmement, et surtout, les barres doivent refroidir complètement avant même que vous ne pensiez à les couper. La garniture continue de s’épaissir et de se solidifier en refroidissant. Si elle est encore liquide après des heures de refroidissement, le temps de frémissement pourrait devoir être prolongé de 30 secondes à une minute la prochaine fois.
Puis-je préparer ces barres à l’avance ?
Elles sont le dessert parfait à préparer à l’avance ! En fait, je trouve qu’elles ont encore meilleur goût le lendemain. Les saveurs ont plus de temps pour se marier. Vous pouvez les cuire jusqu’à deux jours à l’avance. Conservez la plaque entière, non découpée, bien emballée à température ambiante. Découpez-les le jour où vous prévoyez de servir. C’est une bouée de sauvetage pour les fêtes et les soirées.
Par quoi puis-je remplacer le miel ?
Si vous n’aimez pas le miel ou si vous n’en avez tout simplement pas, le sirop d’érable pur est un excellent substitut. Il donnera aux barres une saveur distincte et chaleureuse de maple qui se marie à merveille avec les pacanes. Vous pouvez aussi utiliser du sirop de maïs clair, qui donnera une douceur plus traditionnelle et moins prononcée. La texture sera tout aussi fondante et parfaite.
Pourquoi ma croûte sablée est-elle détrempée ?
Un fond détrempé est souvent le résultat d’une pré-cuisson insuffisante de la croûte. Assurez-vous que votre four est complètement préchauffé avant d’y mettre la croûte. La croûte doit paraître sèche sur le dessus et juste commencer à colorer sur les bords avant d’ajouter la garniture. Aussi, assurez-vous que votre garniture est très chaude lorsque vous la versez sur la croûte tiède. Cela aide à sceller légèrement la surface.
Puis-je congeler les barres aux pacanes ?
Oui, elles se congèlent à merveille ! Laissez-les refroidir complètement après la cuisson, puis découpez-les. Emballez chaque barre individuellement dans du film alimentaire, puis placez-les toutes dans un sac de congélation épais. Elles se conserveront jusqu’à 2 mois. Décongelez-les à température ambiante pendant quelques heures avant de servir. C’est un excellent moyen d’avoir toujours une délicieuse gourmandise maison sous la main.
Est-ce que c’est trop sucré ?
C’est un dessert décadent et riche, donc oui, elles sont sucrées — mais de la bonne manière ! La croûte sablée beurrée et la touche salée du sel de mer aident à équilibrer la douceur de la garniture au miel et au sucre brun. Utiliser un miel de qualité, bien parfumé, et toaster vos pacanes au préalable peut ajouter une complexité qui empêche la douceur d’être unidimensionnelle. Un petit carré suffit généralement à satisfaire une envie de sucre.
Pourquoi ajouter du sel dans une recette sucrée ?
Le sel est un exhausteur de goût, pas seulement un ingrédient salé. La pincée de sel de mer fin dans la croûte et la garniture est cruciale. Il fait ressortir les notes de beurre, approfondit la saveur caramel et empêche le goût d’être plat ou écœurant. Voyez-le comme une note d’arrière-plan qui fait chanter tous les autres goûts plus fort. C’est une astuce simple utilisée par tous les grands pâtissiers, car comprendre comment les minéraux et les sels interagissent est essentiel pour une cuisine équilibrée.
Dois-je absolument utiliser un robot culinaire ?
Pas du tout ! Bien qu’un robot soit rapide, vous pouvez facilement faire la croûte à la main. Fouettez les ingrédients secs dans un grand bol. Ensuite, utilisez un coupe-pâte, deux fourchettes ou même vos doigts pour couper le beurre froid dans le mélange de farine jusqu’à obtenir une texture de chapelure grossière. Travaillez simplement vite pour que le beurre reste froid. Le résultat sera tout aussi délicieux.
Puis-je ajouter du chocolat à ces barres ?
Bien sûr ! Un peu de chocolat n’a jamais fait de mal à personne. Vous pouvez saupoudrer environ une tasse de pépites de chocolat mi-sucré sur la croûte chaude dès sa sortie du four la première fois. Laissez reposer une minute pour qu’elles fondent, puis étalez-les en une fine couche avant d’ajouter la garniture aux pacanes. Vous obtiendrez une délicieuse variation de barre « turtle » chocolat-pacane. Trouvez d’autres idées aussi décadentes dans ma collection de gâteaux et pâtisseries.
Une douce pensée finale
Ce sont vraiment les barres aux pacanes les plus faciles du monde. Elles ont sauvé ma réputation plus d’une fois lorsque des invités surprises se pointaient. Elles prouvent qu’un dessert n’a pas besoin d’être compliqué pour être spectaculaire. Alors, préchauffez ce four, saisissez votre moule, et préparez-vous à recevoir les compliments. Faites-moi confiance, une seule bouchée de ces carrés riches, beurrés et noisetés, et vous direz « Oh là là ! » vous aussi. Bonne pâtisserie !
Equipment
- Moule 23x33 cm
- Papier sulfurisé
- Robot culinaire ou un coupe-pâte
- Casserole moyenne
- Grille de refroidissement
- Couteau de chef pour couper
Ingrédients
- 250 g farine tout usage
- 60 g sucre en poudre
- 1 pincée sel fin
- 170 g beurre non salé coupé en dés et refroidi
- 75 g sucre brun clair tassé
- 120 ml miel
- 170 g beurre non salé
- 60 ml crème épaisse
- 1 pincée sel fin
- 5 ml extrait de vanille
- 400 g noix de pécan grossièrement hachées
Instructions
- Préchauffez votre four à 175°C (350°F) et disposez un moule de 23x33 cm avec du papier sulfurisé en laissant un débord pour faciliter le démoulage.
- Dans un robot culinaire, mélangez la farine, le sucre en poudre et le sel. Ajoutez le beurre en dés et pulsez jusqu'à obtenir une texture de sable grossier, puis pressez le mélange au fond du moule.
- Faites cuire la croûte pendant 18-20 minutes jusqu'à ce qu'elle soit légèrement dorée sur les bords.
- Pendant ce temps, dans une casserole, combinez le sucre brun, le miel, le beurre, la crème épaisse et le sel. Chauffez en remuant jusqu'à ébullition, puis laissez mijoter 2 minutes.
- Retirez du feu, incorporez la vanille et les noix de pécan jusqu'à ce qu'elles soient bien enrobées.
- Versez la garniture chaude sur la croûte chaude et étalez uniformément. Remettez au four et faites cuire pendant 20-25 minutes jusqu'à ce que le dessus soit doré.
- Laissez refroidir complètement sur une grille pendant au moins 2-3 heures avant de couper en carrés.
Notes
Nutrition

Je suis Céline, une véritable passionnée d’ustensiles et de matériel de cuisine ! J’adore tester, comparer et découvrir les meilleurs équipements pour rendre la cuisine plus efficace et agréable. Que ce soit un bon couteau, un robot performant ou une poêle incontournable, je suis toujours à la recherche des outils qui feront la différence. Mon but est de vous guider dans vos choix pour que vous ayez le bon matériel adapté à vos besoins.