
La Part de Rêve Que Vous Allez Préparer : Bienvenue dans le Cheesecake Crémeux Ultime
Vous connaissez cette sensation quand vous croquez dans un cheesecake si onctueux, si parfaitement équilibré entre riche et léger, que vous devez fermer les yeux une seconde ? C’est cette magie que je cherchais. Après une trop grande série de parts correctes mais pas extraordinaires lors de buffets, j’ai décidé qu’il était temps de créer la version ultime. Celle qui ferait dire à mes amis et à ma famille : « Mais comment arrives-tu à le rendre aussi crémeux ? » Eh bien, après de nombreuses expériences heureuses (et quelques ratés friables), je l’ai trouvée. Ce Cheesecake Crémeux Ultime n’est pas seulement un dessert ; c’est un câlin comestible.
Une Part d’Histoire : Des Fromages Anciens au Bonheur Moderne
Le cheesecake est loin d’être une invention moderne. Les Grecs anciens en dégustaient déjà une version lors des premiers Jeux Olympiques ! Bien sûr, leur recette était bien différente de la nôtre, souvent à base de miel, de blé et de fromage frais. Au fil des siècles, la recette a voyagé et évolué, pour finalement atterrir en Amérique où le cream cheese est devenu la star. Cette recette honore cette longue tradition d’ingrédients simples et satisfaisants, mais se concentre entièrement sur l’obtention de cette texture moderne, luxueuse et ultra-crémeuse qui fait d’un cheesecake un véritable « crémeux ».
Pourquoi Vous Allez Tomber Amoureux/Amoureuse de Cette Recette de Cheesecake
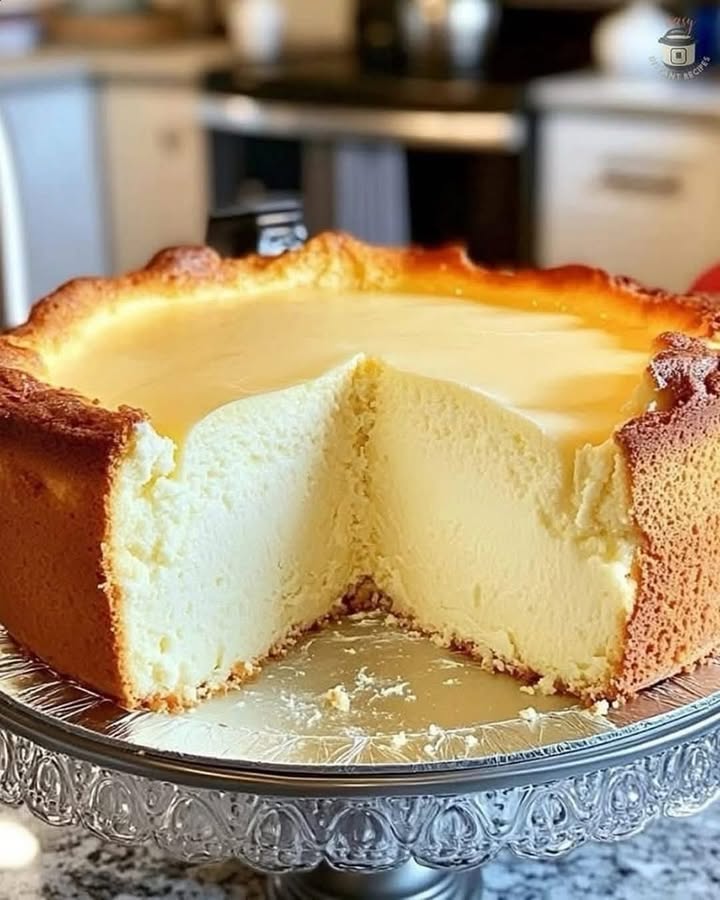
C’est la recette de cheesecake qui fait enfin tout juste. Elle est d’une simplicité trompeuse, ne nécessite aucune technique compliquée, mais donne un résultat qui a l’air d’être fait par un professionnel. La croûte est beurrée et croustillante, offrant le contraste parfait avec la garniture douce et veloutée. Et cette garniture ? Elle est riche sans être lourde, sucrée mais pas écœurante, et possède une qualité fondante en bouche tout simplement inoubliable. C’est le genre de dessert qui se crée son propre club de fans.
Les Occasions Parfaites pour Votre Cheesecake Crémeux Ultime
Ce cheesecake est merveilleusement adaptable. Il est assez élégant pour un dîner de gala, assez réconfortant pour un anniversaire en famille et assez solide pour voyager jusqu’à un pique-nique d’été (gardez-le au frais !). J’adore le préparer pour les fêtes car il peut être fait la veille, vous libérant ainsi pour profiter de vos invités. C’est aussi mon arme secrète pour les buffets partagés : il disparaît toujours le premier, et je ne ramène jamais de restes à la maison.
Ingrédients pour Votre Chef-d’Œuvre de Cheesecake
Rassembler des ingrédients simples et de qualité est la première étape vers le succès. Voici ce dont vous aurez besoin :
Pour la Croûte :
- 2 tasses de chapelure de biscuits type « petit beurre » (environ 15 biscuits)
- 1/3 de tasse de sucre en poudre
- 7 cuillères à soupe de beurre non salé, fondu
Pour la Garniture :
- 5 blocs (1,13 kg au total) de cream cheese entier, ramolli à température ambiante
- 1 tasse de sucre en poudre
- 2 cuillères à café d’extrait de vanille pur
Substitutions d’Ingrédients : Pour le Personnaliser
Pas de biscuits type « petit beurre » ? Des biscuits type « digestive » ou même des biscuits à la vanille simples fonctionnent très bien. Pour une croûte plus gourmande, vous pouvez remplacer la moitié de la chapelure par des noix de pécan ou des amandes finement moulues. Si vous préférez un goût moins sucré, vous pouvez réduire le sucre de la garniture d’un quart de tasse. Bien que je recommande vivement le cream cheese entier pour la meilleure texture et saveur, une version allégée peut être utilisée, bien que le gâteau puisse être un peu moins ferme.
Fabriquer Votre Cheesecake Crémeux Ultime : Un Voyage Étape par Étape
Prêt(e) à cuisiner ? Suivez ces étapes pour un cheesecake infaillible et onctueux. Souvenez-vous, la patience est votre ingrédient secret !
Étape 1 : Construire la Base Croustillante Parfaite
Commencez par préchauffer votre four à 160°C (325°F). Prenez votre chapelure de biscuits et versez-la dans un bol. L’odeur est merveilleusement nostalgique. Ajoutez le sucre et mélangez. Maintenant, versez ce glorieux beurre fondu : vous entendrez un léger crépitement lorsque les ingrédients secs l’absorbent. Mélangez jusqu’à ce que la texture ressemble à du sable humide. Pressez fermement et uniformément ce mélange au fond d’un moule à charnière de 23 cm (9 pouces). J’utilise le fond d’une tasse à mesurer plate pour bien le tasser. Mettez la croûte au réfrigérateur pour qu’elle prenne pendant que vous préparez la garniture. Cela l’aide à rester croustillante.
Étape 2 : Créer la Garniture Ultra-Crémeuse
C’est là que la magie opère. Votre cream cheese doit être si mou qu’il cède au toucher. Fouettez-le dans un grand bol avec un batteur électrique à vitesse moyenne jusqu’à ce qu’il soit complètement lisse et sans grumeaux, environ 2 minutes. C’est crucial ! Raclez les bords du bol. Ajoutez le sucre progressivement et fouettez à nouveau jusqu’à ce que le mélange soit soyeux. Enfin, ajoutez l’extrait de vanille pur. Cette senteur chaude et aromatique indique que vous êtes sur la bonne voie. Mélangez juste jusqu’à ce que tout soit bien combiné. Astuce de pro : Trop fouetter la garniture après avoir ajouté le sucre peut incorporer trop d’air, ce qui peut provoquer des fissures pendant la cuisson.
Étape 3 : La Cuisson à la Perfection
Récupérez votre croûte refroidie et versez la glorieuse garniture par-dessus. Lissez le dessus avec une spatule. Placez le moule sur une plaque à pâtisserie (pour récupérer d’éventuelles fuites de beurre) et transférez-le au centre de votre four préchauffé. Maintenant, la partie la plus difficile : l’attente. Enfournez pendant 60 à 70 minutes. Les bords auront l’air pris et gonflés, mais le centre — un cercle d’environ 8 cm — doit toujours trembler comme une gelée molle lorsque vous secouez doucement le moule. Ce « tremblement » est le signe d’un intérieur parfaitement crémeux.
Étape 4 : Le Refroidissement, Étape Cruciale
Quand la minuterie sonne, éteignez le four. Entrouvrez légèrement la porte du four avec une cuillère en bois et laissez le cheesecake refroidir à l’intérieur pendant une heure. Ce changement de température graduel évite un affaissement ou des fissures dramatiques. Après cette heure, retirez-le du four et laissez-le refroidir complètement sur une grille. Ensuite, et c’est vital, couvrez-le et mettez-le au réfrigérateur pendant au moins 4 heures, idéalement toute une nuit. Ce long refroidissement permet au cheesecake de prendre complètement, obtenant ainsi cette texture signature, qui se tranche mais reste incroyablement crémeuse. Astuce du chef : Passer la lame mince d’un couteau autour du gâteau juste après sa sortie du four peut l’empêcher de coller au moule et de se fissurer en se contractant pendant le refroidissement.
Votre Timeline pour le Cheesecake
C’est une recette qui récompense la planification.
- Temps de Préparation : 20 minutes
- Temps de Cuisson : 65 minutes (en moyenne)
- Temps de Refroidissement/Réfrigération : 5+ heures (incluant 1 heure dans le four éteint)
- Temps Total : Environ 6 heures 25 minutes
- Nombre de Parts : 12 à 14 parts de pur bonheur
Le Secret d’un Dessus Sans Fissure
Mon meilleur conseil ? Ne pas trop mélanger la garniture une fois que le sucre est ajouté. Battre à vitesse élevée incorpore des bulles d’air qui se dilatent et éclatent à la chaleur du four, créant des fissures. Mélangez à vitesse moyenne juste jusqu’à ce que ce soit lisse. Et ce refroidissement lent dans le four éteint ? C’est votre assurance pour une finition impeccable.
Un Fait Amusant sur le Cream Cheese
Saviez-vous que le cream cheese que nous connaissons et aimons a en fait été créé par accident ? Dans les années 1870, un laitier de New York nommé William Lawrence essayait de reproduire un fromage français appelé Neufchâtel. Il a ajouté de la crème supplémentaire, et le résultat fut un fromage plus riche et plus tartinable que nous appelons maintenant le cream cheese de type Philadelphie. Merci, M. Lawrence, pour notre Cheesecake Crémeux Ultime !
Équipement Essentiel pour Réussir
Pas besoin de matériel sophistiqué ! Un bon moule à charnière de 23 cm (9 pouces) est indispensable pour un démoulage facile. Un batteur électrique à main ou sur socle facilite le fouettage du fromage. Un grand bol de mélange, des tasses/cuillères à mesurer et une spatule en caoutchouc pour racler sont tout ce dont vous avez besoin en plus. Une plaque à pâtisserie pour placer le moule dessus est également très utile.
Conserver Votre Trésor Culinaire
Une fois tranché, le cheesecake doit être gardé au frais. Couvrez le moule à charnière avec du film alimentaire ou, si vous l’avez démoulé, placez le gâteau entier sur une assiette et couvrez-le hermétiquement avec un dôme ou du film alimentaire.
Il se conservera parfaitement au réfrigérateur pendant 5 jours. Les saveurs se développent souvent le lendemain, le temps que tout se marie.
Pour une conservation plus longue, vous pouvez congeler le cheesecake entier ou en parts. Enveloppez-le hermétiquement dans du film alimentaire, puis dans une couche de papier aluminium. Il se conservera jusqu’à 2 mois. Décongelez-le une nuit au réfrigérateur avant de servir.
Astuces et Conseils pour une Finition Impeccable
- Température Ambiante est la Clé : Assurez-vous que votre cream cheese est vraiment ramolli. Le fromage froid laissera des grumeaux, peu importe le temps de mélange.
- Ne Pas Ouvrir la Porte ! Résistez à l’envie d’ouvrir la porte du four pendant les 50 premières minutes de cuisson. Une chute brutale de température peut causer un centre affaissé.
- Test avec un Thermomètre : Pour une précision absolue, la température interne doit atteindre 65°C (150°F) à la fin de la cuisson.
- Détacher les Bords : Comme mentionné, passer un couteau autour du bord après la cuisson évite que le gâteau colle et ne se fissure.
Idées de Présentation pour Épater Vos Invités
- Recouvrir d’une couche brillante de compote de fraises fraîches ou d’un simple filet de caramel au beurre salé.
- Pour une touche fraîche, disposez une mosaïque de fruits rouges (framboises, myrtilles, mûres) sur le dessus juste avant de servir.
- Une quenelle de crème fouettée légèrement sucrée et une brindille de menthe est une touche classique et élégante.
- Pour un look festif, râpez un peu de chocolat noir sur le dessus ou ajoutez une pincée de poudre d’or comestible.
Découvrez Plus de Délicieuses Variations de Desserts
La beauté d’une bonne recette de base, c’est qu’on peut jouer avec ! Si vous aimez ce Cheesecake Crémeux Ultime, vous adorerez expérimenter d’autres saveurs. Pour une touche fruitée, essayez ce sublime Gâteau Fraise Mascarpone ou ce rafraîchissant Cheesecake au Melon et à la Menthe. Si vous avez envie de quelque chose d’indulgent et parfait à partager, vous ne pouvez pas vous tromper avec ces Cookies de Noël Craquants. Et pour un hybride petit-déjeuner/gourmandise, ces Roulés Pain à la Cannelle façon French Toast font toujours l’unanimité.
Erreurs Courantes à Éviter
Erreur 1 : Utiliser du Cream Cheese Froid
C’est la raison numéro un d’une garniture granuleuse. Le cream cheese froid ne se mélangera pas bien avec le sucre, quel que soit le temps de battage. Vous vous retrouverez avec de petits morceaux de fromage dans votre pâte, ce qui affecte la texture ultra-crémeuse. Sortez toujours le cream cheese du réfrigérateur au moins 2 heures avant de commencer. Il doit être si mou que vous pouvez facilement y laisser une empreinte avec votre doigt.
Erreur 2 : Trop Fouetter la Pâte
Il est tentant de laisser le batteur tourner, mais une fois que vous ajoutez les œufs ou le sucre, trop battre est votre ennemi. Un excès de battage incorpore trop d’air dans la pâte. Dans le four, ces bulles d’air se dilatent puis s’échappent, faisant monter et descendre le cheesecake de façon dramatique, ce qui entraîne une vilaine fissure au milieu. Mélangez juste jusqu’à ce que chaque ingrédient soit incorporé, et gardez le batteur à vitesse moyenne.
Erreur 3 : Ne Pas Utiliser de Bain-Marie
Bien que pas toujours strictement nécessaire, se passer d’un bain-marie est un risque. Cuire le cheesecake dans un bain-marie fournit une chaleur douce, uniforme et humide. Cela réduit considérablement le risque que les bords ne soient trop cuits avant que le centre ne prenne, et empêche le dessus de sécher et de se fissurer. C’est une étape simple : enveloppez le fond de votre moule à charnière dans du papier aluminium, placez-le dans un grand plat de cuisson et versez de l’eau chaude autour avant la cuisson.
Erreur 4 : Zapper le Long Refroidissement
L’impatience est l’ennemie du cheesecake. Couper un cheesecake qui n’a pas été suffisamment refroidi est une recette pour un désastre gluant. Le temps de réfrigération prolongé (au moins 4 heures, une nuit c’est mieux) permet à la structure de se raffermir correctement. C’est ce qui vous donnera ces tranches nettes et parfaites pour les photos. Considérez cela comme la touche finale qui transforme une crème cuite en un majestueux cheesecake.
Utiliser des ingrédients de haute qualité fait vraiment une différence dans la saveur et la texture finale de vos pâtisseries. Pour plus de conseils sur le choix des meilleurs composants pour votre cuisine, vous pouvez trouver de bons conseils sur nutrition au quotidien.
Foire Aux Questions
Puis-je utiliser du cream cheese allégé ?
Vous pouvez, mais la texture et la saveur ne seront pas tout à fait les mêmes. Le cream cheese entier a un goût plus riche et une structure plus stable, ce qui est crucial pour cette consistance rêveuse, crémeuse et ferme que nous recherchons. Les versions allégées contiennent plus d’eau et d’additifs, ce qui peut donner un cheesecake plus mou, parfois plus humide, qui ne se tranchera pas aussi proprement. Pour la vraie expérience du Cheesecake Crémeux Ultime, je vous recommande vivement d’utiliser les blocs entiers.
Pourquoi mon cheesecake s’est-il fissuré sur le dessus ?
Les fissures surviennent généralement pour deux raisons principales : des changements brusques de température ou un excès de battage. Si vous avez ouvert la porte du four trop tôt ou déplacé le cheesecake alors qu’il était encore chaud, la baisse rapide de température peut le faire se contracter et se fendre. Trop battre la pâte incorpore trop d’air, qui se dilate et s’échappe violemment, créant une fissure. Pour y remédier la prochaine fois, n’ouvrez pas le four pendant les 50 premières minutes, refroidissez-le lentement dans le four éteint et mélangez votre pâte doucement.
Comment savoir quand il est cuit ?
Le « test du tremblement » est votre meilleur ami. Quand le temps de cuisson est presque écoulé, secouez doucement le moule. Les deux à trois centimètres extérieurs doivent avoir l’air pris et fermes, mais le centre même (de la taille d’un petit citron) doit toujours avoir un tremblement distinct et doux — il doit osciller comme une gelée molle, pas comme un liquide. Il continuera à se prendre en refroidissant. Un thermomètre à lecture instantanée inséré au centre doit indiquer 65°C (150°F).
Puis-je congeler ce cheesecake ?
Absolument ! Il se congèle à merveille. Laissez d’abord le cheesecake cuit et complètement refroidi prendre au réfrigérateur. Ensuite, enveloppez le cheesecake entier (ou des parts individuelles) hermétiquement dans du film alimentaire, puis dans une couche de papier aluminium pour éviter les brûlures de congélation. Il se conservera jusqu’à 2 mois. Pour servir, décongelez-le une nuit au réfrigérateur. Ne le décongelez pas à température ambiante, car cela peut rendre la texture un peu granuleuse.
Que puis-je utiliser si je n’ai pas de moule à charnière ?
Un moule à charnière est idéal car ses parois amovibles facilitent le service. Si vous n’en avez pas, vous pouvez utiliser un moule à gâteau rond de 23 cm (9 pouces) chemisé de papier sulfurisé. Assurez-vous que le papier a de longs « bras » qui dépassent des côtés afin de pouvoir soulever tout le cheesecake une fois refroidi. Sortir la première part sera délicat, mais c’est une solution praticable.
Combien de temps à l’avance puis-je le préparer ?
Ce cheesecake est en fait mieux préparé la veille ! Le long refroidissement permet aux saveurs de se marier et de s’intensifier, et la texture devient parfaite. Vous pouvez le cuire sans problème jusqu’à deux jours avant de prévoir de le servir. Gardez-le simplement bien couvert au réfrigérateur.
Ma croûte est détrempée. Qu’ai-je fait de mal ?
Une croûte détrempée signifie généralement que le beurre n’a pas été pleinement incorporé ou fermement tassé, ou que la garniture était très humide. Assurez-vous de bien mélanger les ingrédients de la croûte jusqu’à ce qu’ils tiennent ensemble lorsqu’on les presse. Tassez-la très fermement et uniformément dans le moule : j’utilise le fond d’une tasse plate. Assurez-vous également que vos ingrédients de la garniture sont à température ambiante pour qu’ils se combinent bien sans se séparer.
Puis-je ajouter des arômes comme du citron ou du chocolat ?
Bien sûr ! Cette recette est une toile vierge merveilleuse. Pour un cheesecake au citron, ajoutez le zeste de deux citrons et 2 cuillères à soupe de jus de citron à la garniture. Pour le chocolat, faites fondre 225 g de chocolat mi-sucré, laissez-le refroidir légèrement et incorporez-le délicatement à la pâte terminée. Attention à ne pas trop mélanger une fois vos arômes ajoutés.
Dois-je mettre le moule à charnière dans un bain-marie ?
Bien que la recette ci-dessus fonctionne sans, utiliser un bain-marie est une astuce de professionnel pour le résultat le plus lisse et sans fissure. Il crée un environnement vaporeux pour une cuisson plus douce et uniforme. Si vous choisissez d’en utiliser un, enveloppez l’extérieur de votre moule à charnière dans du papier aluminium épais pour éviter les fuites, puis placez-le dans un grand plat de cuisson rempli d’environ 2,5 cm d’eau chaude.
Pourquoi le centre de mon cheesecake est-il encore liquide après la cuisson ?
Si le centre est vraiment liquide, il avait probablement besoin d’un peu plus de temps de cuisson. Les températures des fours peuvent varier. Utilisez le test du tremblement et le thermomètre comme guides. S’il est juste très mou mais pas liquide, c’est normal : il se raffermira considérablement pendant le long refroidissement au frigo. Mieux vaut toujours avoir un centre légèrement pas assez cuit plutôt que trop cuit, car une surcuisson rend le cheesecake sec et granuleux.
Si ce voyage vers la perfection crémeuse vous donne envie de vous lancer dans plus de projets de pâtisserie, vous trouverez tout un monde d’inspiration dans notre collection de gâteaux et pâtisseries.
La Part de Conclusion
Préparer ce cheesecake est plus que suivre une recette ; c’est un petit acte d’amour. C’est prendre des ingrédients simples et les transformer en quelque chose qui apporte une joie réelle. Le moment où vous faites glisser votre couteau dans cette garniture crémeuse et entendez le craquement de la croûte, vous saurez que chaque minute en valait la peine. Alors rassemblez vos ingrédients, mettez de la bonne musique et offrez-vous, ainsi qu’à vos proches, la part la plus rêveuse et crémeuse de bonheur. Faites-moi confiance, ce Cheesecake Crémeux Ultime est celui qu’on vous redemandera encore et encore.
Equipment
- Moule à charnière de 23 cm (9 pouces)
- Batteur électrique
- Grand bol à mélanger
- Spatule en caoutchouc
- Plaque de cuisson
Ingrédients
- 240 g miettes de biscuits graham environ 15 biscuits entiers
- 67 g sucre granulé
- 100 g beurre non salé fondu
- 1130 g fromage à la crème entier à température ambiante
- 200 g sucre granulé
- 10 ml extrait de vanille pur environ 2 cuillères à café
Instructions
- Préchauffez le four à 160°C (325°F).
- Mélangez les miettes de biscuits graham et le sucre dans un bol.
- Ajoutez le beurre fondu et mélangez jusqu'à obtenir une texture de sable humide.
- Pressez ce mélange dans le fond d'un moule à charnière de 23 cm (9 pouces) et placez-le au réfrigérateur.
- Dans un grand bol, battez le fromage à la crème mou avec un batteur électrique jusqu'à obtenir une consistance lisse.
- Ajoutez le sucre graduellement et mélangez jusqu'à ce que le mélange soit soyeux.
- Incorporez l'extrait de vanille et mélangez jusqu'à ce que tout soit bien combiné.
- Versez le mélange sur la croûte de biscuits refroidie et lissez le dessus.
- Placez le moule sur une plaque de cuisson et enfournez pendant 60 à 70 minutes.
- Après cuisson, laissez refroidir dans le four avec la porte légèrement entrouverte pendant une heure.
- Laissez refroidir complètement sur une grille, puis couvrez et réfrigérez pendant au moins 4 heures, de préférence toute la nuit.
Notes
Nutrition

Je suis Céline, une véritable passionnée d’ustensiles et de matériel de cuisine ! J’adore tester, comparer et découvrir les meilleurs équipements pour rendre la cuisine plus efficace et agréable. Que ce soit un bon couteau, un robot performant ou une poêle incontournable, je suis toujours à la recherche des outils qui feront la différence. Mon but est de vous guider dans vos choix pour que vous ayez le bon matériel adapté à vos besoins.