
Ce Gâteau au Cookies Trop Facile M’a Volé le Cœur (et Volera le Vôtre)
Avez-vous déjà eu un de ces moments où vous avez désespérément besoin d’un dessert spectaculaire mais aucune énergie pour cuisiner ? C’était moi mardi dernier. Mes enfants ont déclaré une « soirée familiale », et mon four a décidé de faire grève. Panique ? Un peu. Puis je me suis souvenue du secret de ma grand-mère : le fabuleux Cookie Cake sans cuisson. Ce n’est pas juste une recette ; c’est une bouée de sauvetage. C’est la magie de transformer de simples biscuits, du lait et du beurre en un Gâteau Cookies Délicieux onctueux et rêvé, qui donnera l’impression que vous avez passé la journée en cuisine. Laissez-moi vous montrer comment faire.
Une Histoire de Simplicité : Les Humbles Origines du Gâteau aux Cookies
Ce dessert a des racines dans la débrouille et l’ingéniosité. Voyez-le comme le cousin malin du tiramisu ou de la charlotte classiques. Dans beaucoup de foyers, surtout en Europe et en Amérique Latine, utiliser des biscuits de la veille pour créer une nouvelle gourmandise était une façon d’éviter le gaspillage. Le biscuit « Marie » ou « Petit-Beurre », avec sa douceur légère et son pouvoir absorbant parfait, en est devenu la star. Ma version est une interprétation moderne de cette tradition. On ne sauve pas juste des biscuits ; on crée une toile pour les saveurs. Le meilleur ? Il n’y a pas de bonne ou de mauvaise façon. Chaque famille y ajoute sa touche, faisant de chaque Recette de Gâteau aux Cookies un chef-d’œuvre personnel.
Pourquoi Vous Allez Absolument Adorer Ce Gâteau aux Cookies Simple
Laissez-moi compter les raisons ! Premièrement, il ne nécessite aucune cuisson. Zéro. Nada. Cela veut dire pas de four chaud, pas de températures précises, pas de risque de milieu qui s’affaisse. Deuxièmement, il est incroyablement versatile. La recette de base est un rêve vanillé onctueux, mais avec une cuillère de cacao, il se transforme en paradis pour les amoureux du chocolat. Troisièmement, il plaît à coup sûr. La texture est incroyable : moelleuse, bien structurée, et fondante. Les enfants l’adorent, les adultes sont impressionnés, et vous allez adorer à quel point il est facile à faire, sans stress.
Les Occasions Parfaites pour Votre Nouveau Dessert Favori
Ce gâteau aux cookies facile sera votre nouveau réflexe pour tout. Il est parfait pour les soirées de semaine chargées où vous voulez une douceur sans prise de tête. Il fait des merveilles aux buffets et pique-niques car il voyage si bien, droit sorti du frigo. Anniversaire ? Décorez-le de paillettes colorées ! Dîner romantique ? Surmontez-le de framboises fraîches et d’une feuille de menthe. C’est le dessert « préparé à l’avance » ultime pour les fêtes, vous permettant de profiter de vos invités au lieu d’être coincé en cuisine. Croyez-moi, une fois que vous l’aurez fait, vous trouverez une raison de le préparer toutes les semaines.
Ce Dont Vous Avez Besoin pour Votre Délicieux Gâteau aux Cookies
Rassembler ces ingrédients simples est la première étape vers la magie. Voici votre liste :
- 400 grammes de biscuits type Maria ou Petit-Beurre – La base robuste et légèrement sucrée.
- 500 ml de lait – Le lait entier le rend encore plus crémeux.
- 200 grammes de sucre – Adoucit parfaitement la préparation crémeuse.
- 2 cuillères à café d’extrait de vanille – Pour cette saveur chaude et classique.
- 200 grammes de beurre à température ambiante – C’est la clé pour une crème riche et lisse.
- 2 cuillères à soupe de cacao en poudre (facultatif) – Votre ticket vers une version chocolat.
- Décorations de votre choix – Pépites de chocolat, noix concassées, fruits frais, vermicelles… lâchez-vous !
Substitutions Astucieuses
Il vous manque quelque chose ? Aucun problème ! Cette recette est très indulgente.
- Biscuits : Tout biscuit à thé simple et robuste fonctionne. Les biscuits Graham sont une excellente alternative.
- Lait : Vous pouvez utiliser n’importe quel lait, même végétaux comme le lait d’amande ou d’avoine.
- Sucre : Le sucre en poudre se dissout plus vite. Vous pouvez réduire légèrement la quantité si vous préférez.
- Beurre : Il doit être mou. Pour une saveur différente, essayez un beurre salé de qualité.
- Cacao : Utilisez du cacao hollandisé pour une saveur chocolat plus profonde dans votre gâteau aux cookies chocolaté.
Créer la Magie : Guide Étape par Étape pour le Gâteau aux Cookies Parfait
Suivez ces étapes simples, et vous ne pouvez pas vous tromper. Le processus est aussi amusant que de déguster le résultat !
Étape 1 : La Base Sucrée
Prenez votre plus grand saladier. Versez-y le lait frais, puis ajoutez le sucre blanc étincelant et le parfum envoûtant de l’extrait de vanille. Prenez un fouet et mélangez. Vous entendrez le doux frottement du sucre contre le bol. Continuez jusqu’à ce que le sucre ait complètement disparu, dissous dans le lait. Cela crée un liquide sucré et vanillé qui va parfaitement ramollir nos biscuits. Astuce de pro : Si le sucre résiste, vous pouvez légèrement réchauffer le lait 30 secondes au micro-ondes—laissez-le simplement refroidir avant d’ajouter le beurre.
Étape 2 : La Transformation Crémeuse
Maintenant, prenez votre beurre à température ambiante. Il devrait être assez mou pour que votre doigt y laisse une légère empreinte. Coupez-le en petits cubes et ajoutez-les au lait sucré. C’est là que la magie opère. En fouettant, le beurre va lentement se mélanger au lait. Au début, ça peut paraître un peu séparé, mais ne vous arrêtez pas ! Continuez à fouetter énergiquement jusqu’à ce que le mélange devienne lisse, homogène et merveilleusement crémeux. La couleur sera un beau ivoire pâle.
Étape 3 : La Version Chocolat (Facultative)
Une envie de chocolat ? C’est le moment ! Tamisez la poudre de cacao directement dans votre base crémeuse. Tamiser évite les grumeaux. En la fouettant, observez la crème se transformer de ivoire à une jolie teinte marron clair, comme un café au lait, puis à une riche nuance chocolatée. L’arôme change aussi, emplissant la cuisine de la promesse d’un gâteau aux cookies chocolaté décadent. Assurez-vous que chaque particule de cacao soit incorporée pour une saveur uniforme.
Étape 4 : Construire la Première Couche
Choisissez votre plat—un moule carré, un moule à cake rond, ou même un beau saladier en verre. Commencez par disposer une simple couche de biscuits tout au fond. Vous devrez peut-être en casser quelques-uns pour combler les trous. Voyez cela comme un puzzle comestible et délicieux. Le but : une fondation de biscuits solide qui va absorber toute la bonté crémeuse.
Étape 5 : Le Rituel du Millefeuille
Voici la partie satisfaisante. Sur votre première couche de biscuits, versez une quantité généreuse de la préparation crémeuse. Utilisez une cuillère ou une spatule pour l’étaler uniformément, en couvrant chaque centimètre de biscuit. Cette humidité est ce qui transforme les biscuits durs en un gâteau moelleux. Puis, ajoutez une autre couche de biscuits, puis plus de crème. Répétez ce processus apaisant jusqu’à épuisement des ingrédients. J’obtiens généralement 3 à 4 belles couches.
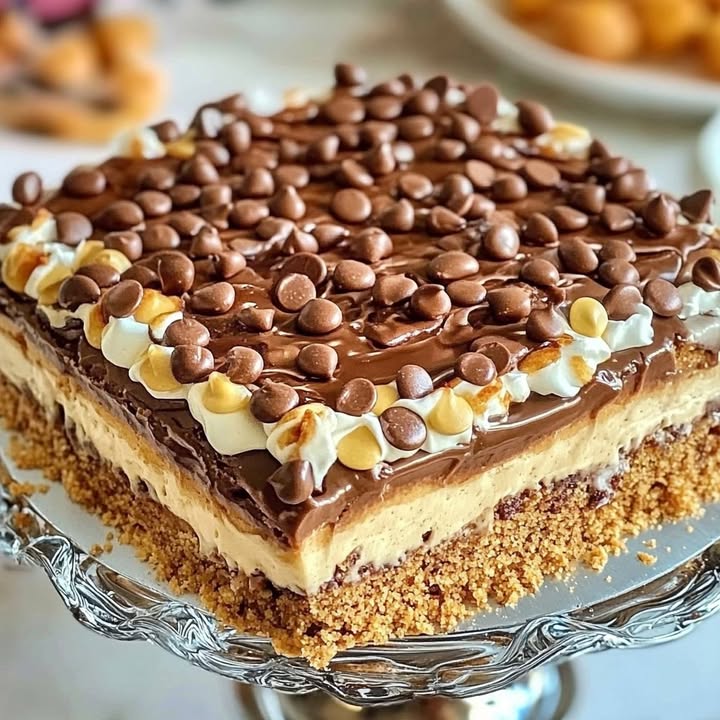
Étape 6 : La Touche Finale
Toujours terminer par une couche supérieure de la préparation crémeuse. Cela vous donne une belle toile lisse pour la décoration. Maintenant, libérez l’artiste en vous ! Parsemez de pépites de chocolat noir pour le croquant. Saupoudrez de noisettes toastées concassées pour l’élégance. Disposez des tranches de fraises bien rouges ou une poignée de myrtilles pour une touche de fraîcheur. C’est là que votre Gâteau Cookies Délicieux devient unique.
Étape 7 : L’Attente Patientante
C’est l’étape la plus dure mais la plus cruciale. Couvrez le plat hermétiquement avec du film alimentaire ou un couvercle. Placez-le délicatement au réfrigérateur. Maintenant, éloignez-vous. Laissez-le reposer pendant au moins 4 heures, mais honnêtement, une nuit entière, c’est l’idéal. Ce temps permet aux biscuits d’absorber lentement la crème, devenant magnifiquement moelleux, comme un gâteau. Les saveurs se marient aussi pour créer quelque chose de vraiment spécial. Astuce du chef : Si vous êtes pressé, 4 heures suffiront, mais la texture et le goût sont infiniment meilleurs après une nuit complète de repos.
Votre Chronologie pour le Gâteau aux Cookies
Décomposons le temps nécessaire, qui est merveilleusement minimal.
- Temps de Préparation : 20 minutes (c’est surtout de l’assemblage !)
- Temps de Cuisson : 0 minute
- Temps de Repos/Réfrigération : 4 heures minimum (une nuit est préférable)
- Temps Total : 4 heures 20 minutes (surtout sans intervention)
- Portions : Pour 8 à 10 personnes heureuses.
Mon Arme Secrète pour le Gâteau aux Cookies Ultime
Voici mon petit secret pour une texture ultra-luxueuse : après avoir fait la préparation crémeuse, laissez-la reposer au frigo 15 minutes avant de commencer l’assemblage. Ce léger refroidissement aide la crème à épaissir un tout petit peu, afin qu’elle adhère mieux aux biscuits et ne coule pas entièrement au fond. Cela donne des couches plus nettes et mieux définies dans votre gâteau sans cuisson final.
Une Anecdote sur Votre Ingrédient Principal
Ces simples biscuits Marie ont une histoire royale ! On dit qu’ils ont été créés à Londres en 1874 pour commémorer le mariage du deuxième fils de la Reine Victoria, le Duc d’Édimbourg, avec la Grande Duchesse Maria Alexandrovna de Russie. Ainsi, chaque fois que vous les utilisez, vous cuisinez avec un biscuit digne d’une duchesse !
Le Matériel Dont Vous Aurez Besoin
Vous avez probablement tout déjà, ce qui est une autre victoire.
- Un grand saladier
- Un fouet (une fourchette fait l’affaire en cas d’urgence)
- Un plat rectangulaire ou carré (env. 20×30 cm)
- Du film alimentaire ou un couvercle adapté
- Une spatule pour étaler
Comment Conserver Votre Gâteau aux Cookies Frais
Ce gâteau doit toujours être conservé au réfrigérateur. La garniture crémeuse à base de produits laitiers ne peut pas rester longtemps à température ambiante. Gardez-le couvert de film alimentaire ou dans un contenant hermétique.
Il restera parfaitement délicieux pendant 3 à 4 jours. Les saveurs continuent en fait de se développer, le rendant encore meilleur le deuxième jour ! Les biscuits resteront magnifiquement moelleux.
Vous pouvez aussi congeler ce gâteau jusqu’à un mois. Enveloppez le plat entier ou des parts individuelles dans du film alimentaire puis dans de l’aluminium. Décongelez-le une nuit au frigo avant de servir.
Astuces et Conseils de Ma Cuisine à la Vôtre
- Pour un gâteau aux cookies au café, dissolvez une cuillère à soupe de café instantané dans le lait avant d’ajouter le sucre.
- Si votre préparation au beurre semble trop liquide, mettez le saladier entier au frigo 10 minutes et fouettez à nouveau.
- Laissez le gâteau à température ambiante 5-10 minutes avant de servir. Cela atténue le froid extrême et laisse briller les saveurs.
- Impliquez les enfants ! Ce sont des experts pour tremper les biscuits et saupoudrer les garnitures.
Présenter Votre Chef-d’Œuvre
Faites qu’il soit aussi beau que bon ! Servez-le en carrés élégants dans des assiettes individuelles avec une pincée de cacao en poudre. Pour un moment convivial, placez le plat entier au milieu de la table avec des couverts de service. Garnissez avec des fleurs comestibles ou des feuilles de menthe pour une touche digne d’un restaurant. Vous pouvez même le superposer dans des verres individuels pour un effet parfait.
Découvrez Plus d’Aventures Gourmandes
Si vous avez aimé la simplicité et l’onctuosité de ce gâteau aux cookies, vous devez explorer nos autres desserts faciles. La magie des desserts sans cuisson est bien réelle ! Pour une option fruitée et élégante, notre Cheesecake Rafraîchissant Citron Myrtille est un rêve d’agrumes. Envie de quelque chose de sophistiqué et croquant ? Essayez le Élégant Gâteau Pistache Chocolat Blanc pour une vraie pâtisserie de fête. Pour une option unique, acidulée et moelleuse, ce Gâteau à la Crème Aigre est un classique européen. Et quand seule l’intensité du chocolat fera l’affaire, notre Cheesecake Caramel Chocolat est un pur délice décadent.
Erreurs Courantes à Éviter pour un Gâteau Sans Faute
Erreur 1 : Utiliser du Beurre Froid et Dur
C’est la raison numéro un pour laquelle la crème ne prend pas. Le beurre froid ne s’émulsionnera pas avec le lait ; il formera juste de petits morceaux durs flottant dans un liquide. Votre gâteau sera détrempé et séparé. Le beurre doit être mou au toucher, environ une heure hors du frigo. Un test rapide : vous devez pouvoir y enfoncer votre doigt facilement. Si vous avez oublié de le sortir, coupez-le en petits cubes et laissez-le reposer 15 minutes—il ramollira plus vite.
Erreur 2 : Brusquer le Temps de Repos au Froid
L’impatience mène à un brouillon friable et détrempé. Si vous ne laissez pas le gâteau refroidir assez longtemps, les biscuits n’auront pas le temps d’absorber l’humidité correctement. Ils seront durs au milieu et mous sur les bords, et le gâteau ne tiendra pas sa forme à la découpe. Ce repos d’une nuit n’est pas une suggestion ; c’est la clé de la texture molle, uniforme et parfaite qui rend ce dessert si spécial. Prévoyez à l’avance pour les meilleurs résultats.
Erreur 3 : Noyer les Couches avec Trop de Crème
C’est tentant de verser beaucoup de crème, mais l’équilibre est essentiel. Si vous ajoutez trop de liquide entre les couches, les biscuits du fond deviendront détrempés et pourront se désintégrer. Vous voulez qu’ils soient complètement enrobés et humides, pas qu’ils nagent. Une bonne règle : utiliser juste assez de crème pour couvrir les biscuits complètement d’une fine couche uniforme. Vous devriez encore voir les contours des biscuits après avoir versé la crème dessus.
Erreur 4 : Utiliser le Mauvais Type de Biscuit
Les biscuits délicats et beurrés vont se transformer en bouillie absolue. Vous avez besoin d’un biscuit robuste et sec comme un Marie, un Petit-Beurre ou un Graham Cracker. Ils sont conçus pour garder leur structure tout en absorbant le liquide, vous donnant des couches définies au lieu d’une pâte homogène. Si vous n’êtes jamais sûr, faites un test rapide : trempez un coin du biscuit dans du lait quelques secondes. Il devrait ramollir mais pas se déliter complètement.
Penser à la qualité de vos ingrédients est toujours une bonne idée. Par exemple, utiliser des ingrédients sains fait partie du plaisir de bien manger, un peu comme suivre les recommandations pour une alimentation riche en fibres peut faire partie d’un mode de vie sain.
Cette merveilleuse Recette de Gâteau aux Cookies n’est que l’une des nombreuses incroyables et faciles recettes de desserts que vous pouvez maîtriser. Pour plus d’inspiration et pour découvrir tout un monde de douceurs, assurez-vous de parcourir notre collection complète de recettes de gâteaux et pâtisseries où la simplicité rencontre la gourmandise.
Vos Questions sur le Gâteau aux Cookies, Répondues
Puis-je rendre ce gâteau aux cookies sans gluten ?
Absolument ! La recette s’adapte parfaitement. Utilisez simplement vos biscuits à thé ou cookies natures sans gluten préférés. Assurez-vous qu’ils soient robustes pour tenir pendant le montage. Tous les autres ingrédients sont naturellement sans gluten, donc vous aurez un dessert délicieux que tout le monde peut apprécier sans souci.
Comment savoir si le beurre est à la bonne « température ambiante » ?
C’est une question de sensation, pas de temps. Le beurre parfaitement ramolli doit céder facilement sous la pression du doigt, laissant une empreinte nette, mais il ne doit pas être gras, brillant ou fondu du tout. Si votre cuisine est chaude, cela peut prendre 30-45 minutes. Dans une cuisine plus fraîche, prévoyez environ une heure. Vous pouvez aussi le ramollir délicatement au micro-ondes par impulsions de 5 secondes, mais attention car il peut fondre très vite.
Ma préparation crémeuse a l’air un peu caillée. Qu’ai-je fait de mal ?
Cela arrive généralement si le beurre était encore trop froid ou si le lait était trop froid, provoquant la séparation des graisses. Pas de panique ! La solution est simple. Placez le saladier entier au-dessus d’une casserole d’eau à peine frémissante (un bain-marie) pendant juste 10-15 secondes en fouettant constamment. La chaleur douce aidera les graisses à se ré-émulsifier. Puis, retirez du feu et fouettez vigoureusement jusqu’à ce que ce soit à nouveau lisse. Laissez refroidir légèrement avant utilisation.
Puis-je utiliser autre chose que des biscuits pour les couches ?
Bien que les biscuits soient traditionnels, vous pouvez expérimenter ! Des tranches fines de quatre-quarts ou même de brioche légèrement toastée peuvent très bien fonctionner. La clé est d’utiliser quelque chose d’assez sec qui absorbera la préparation crémeuse sans se dissoudre. Vous devrez peut-être ajuster légèrement la quantité de crème selon le pouvoir absorbant de votre base.
Est-il possible de rendre ce dessert moins sucré ?
Oui, vous pouvez facilement réduire le sucre. Commencez par diminuer le sucre de 25% (en utilisant 150g au lieu de 200g). Les biscuits eux-mêmes apportent du sucre, donc vous trouverez peut-être que c’est parfait ainsi. Vous pouvez aussi opter pour des biscuits non sucrés si vous en trouvez. Goûtez votre préparation crémeuse avant l’assemblage—elle doit être sucrée à votre goût, sachant que les biscuits vont adoucir un peu la douceur.
Puis-je ajouter de l’alcool à la recette ?
Pour une version adulte, un filet de liqueur est divin ! Ajoutez 1 à 2 cuillères à soupe de rhum, d’amaretto, de Baileys ou de liqueur de café au mélange lait-sucre. Cela ajoute une merveilleuse profondeur de saveur. Attention simplement à ne le servir qu’à des adultes. Le goût de l’alcool sera subtil mais présent.
Pourquoi mon gâteau est-il trop détrempé ou trop sec ?
Trop détrempé : Vous avez probablement utilisé trop de crème par couche ou ne l’avez pas laissé assez longtemps au froid pour une absorption complète. Trop sec : Vous n’avez pas utilisé assez de crème pour bien enrober les biscuits, ou vos biscuits étaient particulièrement épais et avaient besoin de plus d’humidité. L’idéal est d’avoir un gâteau qui tient sa forme à la découpe, sans liquide stagnant au fond du plat.
Quelles sont les meilleures garnitures pour la décoration ?
Les possibilités sont infinies ! Les baies fraîches (fraises, framboises, myrtilles) ajoutent une touche fraîche et acidulée. Les noix concassées (noisettes, pistaches, amandes) apportent un croquant charmant. Le chocolat râpé, les copeaux de chocolat ou un filet de caramel font toujours fureur. Pour un look festif, des vermicelles colorés ou de la feuille d’or comestible le rendent encore plus spécial.
Puis-je faire des portions individuelles au lieu d’un grand gâteau ?
Les portions individuelles sont adorables et parfaites pour les fêtes ! Utilisez de petits verres, pots ou même des tasses à thé. Cassez simplement les biscuits pour qu’ils s’adaptent, et superposez la crème et les biscuits comme dans un grand plat. Le temps de repos reste le même. Cette présentation fait toujours son effet et simplifie le service.
Combien de temps à l’avance puis-je préparer ce gâteau aux cookies ?
C’est le dessert préparé à l’avance ultime. Vous pouvez le préparer jusqu’à 24-48 heures à l’avance sans perte de qualité. En fait, il s’améliore ! Les saveurs ont plus de temps pour se marier, et la texture devient uniformément moelleuse. Gardez-le simplement bien couvert au réfrigérateur. Ajoutez les garnitures de fruits frais juste avant de servir pour qu’elles restent belles.
Prêt(e) à Tomber Amoureux des Desserts Faciles ?
Et voilà—le secret du dessert le plus impressionnant et le moins stressant de votre répertoire. Ce Gâteau Cookies Délicieux est la preuve que des choses incroyables n’ont pas besoin d’être compliquées. C’est une question d’ingrédients simples, d’un peu de patience et de beaucoup d’amour. J’ai hâte que vous l’essayiez, que vous vous l’appropriiez avec vos garnitures préférées, et que vous voyiez les sourires qu’il apporte. Alors allez-y, fouillez votre placard, ramollissez ce beurre et préparez-vous à recevoir les compliments. Bonne cuisine sans cuisson !
Equipment
- Grand bol de mélange
- Plat rectangulaire ou carré environ 20x30 cm
- Fouet
- Spatule pour étaler
- Film plastique ou couvercle pour couvrir
Ingrédients
- 400 g biscuits Marie ou biscuits Digestive
- 500 ml lait entier
- 200 g sucre
- 2 cuillères à café essence de vanille
- 200 g beurre à température ambiante
- 2 cuillères à soupe cacao en poudre optionnel
- décorations au choix pépites de chocolat, noix hachées, fruits frais, vermicelles...
Instructions
- Dans un grand bol, versez le lait frais, ajoutez le sucre et l'essence de vanille, puis mélangez jusqu'à dissolution.
- Coupez le beurre à température ambiante en petits morceaux et incorporez-le au lait sucré en fouettant jusqu'à obtention d'un mélange crémeux.
- Si vous souhaitez une version chocolatée, tamisez le cacao en poudre dans le mélange et fouettez jusqu'à ce qu'il soit bien incorporé.
- Dans un plat (de préférence rectangulaire ou carré), placez une couche de biscuits au fond.
- Versez une quantité généreuse du mélange crémeux sur la première couche de biscuits, en veillant à bien les recouvrir.
- Répétez l'opération en ajoutant des couches de biscuits, puis de crème, jusqu'à épuisement des ingrédients.
- Terminez par une couche de mélange crémeux, puis décorez selon vos envies.
- Couvrez le plat de film plastique et placez-le au réfrigérateur pour au moins 4 heures (idéalement toute la nuit) afin que les biscuits absorbent la crème.
Notes
Nutrition

Je suis Céline, une véritable passionnée d’ustensiles et de matériel de cuisine ! J’adore tester, comparer et découvrir les meilleurs équipements pour rendre la cuisine plus efficace et agréable. Que ce soit un bon couteau, un robot performant ou une poêle incontournable, je suis toujours à la recherche des outils qui feront la différence. Mon but est de vous guider dans vos choix pour que vous ayez le bon matériel adapté à vos besoins.