
Le Gâteau Chocolat Juteux Ultime avec Crème Fraîche : Un Favori Familial
Il y a quelque chose magique dans un gâteau au chocolat qui fait sourire tout le monde. Vous connaissez le genre—celui qui disparaît avant même que le café soit servi. Pendant des années, ma mission était de créer le gâteau au chocolat parfait : ni sec, ni trop dense, mais merveilleusement moelleux et juteux. Après beaucoup de… appelons-les « expériences délicieuses », j’ai trouvé le secret. C’est un ingrédient humble : la crème fraîche ! Cette recette de gâteau chocolat juteux avec crème fraîche est un succès garanti. Idéal pour les anniversaires, les dimanches tranquilles, ou quand vous avez simplement besoin d’un câlin chocolaté dans une assiette.
Une Part de Joie : L’histoire de ce Gâteau au Chocolat
Ce gâteau est une belle fusion de la tradition allemande et de mes aventures culinaires. L’utilisation de crème fraîche ou de lait ribot dans les cakes est un vieux truc de boulanger pour garantir une texture tendre. Je me souviens d’avoir essayé une version chez ma tante, il était tellement incroyablement moelleux que j’ai mendié la recette. Au fil du temps, je l’ai ajustée, ajoutant des copeaux de chocolat noir pour des poches fondantes et un glaçage riche qui lui donne un look aussi professionnel que son goût. C’est le gâteau que mes enfants demandent maintenant pour chaque célébration, et il impressionne toujours les invités. C’est la preuve que les meilleures recettes sont souvent les plus simples, transmises et perfectionnées avec amour.
Pourquoi Vous Tomberez Amoureux de Ce Gâteau Chocolat Juteux
Ce n’est pas un gâteau ordinaire. Voici pourquoi il deviendra votre recette de référence :
- Moelleux Inégalable : La crème fraîche est la star ! Elle réagit avec la levure pour une texture légère et garde le gâteau incroyablement juteux pendant des jours.
- Saveur Chocolat Profonde : Avec de la poudre de cacao et des copeaux de chocolat noir, chaque bouchée est une expérience chocolatée riche et intense.
- Succès Garanti : C’est une méthode simple « mélanger et cuire ». Pas de techniques complexes, juste du plaisir pur.
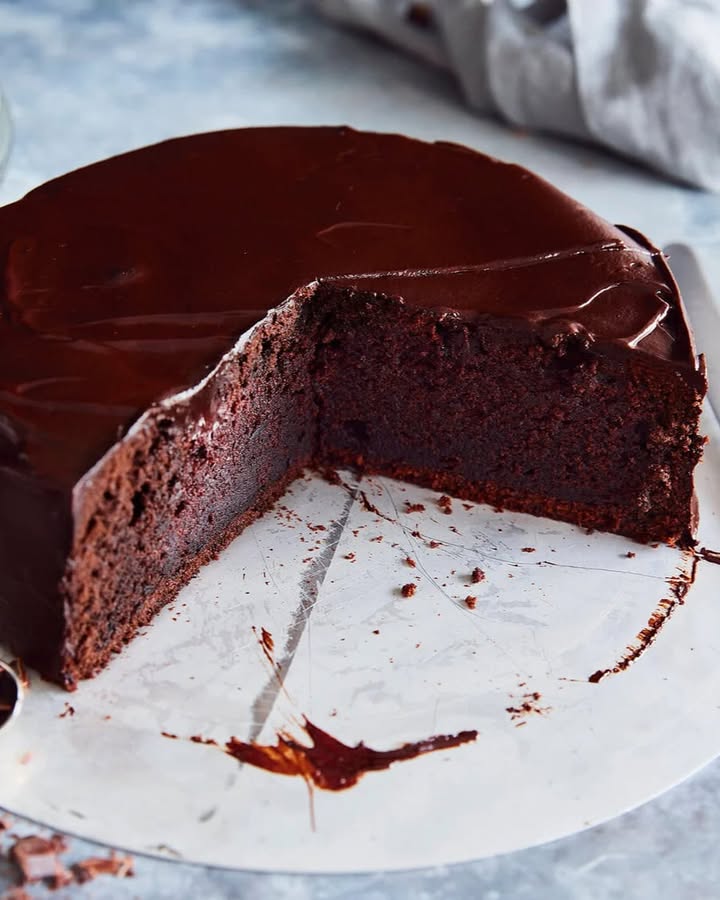
- Présentation Magnifique : Le glaçage ganache chocolat brillant lui donne l’air d’être sorti d’une pâtisserie chic. Ils ne sauront jamais que c’était si facile !
Occasions Parfaites pour Ce Gâteau Spectaculaire
Ce gâteau chocolat juteux est merveilleusement versatile. Idéal pour un dîner familial cosy, pour un repas partagé où vous voulez être le héros, ou comme finale grandiose pour un repas de fête. J’adore le préparer pour les anniversaires—c’est tellement plus spécial qu’un gâteau du commerce. C’est aussi mon atout secret pour les journées « juste parce que ». Une part avec une tasse de thé dans l’après-midi est un petit geste de bienveillance qui rend tout meilleur.
Réunir Vos Ingrédients
Placez tout sur le plan de travail ! Utiliser des ingrédients simples et de qualité fait toute la différence.
Pour la Pâte :
- 250 g de beurre mou (à température ambiante)
- 200 g de sucre
- 1 sachet de sucre vanillé (ou 1 cuillère à café d’extrait de vanille)
- 3 œufs moyens (taille M)
- 200 g de crème fraîche épaisse (la pleine matière grasse est meilleure pour le moelleux)
- 200 g de farine tout usage (type 405 ou farine normale)
- Une pincée de sel
- 6 cuillères à soupe de cacao non sucré pour pâtisserie
- 3 cuillères à café de levure chimique
- 4 cuillères à soupe de lait
- 100 g de copeaux de chocolat noir (utilisez un râpe ou hachez finement)
- Un peu de beurre pour graisser le moule
Pour le Glaçage Luxueux :
- 150 g de couverture chocolat noir ou chocolat de pâtisserie (finement haché)
- 100 g de crème liquide entière (30% de matière grasse)
Pas de Crème Fraîche ? Pas de Problème ! Substitutions Pratiques
Ne vous inquiétez pas si vous manquez quelque chose. Voici quelques alternatives simples :
- Crème Fraîche : Utilisez du yaourt nature entier ou du lait ribot. L’acidité est cruciale pour la texture tendre.
- Copeaux de Chocolat Noir : Des pépites de chocolat peuvent dépanner, mais les copeaux fondent plus délicieusement dans la pâte.
- Farine Tout Usage : Une mix de farine sans gluten 1:1 pour pâtisserie peut être utilisée.
- Pour un Glaçage Plus Léger : Vous pouvez simplement saupoudrer le gâteau refroidi avec du sucre glace ou du cacao en poudre.
Comment Faire Ce Gâteau Chocolat Juteux : Pas à Pas
Enfilez votre tablier, et c’est parti pour cuire de la joie ! L’odeur seule vaut le coup.
Étape 1 : Préparation et Crémage du Beurre
Commencez par préchauffer votre four à 180°C (350°F) pour chaleur tournante. Si vous utilisez un four à convection, réglez à 160°C. Graissez un moule à fond amovible de 20 cm (8 pouces) avec un peu de beurre. Maintenant, prenez votre beau beurre mou et placez-le dans un grand saladier avec le sucre et le sucre vanillé. Utilisez un batteur électrique pour les mélanger à vitesse moyenne pendant 3-4 minutes. Vous voulez que la mixture devienne blanche, aérienne et crémeuse. Cette étape incorpore de l’air, ce qui aide le gâteau à monter. Ajoutez ensuite les œufs un par un, mélangez bien après chaque addition. Finalement, incorporez la crème fraîche jusqu’à que la mixture soit homogène. Astuce pro : Assurez-vous que tous les ingrédients soient à température ambiante pour éviter que la pâte ne se sépare et garantir un mélange uniforme.
Étape 2 : Combiner les Ingrédients Secs et Humides
Dans un autre saladier, mélangez la farine, le sel, le cacao en poudre et la levure chimique. Cela assure une distribution uniforme des agents levant. Ajoutez graduellement ces ingrédients secs à votre mixture de beurre humide. Mixez à vitesse basse juste jusqu’à incorporation—un mélange excessif peut rendre le gâteau dur. La pâte sera assez épaisse. Versez maintenant le lait pour l’assouplir un peu, mélangez jusqu’à lisse. La touche finale est d’incorporer delicatement ces magnifiques copeaux de chocolat noir. Imaginez-les fondant en petites poches de pure joie pendant la cuisson!
Étape 3 : Cuire à la Perfection
Versez la pâte épaisse et chocolatée dans votre moule préparé. Utilisez une spatule pour égaliser le dessus. Placez-le au centre du four préchauffé et faites cuire environ 45 minutes. Évitez de ouvrir la porte du four trop tôt, cela pourrait faire couler le gâteau. Après 45 minutes, faites le test de la pointe : insérer un pic en bois ou une pointe dans le centre du gâteau. Si elle sort avec quelques miettes humides ou un peu de chocolat fondu (des copeaux), c’est perfect ! Une pointe sèche pourrait indiquer qu’il est trop cuit et sec. Laissez le gâteau refroidir complètement dans le moule sur une grille avant de retirer le cercle. Cette patience empêche qu’il se casse.
Étape 4 : Créer le Glaçage Chocolat Satiné
Pendant que le gâteau refroidit, préparez le glaçage simple mais luxueux. Hachez finement votre chocolat noir et placez-le dans un bol résistant à la chaleur. Dans une petite casserole, portez la crème à peine à ébullition—vous verrez des petites bulles se former sur les bords. Immédiatement versez la crème chaude sur le chocolat haché. Laissez reposer sans toucher pendant 2-3 minutes. Cela permet à la chaleur de fondre doucement le chocolat. Puis, en commençant au centre, mélangez lentement avec un fouet jusqu’à obtenir un ganache lisse, brillant et coulant. Laissez-le refroidir 5-10 minutes pour qu’il épaississe légèrement si vous préférez un glaçage qui ne coule pas complètement sur les côtés.
Étape 5 : La Finale – Glaçage et Service
Placez votre gâteau complètement refroidi sur une plaque de service. Versez le glorieux glaçage chocolat sur le centre. Utilisez un couteau palette ou le dos d’une cuillère pour guider doucement le glaçage vers les bords, permettant qu’il coule élégamment sur les côtés. La finition simple et brillante est superbe. Pour une finition professionnelle, vous pouvez créer des swirls avec votre couteau. Laissez le glaçage prendre au moins 30 minutes avant de découper. Astuce du chef : Pour des parts impeccables, trempez un couteau bien aiguisé dans l’eau chaude et essuyez-le entre chaque découpe. Cela vous donne des morceaux nets et beaux chaque fois.
Décomposition du Timing
Voici un aperçu rapide de ce à quoi s’attendre :
- Temps de préparation : 20 minutes
- Temps de cuisson : 45 minutes
- Temps de refroidissement & glaçage : 1 heure 30 minutes
- Temps total : Environ 2 heures 35 minutes
- Portions : 10 parts généreuses
Secret du Chef pour un Gâteau Extra Juteux
Mon secret absolu ? Les copeaux de chocolat. Alors que les pépites gardent leur forme, le chocolat noir finement râpé ou épluché fond complètement dans la pâte pendant la cuisson. Cela crée de minuscules réservoirs invisibles de chocolat qui gardent chaque bouchée incroyablement moelleuse et savoureuse. C’est la différence entre un bon gâteau et un légendaire gâteau chocolat juteux.
Un Petit Histoire Sucrée
Saviez-vous que l’ajout de laitages comme la crème fraîche ou le lait ribot dans les cakes est devenu particulièrement populaire au 19ème siècle avec l’essor des agents levant chimiques comme le bicarbonate ? L’acide dans la crème fraîche réagit avec la levure chimique, créant beaucoup de petites bulles qui font lever le gâteau et le rendent merveilleusement tendre. Ainsi, chaque part de ce gâteau est un délicieux morceau de l’histoire scientifique de la pâtisserie!
Équipement Nécessaire
Vous n’avez pas besoin d’ustensiles sophistiqués. Une liste simple suffira :
- Moule à fond amovible de 20 cm (8 pouces)
- Deux saladiers (un grand, un moyen)
- Batteur électrique ou robot
- Fouet et spatule
- Râpe fine ou couteau pour le chocolat
- Petite casserole
- Grille de refroidissement
- Pointe ou testeur de gâteau
Comment Conserver votre Chef-d’œuvre
Ce gâteau se conserve magnifiquement grâce à son moelleux. Une fois le glaçage bien pris, vous pouvez couvrir le gâteau avec un dôme ou le placer sous un grand bol inversé. Il restera frais et délicieux à température ambiante jusqu’à 2 jours.
Si vous avez besoin de le conserver plus longtemps, vous pouvez le réfrigérer. Placez-le dans un contenant hermétique pour éviter qu’il absorbe les odeurs du frigo. Laissez-le revenir à température ambiante environ une heure avant de servir. Le frigo peut durcir le beurre et le glaçage, donc le réchauffer un peu ramène la texture tendre parfaite.
Vous pouvez aussi congeler ce gâteau, idéalement sans le glaçage. Emballez fermement le gâteau refroidi et non glacé dans du film plastique, puis dans du papier aluminium. Il se gardera jusqu’à 3 mois. Décongelez-le une nuit dans le réfrigérateur, puis ramenez-le à température ambiante et ajoutez votre glaçage frais avant de servir. Il aura le goût d’un gâteau juste sorti du four!
Conseils et Astuces pour un Succès en Pâtisserie
- Température Ambiante est Cruciale : Cela ne peut pas être souligné suffisamment. Les ingrédients froids ne se mélangent pas bien et peuvent donner un gâteau dense.
- Mesurez votre Farine Correctement : Versez la farine dans votre cup et nivelez avec un couteau. Prendre directement tasse la farine, conduisant à trop d’ingrédient sec et un gâteau sec.
- Ne Surmixez Pas : Une fois que vous ajoutez la farine, mixez juste jusqu’à que vous ne voyez plus de trainées blanches. Trop travailler le gluten dans la farine rend les cakes durs.
- Testez la Cuisson : Les fours varient. Commencez à vérifier à 40 minutes. Le cake est prêt quand le dessus rebondit légèrement au toucher et une pointe présente des miettes humides attachées.
Idées de Présentation pour Impresser vos Invités
Faites de votre gâteau la star de la table avec ces idées simples :
- Disposez des framboises ou fraises fraîches autour du plat.
- Juste avant que le glaçage prenne, saupoudrez quelques paillettes de sel marin pour une touche sophistiquée sucrée-salée.
- Ajoutez un saupoudrage de poudre dorée edible ou feuille d’or pour un look vraiment festif.
- Servez chaque part avec un nuage de crème fouettée légèrement sucrée ou une boule de glace vanille.
Explorez Plus de Recettes de Gâteau Délicieux
Si vous avez aimé ce gâteau chocolat juteux, notre site est un coffre aux trésors d’autres desserts incroyables. Pour une touche fruitée, vous devriez essayer notre classique Tarte Normande Irrésistible avec son topping crumble beurré. Les amateurs de chocolat et cookies seront ravis par le délice crémeux sans cuisson de notre Cheesecake Oreo Délicieux. Pour un showstopper qui combine noisette et chocolat, le Gâteau Kinder Bueno est un vrai plaisir pour tous. Et pour un amuse-bouche fun, ces Billes Cheesecake Red Velvet sont idéales pour les fêtes!
Erreurs Courantes à Éviter
Évitez ces pièges pour un gâteau parfait chaque fois.
Erreur 1 : Utiliser des Ingrédients Froids Directement du Frigo
C’est la raison principale d’une pâte grumeleuse, dense qui ne monte pas bien. Le beurre froid ne se crème pas bien avec le sucre, et les œufs ou crème fraîche froids peuvent causer que la mixture se sépare. Comment l’éviter : Sortez votre beurre, œufs et crème fraîche du réfrigérateur au moins 1-2 heures avant de commencer. Votre beurre devrait être mou pour que votre doigt marque un empreinte claire.
Erreur 2 : Trop Cuire le Gâteau
La ligne entre un gâteau moelleux parfait et un sec est fine, souvent juste quelques minutes dans le four. Trop de boulangers se basent seulement sur le chronomètre et finissent par trop cuire. Comment l’éviter : Utilisez le test de la pointe comme guide, pas le timer. Rappelez-vous, quelques miettes collantes ou chocolat fondu sur la pointe est exactement ce que vous voulez. Le gâteau continuera à cuire un peu de la chaleur résiduelle pendant le refroidissement.
Erreur 3 : Ajouter le Glaçage sur un Gâteau encore Tiède
L’impatience est l’ennemi d’un beau glaçage ! Si vous versez ce magnifique ganache sur un gâteau tiède ou même légèrement chaud, il va fondre, devenir liquide, et s’imbiber dans le gâteau plutôt que de former un revêtement brillant. Il peut aussi rendre le dessus mou. Comment l’éviter : Laissez le gâteau refroidir complétement dans le moule sur une grille. Cela peut prendre 1-1.5 heures. Touchez le dessus—il devrait être complètement cool avant même de faire le glaçage.
Erreur 4 : Surmixer la Pâte Après Ajouter la Farine
Une fois que la farine touche le liquide, le gluten commence à se développer. Plus vous mixez, plus le réseau de gluten devient dur et élastique, ce qui est bon pour le pain mais terrible pour un gâteau tendre. Comment l’éviter : Quand vous combinez les ingrédients humides et secs, passez à une spatule ou la vitesse basse sur votre mixeur. Mixez seulement jusqu’à que vous ne voyez plus de trainées de farine blanche. Quelques petits grumeaux sont absolument acceptables.
Note sur les Ingrédients de Qualité
Utiliser du cacao en poudre de bonne qualité et du chocolat noir avec un haut contenu de cacao (au moins 60%) ne fait pas juste améliorer la saveur. Le chocolat noir est aussi riche en flavanols. Selon les experts, ces composés peuvent contribuer à la santé cardiovasculaire lorsqu’ils sont consommés dans une alimentation équilibrée. Ainsi, choisir de meilleurs ingrédients est une manière délicieuse de soigner vos papilles et votre bien-être!
Si ce gâteau chocolat juteux vous a inspiré à cuire plus, vous trouverez un monde entier d’idées merveilleuses dans notre collection de recettes de gâteaux et pâtisseries.
Questions Fréquemment Posées (FAQ)
Est-ce que je peux faire ce gâteau au chocolat sans moule à fond amovible ?
Oui, vous pouvez ! Un moule rond classique de 20 cm (8 pouces) fonctionnera. Assurez-vous de bien le graisser et de tapisser le fond avec un cercle de papier cuisson. Cela le rend beaucoup plus facile à démouler après refroidissement. Laissez le cake refroidir dans le moule environ 15 minutes, puis passez un couteau fin autour des bords avant de le retourner sur une plaque, et encore sur votre plat de service pour que le dessus soit orienté vers le haut.
Mon gâteau a coulé au centre. Qu’est-ce qui s’est mal passé ?
Un gâteau qui coule est généralement causé par quelques problèmes communs. La porte du four aurait pu être ouvert trop tôt (avant que le cake ait pris, autour de 30 minutes). La pâte aurait pu être trop mixée après ajouter la farine, développant trop de gluten. Une autre possibilité est que la levure chimique est ancienne et a perdu sa puissance. Vérifiez toujours la date d’expiration sur vos agents levant. Assurez aussi que la température de votre four est exacte avec un thermomètre de four.
Est-ce que je peux utiliser du cacao en poudre au lieu de copeaux de chocolat dans la pâte ?
Les copeaux de chocolat servent un but différent que le cacao en poudre. Le cacao fournit la saveur chocolatée globale, tandis que les copeaux fondent et créent des poches de moelleux extra et de explosions de chocolat intense. Si vous devez les omettre, vous pouvez, mais le gâteau sera légèrement moins juteux. Vous pouvez substituer avec une cuillère à soupe supplémentaire de cacao en poudre, mais la texture sera différente. Je recommande fortement d’essayer d’inclure les copeaux au moins une fois!
Combien de temps à l’avance je peux préparer ce gâteau ?
Ce gâteau est en fait meilleur le lendemain ! Les saveurs ont plus de temps pour se marier, et le moelleux se distribue encore plus uniformément. Vous pouvez cuire le cake la veille, laisser refroidir complètement, l’emballer fermement dans du film plastique, et le garder à température ambiante. Préparer le glaçage et assembler le gâteau le jour où vous prévoyez servir. Le glaçage est meilleur frais.
Est-ce que je peux utiliser du chocolat au lait plutôt que du noir pour le glaçage ?
Absolument, mais cela changera la saveur et texture. Le chocolat au lait est plus sucré et contient plus de solides laitiers et sucre. Cela signifie que votre glaçage sera plus sucré et pourrait ne pas prendre aussi fermement qu’un ganache chocolat noir. Utilisez le même ratio 150g à 100g de crème. Pour un glaçage plus ferme avec chocolat au lait, vous pouvez réduire la crème par une ou deux cuillères à soupe.
Est-il possible de transformer cette recette en cupcakes ?
Oui, cette pâte fait des cupcakes moelleux fantastiques ! Garnissez un moule à muffins avec des caissettes. Remplissez chaque caissette environ 2/3. Cuire à la même température (180°C) environ 18-22 minutes, ou jusqu’à une pointe insérée ressort propre. Les laisser refroidir complètement avant de garnir avec une touche du glaçage chocolat ou votre frosting préféré. Cette recette devrait donner environ 18-20 cupcakes standard.
Mon glaçage est trop épais/trop liquide. Comment le corriger ?
Le ganache est très accommodant ! Si il est trop épais et ne coule pas, il a peut trop refroidi. Réchauffez-le doucement 5-10 secondes dans le micro-ondes ou sur un bain-marie, mélangez bien. Si il est trop liquide et coulant, il est probablement trop warm. Laissez-le reposer à température ambiante, mélangeant occasionnellement, 10-15 minutes pour épaisir. Vous pouvez aussi le réfrigérer rapidement, mais mélangez chaque 2 minutes pour éviter qu’il prenne irrégulièrement.
Quoi utiliser en lieu de sucre vanillé ?
Si vous n’avez pas de sachets de sucre vanillé, vous pouvez facilement substituer. Utilisez 1 cuillère à café d’extrait de vanille pure ou les grains d’une gousse de vanille. Ajoutez l’extrait quand vous ajoutez les œufs. Si vous utilisez une gousse, grattez les grains dans le sucre avant de le crémage avec le beurre pour distribuer la saveur uniformément.
Est-ce que je peux ajouter des noix ou autres inclusions à la pâte ?
Bien sûr ! C’est une base superbe pour customisation. Ajoutez jusqu’à 100g de noix, pécan ou noisette hachées avec les copeaux de chocolat. Vous pouvez aussi ajouter une handful de cerises sèches ou zest d’orange pour une twist de flavor. Juste attention de ne pas surcharger la pâte, trop d’additions pourrait le rendre heavy.
Pourquoi la crème fraîche est utilisée dans les recettes de cake ?
La crème fraîche est un ingredient fantastique dans la pâtisserie. Son haut contenu de matière grasse ajoute une richesse incroyable et moelleux à la texture. L’acidité dans la crème fraîche rend le gluten dans la farine plus tendre, resultant en une texture plus douce. Elle réagit aussi avec la levure chimique, aidant le cake à monter plus efficacement. Le résultat est un cake qui est simultanément tendre, moelleux, et structuré merveilleusement.
Final Thoughts
Ce gâteau chocolat juteux avec crème fraîche est plus qu’un dessert; c’est une recette reliable qui réunit les gens. Elle a traversé des anniversaires, repas partagés et des après-midis cosy innombrables. La combination de pas simples et résultats spectaculaires c’est ce que la pâtisserie maison représente. J’espère que ce cake trouve une place spéciale dans votre collection de recipes et devient un treat cherished pour votre famille et amis, comme pour ma famille. Maintenant, préchauffez ce four et préparez-vous pour les compliments ! Bonne pâtisserie!
Equipment
- Mixeur à mains ou robot pâtissier
- Moule à charnière de 20 cm
- Petite casserole
- Spatule
- Grille de refroidissement
Ingrédients
- 250 g beurre doux (à température ambiante)
- 200 g sucre
- 1 paquet sucre vanillé ou 1 cuillère à café d'extrait de vanille
- 3 œufs œufs moyens (taille M)
- 200 g crème aigre (de préférence entière) pour l'humidité
- 200 g farine tout usage (type 405) ou farine blanche
- 1 pincée sel
- 6 cuillères à soupe cacao en poudre non sucré
- 3 cuillères à café levure chimique
- 4 cuillères à soupe lait
- 100 g copeaux de chocolat noir râpés ou finement hachés
- un peu beurre pour graisser le moule
Instructions
- Préchauffez le four à 180°C (350°F) et graissez un moule à charnière de 20 cm.
- Dans un grand bol, battez le beurre, le sucre et le sucre vanillé pendant 3-4 minutes jusqu'à ce que le mélange soit pâle et crémeux.
- Ajoutez les œufs un par un, en mélangeant bien après chaque ajout. Incorporez ensuite la crème aigre.
- Dans un autre bol, mélangez la farine, le sel, le cacao et la levure chimique.
- Ajoutez les ingrédients secs au mélange humide, en remuant à basse vitesse jusqu'à incorporation.
- Incorporez le lait pour assouplir la pâte, puis ajoutez délicatement les copeaux de chocolat noir.
- Versez la pâte dans le moule et lissez le dessus. Faites cuire environ 45 minutes.
- Vérifiez la cuisson avec un cure-dent. Laissez refroidir complètement dans le moule.
- Pour le glaçage, faites chauffer la crème jusqu'à ébullition, puis versez-la sur le chocolat haché. Mélangez jusqu'à obtenir une ganache lisse.
- Une fois le gâteau refroidi, versez le glaçage dessus et laissez-set pendant 30 minutes avant de couper.
Notes
Nutrition

Je suis Céline, une véritable passionnée d’ustensiles et de matériel de cuisine ! J’adore tester, comparer et découvrir les meilleurs équipements pour rendre la cuisine plus efficace et agréable. Que ce soit un bon couteau, un robot performant ou une poêle incontournable, je suis toujours à la recherche des outils qui feront la différence. Mon but est de vous guider dans vos choix pour que vous ayez le bon matériel adapté à vos besoins.