
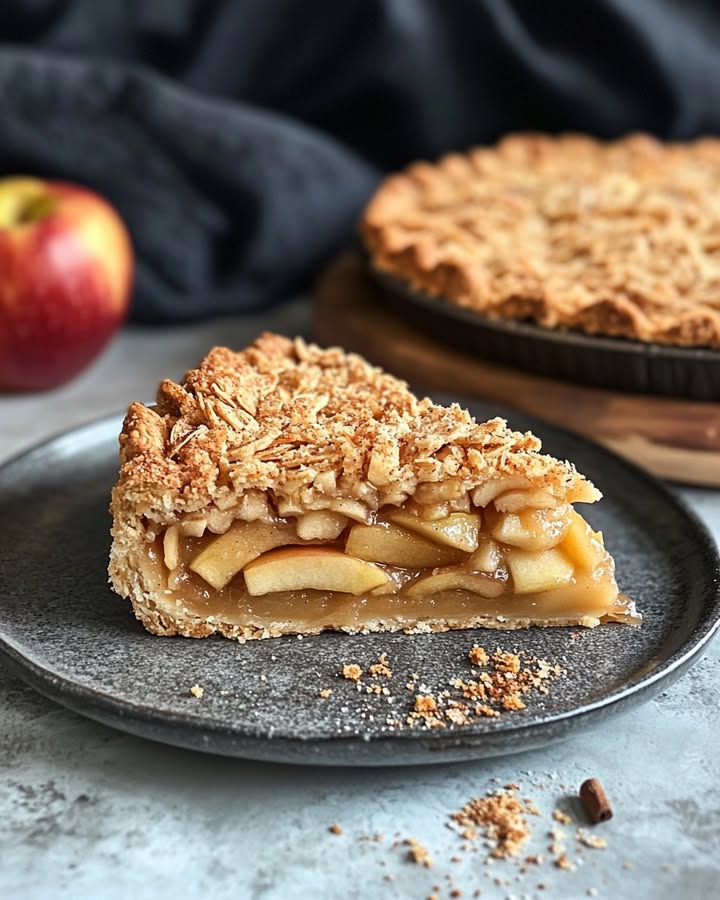
Cette Première Bouchée de Tarte aux Pommes Crumble Néerlandaise
Vous connaissez ce sentiment. La porte du four s’ouvre, et une vague d’air parfumé à la cannelle envahit votre cuisine. Vous avez attendu une heure interminable qu’elle refroidisse. Vous glissez votre fourchette à travers ce crumble doré et beurré, jusqu’aux pommes douces et fondantes en dessous. Cette première bouchée ? Un pur bonheur. C’est la tarte que l’on prépare quand on a envie de câlins en plus. Aujourd’hui, je partage ma recette préférée absolue de Tarte aux Pommes Crumble Néerlandaise, perfectionnée après de nombreux essais (délicieux). C’est celle que ma famille réclame dès que les feuilles commencent à tomber.
Une Part d’Histoire Réconfortante
Cette tarte n’est pas votre classique à couvercle en treillis. Le « Néerlandais » dans son nom fait référence à l’irrésistible topping *struezel* ou crumble, une signature des traditions de pâtisserie néerlandaise et allemande. Oubliez les bandes de pâte à tisser ! Le génie réside dans ce mélange rapide et sablé de farine, de beurre et de sucre qui cuit en une couronne croquante et caramélisée. C’est une torsion brillamment simple qui ajoute une texture incroyable. Ma version rend hommage à cet héritage avec un secret : un trait de noix de pécan toastées dans le crumble pour une profondeur grillée qui fait dire à tout le monde : « Qu’est-ce qu’il y a dedans ? C’est incroyable ! »
Pourquoi Cette Tarte aux Pommes Crumble Va Vous Voler le Cœur
Vous allez adorer cette recette pour trois grandes raisons. Premièrement, le contraste des textures est tout. Les pommes tendres et sucrées reposent sous une montagne de miettes croustillantes et beurrées. Deuxièmement, elle est trompeusement simple. Si vous savez peler des pommes et mélanger des ingrédients avec les mains, vous êtes paré. Pas besoin de compétences pâtissières sophistiquées ! Enfin, c’est le clou du spectacle réconfortant ultime. Apporter cette tarte chaude et parfumée sur la table crée instantanément un sentiment de foyer et de célébration.
Quand Préparer Votre Chef-d’Œuvre
Cette tarte n’est pas que pour les fêtes ! C’est votre arme secrète pour tout rassemblement qui a besoin d’une touche de magie maison. Pensez aux dîners familiaux du dimanche, aux clubs de lecture d’automne cosy, pour accueillir de nouveaux voisins, ou comme cadeau « merci » spectaculaire. Elle transforme un mardi ordinaire en quelque chose de spécial. J’en fais toujours deux—une pour dévorer et une à offrir. Croyez-moi, c’est un succès garanti.
Rassemblez Vos Ingrédients
Une bonne tarte commence par des ingrédients simples et de qualité. Voici ce dont vous aurez besoin :
- Pour la Tarte aux Pommes Néerlandaise :
- 1 fond de tarte maison (utilisez la moitié de ma recette préférée de pâte à tarte)
- 1 kg de pommes Granny Smith (environ 6 moyennes)
- 1 cuillère à café de cannelle moulue
- 115 g de beurre doux (une plaquette)
- 3 cuillères à soupe de farine tout usage
- 6 cl d’eau
- 200 g de sucre en poudre
- Pour le Crumble :
- 125 g de farine tout usage
- 50 g de sucre brun non raffiné
- 2 cuillères à soupe de sucre en poudre
- 1/4 de cuillère à café de cannelle
- 1/4 de cuillère à café de sel
- 115 g de beurre doux, température ambiante
- 50 g de noix de pécan hachées
Pas de Problème ! Substitutions Astucieuses
Il vous manque quelque chose ? Ne vous inquiétez pas ! Cette tarte est flexible.
Pommes : Utilisez un mélange de Granny Smith et de Honeycrisp ou de Braeburn pour une garniture plus douce et plus tendre.
Noix de pécan : Les noix ou les amandes fonctionnent très bien, ou simplement omettez les fruits à coque.
Fond de tarte : Une croûte du commerce de bonne qualité est un parfait gain de temps. On l’utilise tous !
Beurre : Le beurre salé convient ; il suffit d’omettre le sel ajouté dans le crumble.
C’est Parti ! Guide Pas à Pas
Étape 1 : Organisation & Abaissage
Tout d’abord, préchauffez votre four à 190°C. Placez une grille tout en bas et une autre au centre—c’est essentiel pour une cuisson uniforme. Prenez votre pâte à tarte bien froide et étalez-la sur un plan de travail légèrement fariné. Visez un cercle de 30 cm pour avoir de quoi former un bord. Déposez-la délicatement dans votre moule à tarte de 23 cm, rentrez les bords, et formez un joli bord avec vos doigts. C’est votre toile ! Astuce de pro : Placez la croûte formée au frigo pendant 15 minutes pendant que vous préparez la garniture pour éviter qu’elle ne rétrécisse.
Étape 2 : L’Avalanche de Pommes
Maintenant, les pommes ! Pelez, épépinez et coupez-les en tranches de 5 mm d’épaisseur. Vous devriez avoir environ 7 tasses bien bombées. Mélangez-les dans un grand saladier avec cette cuillère à café de cannelle. L’arôme est déjà prometteur ! Vous verrez les pommes pâles prendre une teinte chaude et mouchetée. Utiliser des Granny Smith acidulées est mon secret—elles gardent leur forme et équilibrent parfaitement le topping sucré.
Étape 3 : Créez le Glacage Magique
C’est là que la magie opère. Dans une casserole moyenne, faites fondre le beurre à feu moyen. Une fois qu’il mousse, fouettez-y les 3 cuillères à soupe de farine. Faites cuire pendant une minute ; cela sentira le noisetté et aura l’apparence d’une pâte lisse. Cela cuit le goût cru de la farine. Maintenant, fouettez l’eau et le sucre. Portez à ébullition vive, puis réduisez et laissez mijoter pendant 3 minutes. Vous le verrez se transformer en une sauce épaisse, brillante et couleur caramel. Versez cette merveille brûlante directement sur vos pommes à la cannelle et mélangez jusqu’à ce que chaque tranche soit luisante.
Étape 4 : Remplissez ce Fond de Tarte
Versez le mélange de pommes sauceux dans votre croûte qui attend. Étalez-les en une couche uniforme. Cela formera un petit monticule—ne paniquez pas ! Les pommes ramollissent et se tassent à la cuisson. J’aime bien arranger quelques tranches joliment sur le dessus, mais un empilement rustique est tout aussi merveilleux. Astuce du chef : Placez une plaque de cuisson recouverte de papier aluminium sur la grille du bas maintenant. Cela récupérera les éventuelles gouttes de débordement et vous évitera un nettoyage de four compliqué plus tard !
Étape 5 : Préparez le Topping Crumble Irrésistible
C’est la partie amusante ! Dans un saladier propre, combinez la farine, le sucre brun, le sucre en poudre, la cannelle et le sel. Ajoutez le beurre à température ambiante. Maintenant, utilisez vos doigts pour sabler le beurre avec les ingrédients secs. Continuez jusqu’à obtenir un mélange de miettes de la taille de petits pois et d’amas sablonneux plus gros. Incorporez les noix de pécan hachées. Prenez des poignées de ce mélange et saupoudrez-le généreusement sur les pommes, en recouvrant chaque centimètre.
Étape 6 : Cuisez jusqu’à Perfection Dorée
Placez votre tarte sur la grille centrale. Faites cuire pendant 50 à 60 minutes. Vous devez voir le crumble devenir d’un brun doré profond et la garniture bouillonner sur les bords. Le test le plus fiable ? Un thermomètre instantané inséré au centre doit indiquer 80°C. Si votre croûte ou votre crumble brunit trop vite, couvrez-la simplement d’une feuille de papier aluminium. Une fois cuite, laissez-la refroidir sur une grille pendant une heure complète. Cette attente est cruciale pour que la garniture prenne et que vous obteniez des parts parfaites.
Votre Chronologie pour la Tarte
Les bonnes choses prennent du temps, mais ça en vaut vraiment la peine !
- Temps de Préparation : 30 minutes (avec un peu de multi-tâches !)
- Temps de Cuisson : 1 heure
- Temps de Repos (la partie la plus dure !) : 1 heure
- Temps Total : Environ 2 heures 30 minutes
- Nombre de Parts : Pour 10 personnes heureuses
- Calories par Part : Environ 493
Ma Règle d’Or : Le Refroidissement Patient
Mon secret numéro un ? Laissez la tarte refroidir complètement. Je sais, l’arôme est une torture. Mais couper dans une tarte chaude signifie une garniture liquide et détrempée. Cette heure complète (ou même deux) de refroidissement permet aux épaississants du glacage de prendre complètement. Vous serez récompensé par de belles parts nettes qui tiennent leur forme dans l’assiette. Servez-la tiède ou à température ambiante pour une expérience optimale.
Un Peu de Légende sur la Pomme
Saviez-vous que les pommes Granny Smith portent le nom d’une vraie personne ? Maria Ann Smith a propagé cette variété en Australie dans les années 1860. Leur équilibre parfait entre acidité et fermeté en font la championne incontestée pour les tartes. Choisir la bonne variété de pommes peut vraiment élever votre pâtisserie, tout comme choisir des ingrédients de qualité pour n’importe quel plat. Pour en savoir plus sur la façon dont le contenu minéral des plantes affecte la qualité des aliments, c’est une lecture fascinante pour tout cuisinier à la maison.
Le Matériel de Cuisine dont Vous Aurez Besoin
- Moule à tarte de 23 cm (en verre ou céramique, c’est mieux)
- Rouleau à pâtisserie
- Grands saladiers
- Casserole moyenne et fouet
- Économe et couteau aiguisé
- Tasses et cuillères à mesurer
- Thermomètre instantané (très recommandé !)
Conserver Votre Tarte Parfaite (S’il en Reste !)
Couvrez la tarte refroidie avec du papier aluminium ou du film alimentaire. Elle restera fraîche et délicieuse à température ambiante jusqu’à deux jours. La croûte peut ramollir un peu, mais le goût sera toujours fantastique.
Pour une conservation plus longue, vous pouvez la garder au réfrigérateur jusqu’à 4 jours. Laissez une part revenir à température ambiante ou réchauffez-la doucement au four pendant quelques minutes pour redonner du croustillant au dessus.
Cette tarte se congèle aussi très bien ! Enveloppez la tarte entière refroidie ou des parts individuelles hermétiquement dans du film alimentaire, puis dans du papier aluminium. Congelez jusqu’à 3 mois. Décongelez une nuit au réfrigérateur et réchauffez dans un four à 150°C jusqu’à ce qu’elle soit tiède.
Astuces pour une Tarte Parfaite
- Le Beurre Froid est Clé : Pour le crumble, votre beurre doit être à température ambiante pour faciliter le sablage, mais pour la pâte à tarte elle-même, utilisez du beurre et de l’eau glacés.
- Évitez les Fonds Ssogies : Un four chaud et placer la tarte sur la grille du bas au début aide à faire croustiller le fond.
- Le Papier Aluminium est Votre Ami : Si le crumble dore trop vite, n’hésitez pas à couvrir légèrement toute la tarte avec du papier aluminium.
- L’Astuce du Thermomètre : Prendre la température interne de la tarte est le moyen infaillible de savoir qu’elle est parfaitement cuite à cœur.
Présentez Votre Belle Tarte
- Servez-la sur un simple présentoir à gâteau pour lui donner la place d’honneur.
- Une quenelle de crème fouettée légère ou une boule de glace à la vanille est non-négociable pour ma famille.
- Versez un filet de sauce caramel sur l’assiette pour une touche style restaurant.
- Pour une table de fête, décorez le plat de service avec quelques bâtons de cannelle et des noix de pécan entières.
Vous Aimez Cette Tarte ? Essayez Ces Autres Desserts Incroyables !
Si cette Tarte aux Pommes Crumble Néerlandaise vous donne envie de pâtisser, j’ai tant d’autres recettes adorées à vous faire essayer. Pour un régal épicé de fête, mon pain d’épices au miel moelleux et parfumé fait toujours un tabac. Une envie de quelque chose de crémeux et élégant ? Vous devez essayer le Bánh Flan Vietnamien avec sa touche riche au café. Pour une gourmandise frite et ludique, ces beignets « rêves » fourrés à la crème vanille sont un pur délice. Et quand vous avez besoin d’un gâteau léger et aérien, le « Gâteau Nuage » de mon arrière-grand-mère est un classique intemporel. Vous pouvez trouver tous ces trésors et bien d’autres dans ma collection de gâteaux et pâtisseries.
Erreurs Courantes à Éviter
Erreur 1 : Utiliser les Mauvaises Pommes
C’est l’écueil le plus courant pour une tarte ! Utiliser des pommes qui se transforment en compote, comme les Red Delicious, donnera une garniture détrempée et semblable à de la compote. Vous voulez des pommes fermes et acidulées qui gardent leur forme et offrent un contraste avec le topping sucré. Choisissez toujours des pommes à cuire fermes et acidulées comme les Granny Smith, Braeburn ou Honeycrisp pour la texture et l’équilibre des saveurs parfaits.
Erreur 2 : Passer l’Étape Cruciale du Refroidissement
Je comprends, la tentation est réelle. Mais couper votre tarte directement sortie du four est une recette pour un désordre liquide. La garniture a besoin de cette heure complète (ou plus) pour refroidir et prendre correctement. Les sucres et les épaississants ont besoin de temps pour se solidifier. La patience est l’ingrédient secret pour des parts nettes et dignes d’une photo qui ne coulent pas dans l’assiette.
Erreur 3 : Trop Travailler le Crumble
Lorsque vous préparez le crumble, le but est d’obtenir un mélange rustique et irrégulier de miettes. Si vous le mélangez trop—surtout avec un robot culinaire—vous obtiendrez une couche dense et pâteuse au lieu d’une couche légère et croustillante. Utilisez le bout de vos doigts pour sabler le beurre juste jusqu’à obtenir des tailles variées, allant de grains de sable à de petits cailloux. Un peu de texture est une bonne chose !
Erreur 4 : Ne Pas Prévoir les Coulures
Cette garniture sucrée aux pommes adore déborder. Si vous ne placez pas un plat de cuisson ou une feuille de papier aluminium sur la grille en dessous de votre tarte, vous risquez un four enfumé et un désordre collé et brûlé à nettoyer. C’est une étape si simple qui vous évite bien des tracas. Placez toujours une plaque de cuisson recouverte sur la grille du bas avant de commencer la cuisson.
Vos Questions sur la Tarte aux Pommes Néerlandaise, Répondue
Est-ce que je peux préparer cette tarte à l’avance ?
Absolument ! Vous pouvez la préparer jusqu’à un jour à l’avance. Faites-la cuire comme indiqué, laissez-la refroidir complètement, puis couvrez-la légèrement et gardez-la à température ambiante. La saveur s’approfondit même en reposant une nuit. Pour une conservation plus longue, voir les instructions de congélation ci-dessus.
Les bords de ma croûte brûlent ! Que faire ?
Cela arrive aux meilleurs d’entre nous. La solution est un protège-bords pour tarte ou un simple anneau de papier aluminium. Couvrez délicatement juste les bords crantés de la croûte vers la moitié du temps de cuisson. Cela les protège de la chaleur directe tout en permettant au centre de la tarte et au crumble de continuer à dorer magnifiquement.
Est-ce que je peux utiliser une croûte à tarte du commerce ?
Oui, bien sûr ! Une croûte du commerce de qualité est un gain de temps fantastique et fonctionne parfaitement dans cette recette. Que vous utilisiez une coque surgelée ou une pâte réfrigérée que vous étalez vous-même, vous obtiendrez toujours une tête délicieuse qui fera plaisir à tous. Le fait maison est merveilleux, mais la commodité l’emporte parfois !
Pourquoi ma garniture est-elle si liquide ?
Une garniture liquide a généralement deux causes : une cuisson insuffisante de la tarte, ou un temps de refroidissement trop court. Assurez-vous de cuire jusqu’à ce que la garniture bouillonne activement sur les bords et que le centre indique 80°C. Ensuite, aussi dur que cela soit, laissez-la reposer pendant une heure complète. Cela permet à la sauce épaissie à la farine de prendre correctement.
Quelle est la différence entre une tarte aux pommes néerlandaise et une tarte aux pommes classique ?
La principale différence est le dessus ! Une tarte aux pommes américaine traditionnelle a généralement deux croûtes—une en bas et une en haut, souvent en treillis. Une tarte aux pommes néerlandaise a une seule croûte en bas et est recouverte d’un mélange de miettes sucrées et beurrées (le *struezel*). Tout est question de cette texture croquante et délicieuse sur le dessus.
Est-ce que je peux omettre les noix du crumble ?
Bien sûr que oui. Si vous avez des allergies ou n’aimez tout simplement pas les fruits à coque, contentez-vous de les omettre. Le crumble sera toujours fantastique. Vous pourriez ajouter une cuillère à soupe supplémentaire de farine au mélange pour compenser le volume perdu, mais ce n’est pas strictement nécessaire.
Quelle est la meilleure façon de réchauffer une part ?
Pour une texture optimale, réchauffez les parts individuelles dans un four à convection ou un four traditionnel préchauffé à 150°C pendant environ 10-15 minutes. Cela redonnera du croustillant au dessus et réchauffera la garniture sans la rendre détrempée. Le micro-ondes est rapide mais ramollira le crumble.
Est-ce que je peux utiliser d’autres fruits avec ce crumble ?
Ce crumble est incroyablement polyvalent ! Il est merveilleux sur une tarte aux pêches, aux cerises ou aux fruits rouges. Adaptez simplement la quantité de sucre dans la garniture aux fruits en fonction de la douceur du fruit choisi. Les miettes beurrées à la cannelle et aux noix de pécan se marient parfaitement avec presque tous les fruits cuits au four.
Comment savoir quand la tarte est vraiment cuite ?
Cherchez trois signes : 1) Le crumble est d’un brun doré profond. 2) La garniture bouillonne visiblement sur les bords à travers les miettes. 3) Plus fiable encore, un thermomètre instantané inséré au centre de la tarte (à travers le crumble dans les pommes) indique 80°C.
Mon crumble a coulé dans la garniture. Pourquoi ?
Cela arrive généralement si le crumble a été mélangé jusqu’à être trop fin et ressembler à de la pâte, ou si la garniture aux pommes était extrêmement humide lorsque les miettes ont été ajoutées. Assurez-vous que votre mélange de crumble soit grumeleux et non une pâte uniforme. Laissez également votre glaçage beurre-farine-sucre refroidir pendant une minute après la cuisson avant de le mélanger avec les pommes pour qu’il épaississe légèrement.
Une Dernière Part de Joie
Et voilà—ma Tarte aux Pommes Crumble Néerlandaise réconfortante et qui plaît à tous. C’est plus qu’un dessert ; c’est un câlin chaleureux dans une assiette, une raison de se réunir et un goût de tradition cosy. J’espère que cette recette deviendra un favori chéri dans votre maison, créant autant de doux souvenirs pour vous que pour ma famille. Maintenant, allez préchauffer ce four et lancez-vous. Votre cuisine va bientôt sentir incroyablement bon.
Equipment
- Moule à tarte de 23 cm
- Rouleau à pâtisserie
- Petite casserole
- Bols à mélanger
- Fouet
Ingrédients
- 1 pâte à tarte maison pâte à tarte Utilisez la moitié de ma recette de pâte à tarte préférée.
- 1021 g pommes Granny Smith Environ 6 moyennes.
- 1 c. à café cannelle en poudre
- 113 g beurre non salé
- 24 g farine tout usage
- 60 ml eau
- 200 g sucre granulé
- 120 g farine tout usage (pour le crumble)
- 50 g cassonade tassée
- 30 g sucre granulé (pour le crumble)
- 1 c. à café cannelle (pour le crumble)
- 1 c. à café sel
- 113 g beurre à température ambiante (pour le crumble)
- 60 g noix de pécan hachées
Instructions
- Préchauffez votre four à 190°C (375°F). Roulez la pâte à tarte en un cercle de 30 cm et placez-la dans un moule à tarte de 23 cm.
- Pelez, épépinez et coupez les pommes en tranches de 6 mm d'épaisseur. Mélangez-les avec la cannelle.
- Faites fondre le beurre dans une casserole moyenne, incorporez la farine, l'eau et le sucre, puis portez à ébullition et laissez mijoter pendant 3 minutes.
- Versez le mélange de pommes dans la croûte à tarte.
- Mélangez les ingrédients du crumble (farine, sucres, cannelle, sel et beurre) jusqu'à obtenir des miettes, puis incorporez les noix de pécan.
- Saupoudrez le mélange de crumble sur les pommes et enfournez pendant 50 à 60 minutes, jusqu'à ce que le dessus soit doré.
Notes
Nutrition

Je suis Céline, une véritable passionnée d’ustensiles et de matériel de cuisine ! J’adore tester, comparer et découvrir les meilleurs équipements pour rendre la cuisine plus efficace et agréable. Que ce soit un bon couteau, un robot performant ou une poêle incontournable, je suis toujours à la recherche des outils qui feront la différence. Mon but est de vous guider dans vos choix pour que vous ayez le bon matériel adapté à vos besoins.