
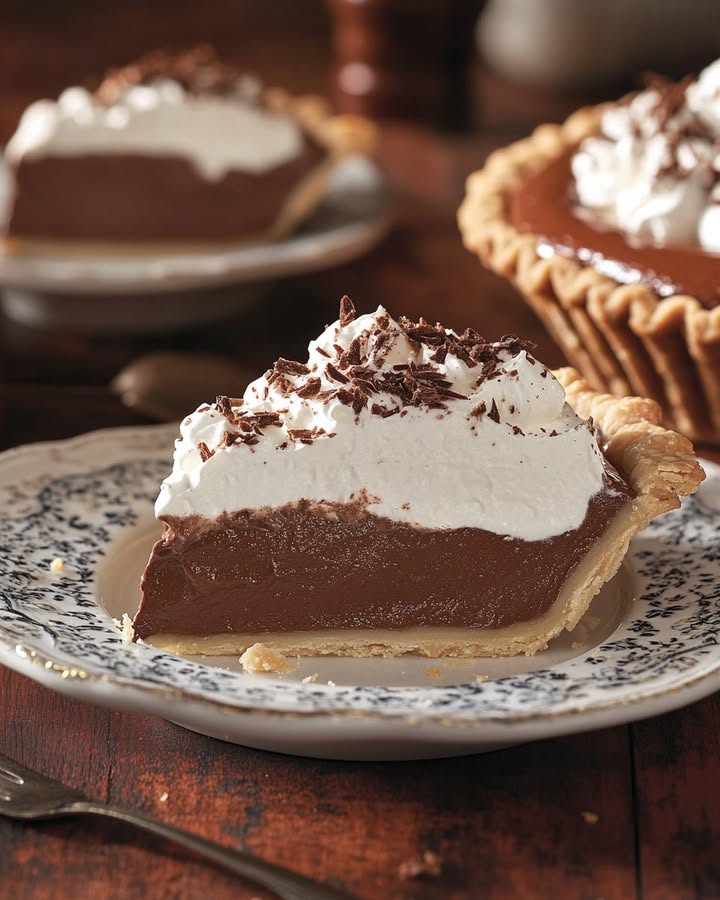
L’Appel Irrésistible de la Tarte au Chocolat Soie
Avez-vous déjà goûté à un nuage ? Un nuage de chocolat, pour être exacte. C’est la première pensée qui m’a traversé l’esprit au moment où ma fourchette a glissé dans la garniture incroyablement lisse de ma première Tarte au Chocolat Soie maison. Ce fut un coup de foudre. Ce n’était pas juste un dessert ; c’était une expérience. Un moment de joie pure et simple partagé avec ma famille, où le seul son audible était celui des soupirs heureux et satisfaits autour de la table. Aujourd’hui, j’ai pour mission d’apporter cette même magie dans votre cuisine. Oubliez les pâtisseries compliquées. Cette Tarte Chocolat Crémeuse est votre ticket pour devenir le héros incontesté du dessert à chaque rassemblement.
Une Part d’Histoire Gourmande
Les origines de la « French Silk Pie » sont merveilleusement américaines, malgré son nom chic. Elle a remporté le concours Pillsbury Bake-Off en 1951 ! Sa créatrice, Betty Cooper, a nommé sa texture lisse en référence à la soie fine. À l’époque, la recette utilisait des œufs crus. Ma version, que j’ai testée et ajustée pendant des années, cuit les œufs avec le sucre jusqu’à obtenir une consistance soyeuse et sûre. Cela crée une garniture luxueuse, semblable à une mousse, à la fois sûre et divine. C’est le mélange parfait entre tradition et bon sens culinaire moderne.
Pourquoi Vous Allez Tomber Amoureux de Cette Tarte Chocolat Crémeuse
Cette recette est une gagnante pour tant de raisons. Premièrement, la saveur est une pure extase chocolatée profonde, pas trop sucrée, parfaitement équilibrée par la croûte aux Oreo. Deuxièmement, même si elle demande un peu de patience (bonjour, le temps de réfrigération !), les étapes en elles-mêmes sont simples et amusantes. Pas besoin d’être un chef pâtissier. Enfin, elle est incroyablement impressionnante. Apporter cette tarte magnifique à table suscite toujours des exclamations de joie. C’est un dessert qui dit « Je tiens à vous » sans que vous ayez à prononcer un mot.
Quand Préparer Ce Dessert Rêvé
Cette tarte est votre arme secrète pour toute occasion qui mérite un « show-stopper ». C’est un incontournable pour les dîners de fêtes—les assiettes de Thanksgiving et de Noël la réclament. Elle transforme un simple barbecue d’été en un événement élégant. Anniversaires, fêtes des mères, ou simplement un mardi soir « comme ça » ? Tous les jours sont meilleurs avec une part de cette Tarte au Chocolat Soie. Elle rend un moment ordinaire extraordinairement spécial.
Rassemblez Vos Ingrédients
La qualité des ingrédients fait une grande différence ici, surtout pour le chocolat. Voici ce dont vous aurez besoin :
- Pour la croûte aux Oreo : 20 biscuits Oreo standards (230g) et 3 cuillères à soupe de beurre doux fondu.
- Pour la garniture chocolat soyeuse : Sucre en poudre (266g), 4 gros œufs, 225g de bon chocolat de couverture noir à pâtisser (fondu), 2 cuillères à café d’extrait de vanille, 140g de beurre doux ramolli, crème liquide entière froide (32 cl), et 4 cuillères à café de sucre glace.
- Pour la garniture aérienne : Encore 24 cl de crème liquide entière froide, 2 cuillères à soupe de sucre glace, 1 cuillère à café d’extrait de vanille, et des copeaux de chocolat ou de la poudre de cacao pour la décoration (facultatif).
Échanges Malins : Substitutions d’Ingrédients
Pas de panique si il vous manque quelque chose ! Voici quelques échanges faciles :
- Croûte aux Oreo : Utilisez n’importe quel biscuit sandwich au chocolat, ou faites une croûte classique avec des biscuits type « petit beurre » et de la poudre de cacao.
- Chocolat Noir : Un bon chocolat dessert fonctionne parfaitement aussi. Évitez juste les pépites de chocolat, qui contiennent des stabilisants.
- Crème Liquide Entière : Elle est essentielle pour monter la crème en chantilly. Il n’y a pas de substitut direct pour la bonne texture.
- Sans Laitiers : Utilisez du beurre végétal et une crème de coco riche en matière grasse, réfrigérée toute une nuit, pour les composants à fouetter.
Créer Votre Chef-d’œuvre : Étape par Étape
Étape 1 : Réaliser la Base Croquante Parfaite
Préchauffez d’abord votre four à 175°C (350°F). Vaporisez légèrement votre moule à tarte profond de 23 cm. Maintenant, la partie amusante : réduisez les Oreo en poudre fine dans un robot culinaire. L’odeur est déjà incroyable ! Versez le beurre fondu en filet et mixez par à-coups jusqu’à ce que le mélange ressemble à de la chapelure humide. Versez ce mélange parfumé dans votre moule à tarte. À l’aide du fond d’un verre, tassez fermement et uniformément sur le fond et sur tous les côtés. Enfournez pendant environ 10 minutes. Vous saurez que c’est prêt lorsque votre cuisine sentira la pâtisserie au chocolat. Laissez refroidir complètement—c’est crucial pour une base croustillante.
Étape 2 : Cuire la Fondation Chocolat Soie
Cette étape est le cœur de la sécurité et de la texture de la tarte. Dans une petite casserole, fouettez le sucre en poudre et les œufs jusqu’à ce qu’ils soient complètement combinés et d’un jaune pâle. Placez maintenant la casserole sur feu moyen-doux. Ce n’est pas le moment de s’éloigner ! Fouettez constamment et patiemment. Vous devez obtenir un mélange qui épaissit et atteint 71°C (160°F). Il doit napper le dos d’une cuillère. Cela pasteurise les œufs. Une fois prêt, retirez du feu et incorporez immédiatement votre chocolat fondu et la vanille en fouettant. Le mélange deviendra magnifiquement sombre et brillant. Laissez refroidir jusqu’à ce qu’il soit juste tiède au toucher, en remuant de temps en temps.
Astuce de pro : Utilisez un thermomètre digital pour une précision absolue. Pas de devinettes !
Étape 3 : Construire la Garniture Luxueuse
Dans un grand saladier, battez votre beurre à température ambiante avec un batteur électrique pendant 2-3 bonnes minutes. Vous voulez qu’il soit pâle, mousseux et presque monté. Maintenant, ajoutez lentement votre mélange chocolat refroidi au beurre. Une fois combiné, mettez le batteur sur vitesse élevée et laissez-le travailler pendant 5 minutes pleines. Observez la transformation en une mousse légère, couleur café, semblable à un nuage. Dans un autre saladier propre et froid, fouettez la crème liquide froide. Quand elle commence à épaissir, ajoutez le sucre glace et battez jusqu’à obtenir des pics fermes. Incorporez délicatement cette crème fouettée à la mousse au chocolat. Soyez patient et mélangez jusqu’à ce qu’il ne reste plus de traînée blanche. Versez cette garniture de rêve dans votre croûte refroidie et lissez le dessus.
Étape 4 : Le Repos Final et la Grande Finale
Patience, mon ami(e) ! Couvrez la tarte et laissez-la reposer au réfrigérateur pendant au moins 6 heures, ou mieux encore, toute une nuit. Cela permet à la garniture de prendre parfaitement et aux saveurs de se marier. Juste avant de servir, préparez la garniture. Fouettez la crème froide, le sucre glace et la vanille jusqu’à ce que les pics soient fermes. Empilez-la généreusement sur la tarte ! Décorez avec d’élégants copeaux de chocolat ou une délicate pluie de cacao en poudre. Le contraste entre la crème blanche et aérienne et la Tarte Chocolat Crémeuse sombre et profonde est tout simplement superbe.
Astuce du chef : Pour de superbes copeaux de chocolat, utilisez un économe sur une tablette de chocolat à température ambiante. C’est plus facile que ça en a l’air et cela ajoute une touche gourmande.
Votre Chronologie pour la Tarte
- Temps de Préparation : 30 minutes
- Temps de Cuisson : 10 minutes (pour la croûte)
- Temps de Repos : 6 heures (essentiel !)
- Temps Total : 6 heures 40 minutes
Le Secret de la Soie Ultime
Mon secret absolu ? Fouetter le mélange beurre-chocolat pendant les 5 minutes complètes. Ne précipitez pas cette étape ! Cela incorpore une tonne d’air, ce qui donne à la garniture cette texture légendairement légère, soyeuse, presque éthérée. C’est la différence entre une bonne tarte au chocolat et une Tarte au Chocolat Soie inoubliable.
Une Info Chocolatée Amusante
Saviez-vous que le « soie » du nom ne se réfère pas seulement à la texture ? Dans les années 1950, décrire un dessert comme « soyeux » était le plus grand compliment pour sa sensation en bouche luxueuse et lisse. Cela évoquait une élégance et un luxe que les pâtissiers amateurs adoraient. Aujourd’hui, nous recherchons toujours cette sensation parfaite qui fond dans la bouche.
Votre Kit d’Outils de Cuisine
Pas besoin de matériel sophistiqué ! Un moule à tarte profond de 23 cm est crucial. Vous aurez aussi besoin :
- D’un robot culinaire ou d’un mixeur pour la croûte
- D’une petite casserole et d’un fouet
- D’un thermomètre de cuisine digital (très recommandé)
- D’un batteur électrique à main ou d’un robot de cuisine
- De deux saladiers (un grand, un moyen)
- D’une spatule pour incorporer délicatement
Conserver Votre Part de Paradis
Couvrez la tarte hermétiquement avec du film alimentaire ou placez-la dans une boîte à gâteau. Elle se conservera parfaitement au réfrigérateur jusqu’à 3 jours. La croûte peut ramollir légèrement le deuxième jour, mais le goût sera toujours incroyable.
Oui, vous pouvez congeler cette tarte ! Enveloppez la tarte entière ou des parts individuelles très serrées dans du film alimentaire, puis dans du papier aluminium. Congelez jusqu’à 1 mois. Décongelez toute une nuit au réfrigérateur. Notez que la garniture à la crème chantilly peut « pleurer » un peu après décongélation, donc pour une meilleure présentation, ajoutez de la crème chantilly fraîche après décongélation.
Conservez toujours les tartes avec de la crème chantilly au réfrigérateur. Si vous la préparez à l’avance, vous pouvez faire la croûte et la garniture deux jours avant, puis ajouter la garniture à la crème chantilly fraîche quelques heures avant de servir.
Conseils Utiles pour la Perfection
- Assurez-vous que vos œufs sont frais et que votre beurre est vraiment à température ambiante pour une garniture ultra-lisse.
- Pour cuire le mélange œufs-sucre, la méthode douce et lente est la bonne. Se précipiter peut provoquer la formation de grumeaux.
- Utilisez un saladier en métal pour fouetter la crème et refroidissez-le au préalable pour des pics plus rapides et meilleurs.
- Si votre moule à tarte n’est pas « profond », vous pourriez avoir un peu trop de garniture. Considérez-vous comme béni(e) — dégustez-la à la cuillère !
Idées de Présentation pour Impressionner
- Créez un beau motif avec de la poudre de cacao à l’aide d’un pochoir ou d’une nappe en dentelle.
- Pochez la garniture à la crème chantilly avec une douille étoile pour un look de pâtisserie professionnelle.
- Servez avec des framboises fraîches ou un léger filet de coulis de framboise pour un contraste acidulé.
- Pour une fête, faites des mini-tartes dans un moule à muffins avec des croûtes aux Oreo—les portions individuelles font toujours fureur.
Vous Aimez Cette Tarte ? Essayez Ces Autres Merveilles Dessert
Si vous adorez les desserts qui se préparent à l’avance et qui ravissent les foules, vous êtes au bon endroit. Mon site est un véritable trésor d’idées sucrées. Pour un autre incroyable petit-déjeuner/préparé à l’avance devenu dessert, vous devez absolument essayer mon décadent Pain Perdu Crème Brûlée de Nuit. C’est à tomber par terre. Envie de combiner deux classiques ? Mon Cheesecake aux Roulés à la Cannelle est un succès viral pour une raison—c’est du pur réconfort. Pour une touche tropicale et acidulée, cette Mousse au Fruit de la Passion légère et rafraîchissante est parfaite après un gros repas. Et si vous vous sentez aventureux, mes Beignets à la Crème faits maison sont un projet amusant pour le week-end qui donne des résultats délicieux et moelleux.
Erreurs Courantes à Éviter
Erreur 1 : Ne Pas Cuire les Œufs Correctement
C’est la plus grande erreur en termes de sécurité et de texture. Mélanger simplement des œufs crus à la garniture est un risque et ne vous donnera pas la bonne consistance. Le sucre et les œufs doivent être cuits ensemble jusqu’à 71°C. Cette température pasteurise les œufs, les rendant sûrs à la consommation, et crée également la base épaisse et crémeuse essentielle à la structure de la tarte. Utilisez un thermomètre digital. Si vous n’en avez pas, cuisez jusqu’à ce que le mélange nappe le dos d’une cuillère et que vous puissiez y tracer un trait net avec votre doigt.
Erreur 2 : Ajouter le Chocolat Chaud au Beurre Froid
Si vous versez votre mélange chocolat encore chaud dans le beurre crémeux, vous obtiendrez probablement un mélange graisseux et séparé. La chaleur va faire fondre le beurre que vous venez de travailler si dur pour le rendre aérien. Laissez toujours refroidir le mélange chocolat-œufs jusqu’à ce qu’il soit juste tiède au toucher, et non chaud. Un bon test est d’en mettre un peu sur votre poignet ; cela doit être chaud mais pas inconfortable.
Erreur 3 : Sous-Fouetter la Garniture Finale
Ces 5 minutes de fouettage pour le mélange beurre-chocolat sont non négociables. C’est là que la « soie » se crée ! Sous-fouetter signifie que votre garniture sera plus dense et lourde, plus proche d’un ganache que d’une mousse aérienne. Réglez un minuteur et laissez le mixeur tourner à vitesse élevée. Vous verrez la couleur s’éclaircir et le volume augmenter considérablement, ce qui est exactement ce que vous voulez.
Erreur 4 : Lésiner sur le Temps de Repos
Je sais qu’il est tentant de raccourcir le temps de repos de 6 heures, mais résistez, s’il vous plaît ! Ce temps permet à la garniture de prendre fermement pour obtenir de belles parts nettes. Cela laisse aussi les saveurs se développer et se mélanger harmonieusement. La servir trop tôt peut donner une tarte liquide. Préparer la veille pour une perfection sans stress. Votre futur vous-même vous remerciera.
Questions Fréquemment Posées
Puis-je utiliser une croûte de biscuit toute faite ?
Absolument, pour un raccourci ! Une croûte de biscuit au chocolat du commerce fera l’affaire. Cependant, je trouve que le goût de la croûte aux Oreo maison, avec son chocolat profond et son léger salé, est bien supérieur et complète vraiment la garniture. Elle est aussi étonnamment facile à faire. Si vous utilisez une croûte toute faite, cherchez une version « profonde » et pré-cuisez-la à blanc selon les instructions de l’emballage pour un résultat plus croustillant.
Ma garniture semble un peu molle après le repos. Que s’est-il passé ?
Cela pointe généralement vers l’une de ces trois choses. Premièrement, le mélange œufs-sucre n’a peut-être pas été cuit jusqu’à une consistance assez épaisse. Deuxièmement, la crème fouettée peut avoir été sous-fouettée et s’être un peu dégonflée lors de l’incorporation. Troisièmement, le temps de repos a peut-être simplement besoin d’être plus long. Remettez-la au frigo quelques heures de plus. Si elle est encore trop molle, elle aura toujours un goût délicieux—servez-la simplement à la cuillère comme un parfait de mousse au chocolat !
Quel est le meilleur chocolat à utiliser pour la Tarte au Chocolat Soie ?
Utilisez une bonne tablette de chocolat de couverture à pâtisser, soit noir (environ 60-70% de cacao) soit dessert. Je préfère le chocolat noir car il équilibre parfaitement le sucre de la tarte. Évitez les pépites de chocolat, car elles contiennent des stabilisants comme la lécithine qui les empêchent de fondre aussi lisse. Un chocolat de qualité fait une différence notable dans la profondeur de saveur de votre Tarte Chocolat Crémeuse.
Puis-je faire cette tarte sans robot de cuisine ni batteur électrique ?
Techniquement oui, mais ce sera un sérieux entraînement pour les bras ! Les étapes cruciales de fouettage du beurre et de la crème sont beaucoup, beaucoup plus faciles avec des batteurs électriques. Vous devez incorporer beaucoup d’air pour obtenir la bonne texture. Pour les meilleurs résultats et pour sauver vos bras, je recommande vivement d’utiliser une forme de batteur électrique.
Combien de temps à l’avance puis-je préparer la tarte entière ?
Cette tarte est un dessert fantastique à préparer à l’avance. Vous pouvez assembler la tarte entière (y compris la garniture à la crème chantilly finale) jusqu’à un jour à l’avance. Gardez-la couverte au réfrigérateur. Si vous voulez la préparer encore plus tôt, faites la croûte et la garniture jusqu’à 2 jours à l’avance. Conservez-les séparément au frigo. Ensuite, ajoutez la garniture à la crème chantilly fraîche le jour où vous prévoyez de la servir pour une présentation plus jolie.
Est-ce sans danger pour les femmes enceintes ou les jeunes enfants ?
Parce que cette recette cuit le mélange œufs-sucre à 71°C, qui est la température recommandée pour tuer les bactéries potentielles comme la salmonelle, elle est considérée comme sûre. Cependant, si vous avez des inquiétudes concernant votre santé, il est toujours préférable de consulter votre médecin. Vous pouvez également utiliser des œufs pasteurisés pour une couche de sécurité supplémentaire si vous préférez.
Puis-je congeler la Tarte au Chocolat Soie ?
Oui, vous pouvez la congeler ! Je recommande de la congeler sans la garniture à la crème chantilly pour de meilleurs résultats. Enveloppez la tarte réfrigérée (juste la croûte garnie) très serrée dans du film alimentaire, puis dans du papier aluminium. Congelez jusqu’à 1 mois. Décongelez toute une nuit au réfrigérateur. La texture peut être légèrement plus dense après congélation, mais elle sera toujours délicieuse. Ajoutez de la crème chantilly fraîche juste avant de servir.
Ma crème chantilly est liquide ou ne forme pas de pics. Pourquoi ?
Cela est presque toujours dû au fait que la crème ou le saladier n’est pas assez froid. Assurez-vous que votre crème liquide entière est bien froide, sortie directement du frigo. Refroidissez votre saladier et vos batteurs au congélateur pendant 10-15 minutes avant de commencer. Assurez-vous aussi d’utiliser de la « crème liquide entière » ou « à fouetter », qui a une teneur en matière grasse élevée nécessaire pour fouetter. Évitez les crèmes « à fouetter » allégées ou moins riches.
Puis-je utiliser du chocolat au lait à la place du chocolat noir ?
Vous pouvez, mais la tarte sera beaucoup plus sucrée. Le chocolat au lait contient plus de sucre et de produits laitiers que le chocolat noir. Si vous adorez les desserts très sucrés, allez-y. Je recommanderais de réduire le sucre en poudre dans le mélange aux œufs de quelques cuillères à soupe pour équilibrer. Néanmoins, pour cette saveur classique et riche de Tarte au Chocolat Soie, le chocolat noir est le champion.
Que puis-je faire avec de la garniture restante ?
Chanceux(se) ! La garniture restante est un régal. Vous pouvez la verser dans de petits ramequins ou verrines et les réfrigérer pour des mousses au chocolat individuelles. Faites-en des couches avec de la crème chantilly et des biscuits écrasés pour un parfait rapide. Ou, simplement, prenez une cuillère et dégustez-la directement dans le bol—je ne dirai rien !
Prêt(e) pour Plus d’Inspiration Dessert ?
Si cette Tarte Chocolat Crémeuse a enflammé votre passion pour la pâtisserie, j’ai tellement plus à partager avec vous. Pour des centaines d’autres recettes sucrées éprouvées, des simples biscuits aux gâteaux à étages élaborés, explorez ma collection complète de gâteaux et pâtisseries. C’est votre guichet unique pour transformer les moments du quotidien en célébrations.
Le Mot Final, Délicieux
Cette Tarte au Chocolat Soie est plus qu’une simple recette. C’est une promesse de joie, une création qui rassemble les gens, et un témoignage de la magie qui opère dans une cuisine familiale. Elle est étonnamment simple mais offre un résultat à couper le souffle. Rappelez-vous, utiliser les meilleurs ingrédients possibles, comme un chocolat de haute qualité, n’améliore pas seulement la saveur mais peut aussi faire partie d’une approche attentive pour profiter de votre nourriture, contribuant à un meilleur sentiment global d’équilibre digestif et de bien-être. Alors, attachez votre tablier, mettez de la musique, et préparez-vous à faire de la magie. J’ai hâte que vous viviez le moment où vous prendrez cette première bouchée, soyeuse et chocolatée, et que vous voyiez les sourires illuminer la pièce. Bonne pâtisserie !
Equipment
- Robot ménager
- Petite casserole
- Fouet
- Batterie électrique
- Bol de mélange
Ingrédients
- 20 g Oreo cookies pour la croûte
- 3 cuillères à soupe beurre non salé pour la croûte
- 266 g sucre cristallisé pour la garniture
- 4 gros œufs pour la garniture
- 227 g chocolat noir de bonne qualité fondu, pour la garniture
- 2 cuillères à café extrait de vanille pour la garniture
- 142 g beurre non salé ramolli, pour la garniture
- 1 ⅓ tasse crème épaisse froide, pour la garniture
- 4 cuillères à café sucre en poudre pour la garniture
- 1 tasse crème épaisse froide, pour la garniture
- 2 cuillères à soupe sucre en poudre pour la garniture
- 1 cuillère à café extrait de vanille pour la garniture
Instructions
- Préchauffez votre four à 175°C (350°F) et vaporisez légèrement votre moule à tarte de 9 pouces.
- Réduisez les Oreo en poudre dans un robot ménager, puis ajoutez le beurre fondu et mélangez jusqu'à obtenir des miettes humides.
- Versez ce mélange dans le moule et pressez fermement au fond et sur les côtés. Faites cuire pendant 10 minutes, puis laissez refroidir complètement.
- Dans une casserole, fouettez le sucre et les œufs jusqu'à ce que le mélange soit de couleur jaune pâle, puis chauffez à feu moyen-doux en fouettant constamment jusqu'à atteindre 71°C (160°F).
- Retirez du feu et incorporez le chocolat fondu et la vanille, puis laissez refroidir jusqu'à ce que ce soit tiède.
- Dans un grand bol, battez le beurre avec un batteur électrique pendant 2 à 3 minutes jusqu'à ce qu'il soit léger et crémeux. Ajoutez le mélange de chocolat refroidi et battez à vitesse élevée pendant 5 minutes.
- Dans un autre bol, fouettez la crème jusqu'à obtenir des pics ferme, puis incorporez doucement à la mousse de chocolat jusqu'à ce qu'il n'y ait plus de traces blanches.
- Versez la garniture dans la croûte refroidie et lissez le dessus. Couvrez et laissez reposer au réfrigérateur pendant au moins 6 heures, ou mieux toute la nuit.
- Avant de servir, battez la crème avec le sucre en poudre et la vanille jusqu'à former des pics fermes, puis déposez-la sur la tarte. Garnissez de copeaux de chocolat ou de cacao en poudre.
Notes
Nutrition

Je suis Céline, une véritable passionnée d’ustensiles et de matériel de cuisine ! J’adore tester, comparer et découvrir les meilleurs équipements pour rendre la cuisine plus efficace et agréable. Que ce soit un bon couteau, un robot performant ou une poêle incontournable, je suis toujours à la recherche des outils qui feront la différence. Mon but est de vous guider dans vos choix pour que vous ayez le bon matériel adapté à vos besoins.