
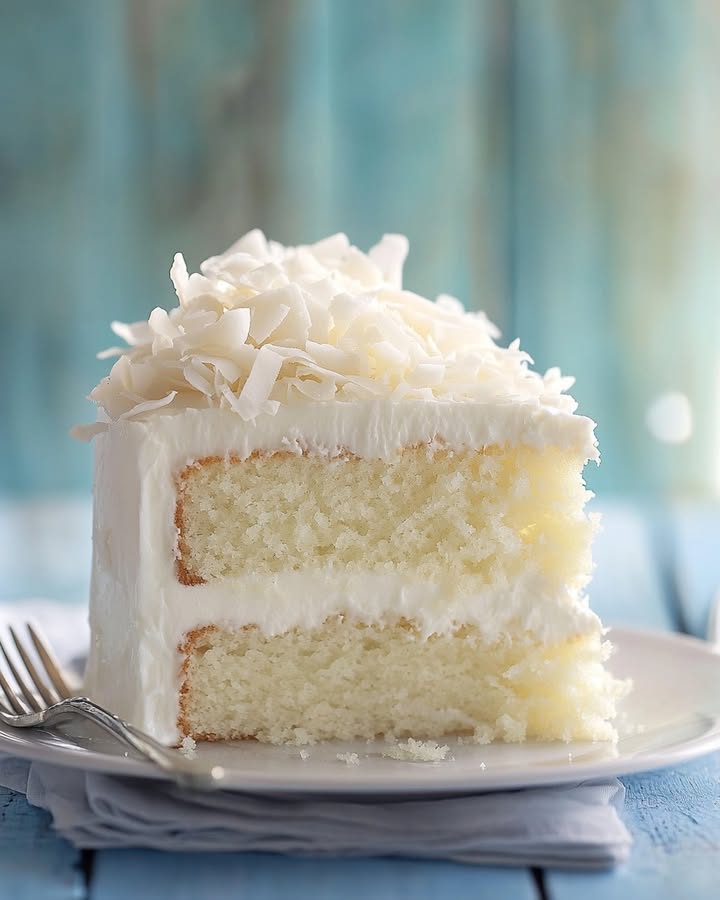
Votre Nouveau Dessert Préféré : Le Gâteau Coco Chocolat Blanc Céleste
Avez-vous déjà goûté un morceau de gâteau qui vous fait fermer les yeux et soupirer de plaisir ? C’est ce gâteau. Tout a commencé quand j’avais besoin d’un dessert spectaculaire pour la douche nuptiale de ma nièce. Je voulais quelque chose d’élégant, de tropical et d’incontestablement délicieux. Après de nombreux (et délicieux) essais, ce Gâteau Coco Chocolat est né. C’est le gâteau dont on me demande la recette à chaque fois que je le sers. Les étages moelleux, le glaçage crémeux et cette texture parfaite de la noix de coco toastée… c’est du bonheur pur dans une assiette.
L’Histoire de Ce Gâteau Coco Chocolat
Ce gâteau est ma déclaration d’amour aux saveurs classiques, avec une touche de luxe. Si les gâteaux à la noix de coco ont des racines dans de nombreuses cultures tropicales, l’ajout du chocolat blanc a été mon propre moment « Eurêka ! ». Je me souviens de ma grand-mère qui faisait un simple cake à la noix de coco, qui était merveilleux. Mais je rêvais de quelque chose de plus décadent pour les réunions modernes. Le chocolat blanc n’ajoute pas seulement de la douceur ; il fond dans la mie, créant des poches de richesse crémeuse qui équilibrent parfaitement la noix de coco râpée. C’est un beau mélange de tradition et d’un peu de magie culinaire.
Pourquoi Vous Allez Tomber Amoureux de Ce Gâteau
Vous allez adorer cette recette parce qu’elle fonctionne. La texture est incroyablement douce et moelleuse, jamais sèche. La saveur est complexe – beurrée, sucrée et tropicale – et pourtant, elle est étonnamment facile à réaliser. La pâte est indulgente et le glaçage est un rêve à étaler. Que vous soyez un pâtissier expérimenté ou que vous tentiez votre premier gâteau à étages, cette recette vous guidera vers le succès. De plus, cette magnifique couverture neigeuse de noix de coco cache toutes les imperfections, ce qui vous donne l’air d’un(e) vrai(e) pro !
Les Occasions Parfaites pour Ce Gâteau Coco Chocolat Blanc
Ce gâteau transforme n’importe quel événement en célébration. Il est parfait pour les anniversaires de printemps, les brunchs de la Fête des Mères, ou comme dessert de Pâcles éblouissant. Je l’ai servi à des douches de bébé (il se marie parfaitement avec un ruban bleu ou rose !) et comme grand final lors de barbecues d’été. C’est aussi une merveilleuse façon d’apporter un goût de soleil à un repas-partage en hiver. Honnêtement, tous les jours qui nécessitent un peu de joie supplémentaire sont le bon jour pour ce Gâteau Coco Chocolat.
Ce Dont Vous Aurez Besoin : La Liste des Ingrédients
Rassemblez ces ingrédients simples pour un gâteau parfait :
- Pour le Gâteau :
- 2 tasses et demie de farine tout usage
- 1 ½ cuillère à café de poudre à pâte
- ½ cuillère à café de bicarbonate de soude
- ½ cuillère à café de sel
- 1 tasse de beurre non salé, à température ambiante
- 2 tasses de sucre granulé
- 4 gros œufs
- 1 cuillère à café d’extrait de vanille
- 1 tasse de babeurre (lait ribot)
- 1 tasse de noix de coco râpée (sucrée)
- 1 tasse de pépites de chocolat blanc
- Pour le Glaçage :
- 1 tasse de beurre non salé, à température ambiante
- 4 tasses de sucre glace
- ¼ de tasse de crème épaisse
- 1 cuillère à café d’extrait de vanille
- 1 tasse de noix de coco râpée (pour l’enrobage)
Substitutions d’Ingrédients Astucieuses
Pas de babeurre ? Pas de problème ! Faites le vôtre en ajoutant 1 cuillère à soupe de jus de citron ou de vinaigre blanc à une tasse de lait. Laissez reposer pendant 5 minutes. À court de pépites de chocolat blanc ? Des barres de chocolat blanc hachées fonctionnent très bien. Pour une saveur plus noisettée, toastez la noix de coco râpée avant de l’incorporer. Si vous voulez une option sans produits laitiers, utilisez de l’huile de coco à la place du beurre et du lait de coco entier pour remplacer le babeurre et la crème. Le gâteau sera un peu plus dense mais toujours délicieux.
Comment Réaliser Votre Gâteau Coco Chocolat Blanc Céleste : Étape par Étape
Étape 1 : Préparez Vos Moules et Votre Four
D’abord, préchauffez votre four à 350 °F (175 °C). Cela garantit une belle levée. Pendant qu’il chauffe, préparez vos trois moules à gâteau ronds de 20 cm. J’adore utiliser un pinceau à pâtisserie pour les enduire de beurre ramolli, en insistant dans tous les coins. Ensuite, ajoutez une cuillerée de farine dans chaque moule, inclinez et tapotez jusqu’à ce qu’ils soient bien enrobés, puis secouez l’excédent. Cette méthode « beurrer et fariner » est votre meilleure assurance pour des gâteaux qui se démoulent parfaitement. Garnir le fond des moules avec des cercles de papier sulfurisé est une astuce de pro pour un résultat parfait.
Étape 2 : Mélangez Vos Ingrédients Secs
Prenez un bol moyen et votre fidèle fouet. Mesurez votre farine, votre poudre à pâte, votre bicarbonate de soude et votre sel. Fouettez-les ensemble pendant une bonne minute. Il ne s’agit pas seulement de mélanger ; c’est aussi aérer la farine et s’assurer que les agents levant sont uniformément répartis. Vous verrez le mélange devenir léger et uniforme. Préparer ce bol à l’avance vous permet d’être organisé(e) et prêt(e) pour les étapes suivantes sans chercher frénétiquement vos ingrédients. Un peu de préparation rend le processus de cuisson tellement plus fluide.
Étape 3 : Crémez le Beurre et le Sucre
Cette étape est cruciale pour la texture légère du gâteau. Dans un grand bol, battez ensemble le beurre à température ambiante et le sucre granulé. Utilisez un batteur électrique à vitesse moyenne. Battez pendant 3 à 5 minutes jusqu’à ce que le mélange soit très pâle et aéré. Il doit ressembler à un nuage crémeux. Ensuite, ajoutez vos œufs un par un, en battant bien après chaque addition. Écoutez le changement de son à chaque fois qu’un œuf est incorporé. Enfin, mélangez l’extrait de vanille, remplissant votre cuisine de cette odeur chaude et réconfortante.
Étape 4 : Alternez les Ingrédients Secs et Liquides
Maintenant, rassemblez tout. Avec votre batteur sur vitesse basse, ajoutez environ un tiers de votre mélange de farine. Mélangez jusqu’à ce qu’il soit juste combiné – quelques stries de farine sont acceptables. Ensuite, versez la moitié du babeurre. La pâte peut sembler un peu caillée ; c’est normal ! Continuez à alterner, en terminant par le dernier tiers des ingrédients secs. Astuce de pro : Arrêtez de mélanger dès que la dernière strie de farine disparaît. Trop mélanger à ce stade rend le gâteau caoutchouteux.
Étape 5 : Incorporez les Trésors
C’est la partie amusante ! Saupoudrez la noix de coco râpée et les pépites de chocolat blanc sur la pâte. À l’aide d’une grande spatule en silicone, incorporez-les délicatement. Utilisez un mouvement ample, en partant du fond du bol et en remontant par-dessus. Vous voulez répartir la noix de coco et les pépites uniformément sans dégonfler tout l’air délicieux que vous venez de battre dans la pâte. La pâte sera épaisse et tachetée de blanc – elle est déjà céleste.
Étape 6 : Cuisez Jusqu’à Perfection Dorée
Divisez la pâte uniformément entre vos trois moules préparés. Une balance de cuisine est l’outil le plus précis pour cela, ou vous pouvez utiliser une grande cuillère à biscuits. Lissez les surfaces avec votre spatule. Placez-les au centre de votre four préchauffé. Faites cuire pendant 25 à aware 30 minutes. Vous saurez qu’ils sont prêts lorsque le dessus est élastique au toucher, que les bords se détachent du moule et qu’un cure-dent inséré au centre en ressorte propre ou avec quelques miettes humides. L’odeur sera incroyable !
Étape 7 : Refroidissez les Étages du Gâteau
Résistez à l’envie de glacer des gâteaux chauds ! Laissez les moules refroidir sur une grille pendant exactement 10 minutes. Cela permet aux gâteaux de se raffermir juste assez. Ensuite, passez un couteau fin autour des bords pour les détacher. Placez une grille sur un moule, retournez-le et retirez délicatement le moule. Si vous avez utilisé du papier sulfurisé, retirez-le maintenant. Laissez les gâteaux refroidir complètement sur les grilles. La patience ici est essentielle pour un gâteau qui ne fera pas fondre votre glaçage.
Étape 8 : Préparez le Glaçage
Pendant que les gâteaux refroidissent, préparez le glaçage. Dans un bol propre, battez le beurre à température ambiante jusqu’à ce qu’il soit très crémeux et presque blanc. Ajoutez graduellement le sucre glace, environ une tasse à la fois, en mélangeant d’abord à vitesse basse pour éviter un nuage de sucre ! Une fois incorporé, ajoutez la crème épaisse et la vanille. Maintenant, augmentez la vitesse du batteur (moyenne à élevée) et battez pendant 2 à 3 minutes. Regardez-le se transformer en un glaçage au beurre léger, aérien et facile à étaler. Goûtez-le — vous savez que vous en avez envie !
Étape 9 : Assemblez et Glacez le Gâteau
Placez votre premier étage de gâteau sur une assiette de service ou un présentoir à gâteau. Déposez une quantité généreuse de glaçage sur le dessus et étalez-le jusqu’aux bords avec une spatule coudée. Répétez avec le deuxième étage. Posez le troisième étage par-dessus. Maintenant, appliquez une fine couche de « glaçage de masquage » (crumb coat) sur tout le gâteau pour emprisonner les miettes. Mettez au frais pendant 15 minutes, puis appliquez votre couche finale, épaisse et magnifique, de glaçage. Lissez les côtés et faites des volutes sur le dessus.
Étape 10 : La Finition à la Noix de Coco
Versez votre tasse restante de noix de coco râpée dans une assiette à tarte ou un bol peu profond. Tenez votre gâteau au-dessus (ou faites-vous aider !). Appuyez doucement des poignées de noix de coco sur le glaçage, en travaillant sur les côtés et en recouvrant le dessus. Ne vous contentez pas de saupoudrer — appuyez légèrement pour qu’elle adhère. Vous obtiendrez un magnifique chef-d’œuvre blanc neige et texturé. Astuce du chef : Pour plus de saveur et de couleur, toastez la moitié de cette noix de coco jusqu’à ce qu’elle soit dorée avant de l’appliquer. Cela ajoute une merveilleuse texture croquante et noisettée !
Votre Chronologie de Préparation
Temps de préparation : 20 minutes de travail actif. Temps de cuisson : 30 minutes. Temps de refroidissement : 1 heure (c’est crucial !). Glaçage & assemblage : 20 minutes. Temps total : Environ 2 heures 10 minutes du début à la belle finition. Cela donne 12 généreuses parts de pur bonheur.
Un Secret de Ma Cuisine
Mon arme secrète est un simple pinceau à sirop. Après le refroidissement des étages du gâteau, je les badigeonne parfois d’un sirop léger fait avec ¼ de tasse de lait de coco et 1 cuillère à soupe de sucre, chauffés jusqu’à dissolution. Cela ajoute une couche supplémentaire d’humidité et de saveur de noix de coco qui rend le gâteau incroyablement fondant et le garde frais pendant des jours.
Une Douce Information
Saviez-vous que le type de gras dans la noix de coco est unique ? Bien qu’elle soit riche en graisses saturées, une grande partie est sous forme de triglycérides à chaîne moyenne (TCM). Certaines recherches, comme celles soulignées par des ressources sur les acides gras essentiels et la nutrition, suggèrent que notre corps pourrait traiter les TCM différemment des autres graisses saturées. C’est une fascinante touche de science derrière l’une de nos saveurs préférées !
Les Outils Dont Vous Aurez Besoin
- Trois moules à gâteau ronds de 20 cm
- Batteur électrique à main ou sur pied
- Bol à mélanger (grand et moyen)
- Fouet et spatule en silicone
- Tasses et cuillères à mesurer
- Grilles de refroidissement
- Spatule coudée pour le glaçage
- Cure-dent ou sonde à gâteau
Conservation de Votre Chef-d’œuvre
En raison du glaçage au beurre, ce gâteau doit être conservé au réfrigérateur. Placez-le dans une boîte à gâteau ou couvrez-le légèrement d’un dôme ou d’une feuille d’aluminium chiffonnée pour qu’elle ne touche pas le dessus en noix de coco. Il restera frais et délicieux jusqu’à 5 jours.
Pour une conservation plus longue, vous pouvez congeler les étages non glacés individuellement. Enveloppez chaque étage refroidi hermétiquement dans deux couches de film alimentaire, puis dans une couche de papier d’aluminium. Ils peuvent être congelés jusqu’à 2 mois. Décongelez-les une nuit au réfrigérateur avant de les glacer.
Le gâteau glacé peut également être congelé entier jusqu’à un mois. Congelez-le découvert sur l’assiette jusqu’à ce que le glaçage soit très ferme, puis enveloppez-le hermétiquement dans plusieurs couches de film alimentaire. Décongelez au réfrigérateur une nuit.
Astuces pour le Meilleur Gâteau Coco Chocolat
- Tous les ingrédients, en particulier les œufs et le babeurre, doivent être à température ambiante pour une pâte lisse et bien émulsifiée.
- Ne mesurez pas trop votre farine. Utilisez une cuillère pour la mettre dans la tasse à mesurer et nivelez-la avec un couteau.
- Si votre cuisine est chaude, mettez le glaçage au frais pendant 10 minutes avant de l’assembler s’il vous semble trop mou.
- Pour des tranches nettes, trempez votre couteau dans de l’eau chaude et essuyez-le entre chaque coupe.
Idées de Présentation pour Épater Vos Invités
- Decorez avec des baies fraîches comme des framboises ou des fleurs comestibles pour une touche de couleur.
- Versez un peu de chocolat blanc fondu en volutes artistiques sur la noix de coco.
- Servez chaque part avec une quenelle de crème chantilly et une pincée de noix de coco toastée.
- Placez le gâteau sur un beau présentoir et entourez-le de bougies chauffe-plat pour un centre de table de fête.
Vous Aimez Ce Gâteau ? Essayez Ces Variations !
Si vous avez aimé cette recette, vous serez enchanté(e) d’explorer d’autres gourmandises décadentes. Pour un dessert amusant et facile à prendre, vous devez essayer ces Roulés S’mores Gourmands – ils sont un succès auprès des enfants comme des adultes. Les amoureux des baies seront enchantés par un superbe Gâteau aux Mûres multi-étages au citron vert et au glaçage luxuriant. Quand vous avez besoin du succès ultime auprès des invités, un Délicieux Gâteau « Meilleur que Tout » au chocolat, caramel et toffee est pure magie. Et pour un classique adoré, rien ne vaut un moelleux Délice de Gâteau aux Carottes épicé avec son glaçage crémeux.
- Extase Citron-Coco : Ajoutez le zeste de deux citrons dans la pâte à gâteau et utilisez du jus de citron à la place de la vanille dans le glaçage pour une touche tropicale et acidulée.
- Coco aux Amandes Toastées : Incorporez ¾ de tasse d’amandes finement hachées et toastées dans la pâte avec la noix de coco et utilisez de l’extrait d’amande à la place de la vanille.
- Gâteau Piña Colada : Remplacez ½ tasse de babeurre par du jus d’ananas en conserve. Ajoutez ½ tasse d’ananas écrasé bien égoutté à la pâte.
- Marbré au Chocolat Noir : Faites fondre ½ tasse de pépites de chocolat noir et marbrez-la dans la pâte dans les moules avec un couteau avant cuisson pour un effet marbré.
- Garniture Mangue-Fruit de la Passion : Divisez la recette du glaçage. Utilisez la moitié entre les étages mélangée à une réduction de purée de mangue et de fruit de la passion pour une surprise tropicale au centre.
- Version Sans Gluten & Sans Lactose : Utilisez un mélange de farine sans gluten 1:1, du beurre et du chocolat blanc sans lactose, et de la crème de coco dans le glaçage. C’est tout aussi délicieux !
Erreurs Courantes à Éviter
Erreur 1 : Utiliser des Ingrédients Froids
Le beurre, les œufs et le babeurre sortis directement du frigo sont une recette pour un gâteau dense. Le beurre froid ne se crèmera pas correctement avec le sucre, et les ingrédients froids peuvent faire séparer ou cailler la pâte. Cela conduit à une cuisson inégale et une texture lourde. Anticipez toujours. Sortez vos ingrédients au moins une heure avant de commencer. Votre beurre doit être assez mou pour que votre doigt laisse une empreinte nette avec une pression légère.
Erreur 2 : Trop Mélanger la Pâte
Une fois que vous avez ajouté la farine, le compte à rebours commence. Trop mélanger développe le gluten dans la farine, ce qui est génial pour le pain mais terrible pour un gâteau. Cela rend le gâteau caoutchouteux, moelleux et peut le faire monter puis retomber dans le four. Mélangez à vitesse basse et seulement jusqu’à ce que la dernière strie de farine disparaisse. Ce n’est pas grave si la pâte a quelques petits grumeaux – ils disparaîtront à la cuisson.
Erreur 3 : Mal Préparer les Moules à Gâteau
Beurrer le moule ne suffit pas. Vous devez absolument le fariner ou utiliser du papier sulfurisé. Sans cette étape, vos beaux étages de gâteau risquent de coller et de se déchirer quand vous tenterez de les démouler. Rien n’est plus décourageant ! Prenez la minute supplémentaire pour beurrer, fariner et secouer l’excédent. Pour un succès garanti, ajoutez un cercle de papier sulfurisé au fond de chaque moule après avoir beurré.
Erreur 4 : Glacer un Gâteau Encore Tiede
L’impatience est l’ennemie d’un beau gâteau. Si les étages sont même légèrement tièdes, le glaçage au beurre fondra au contact. Vous obtiendrez un désordre gluant et glissant, et les miettes du gâteau se mélangeront à votre glaçage, gâchant cette finition lisse et blanche. Laissez les étages refroidir complètement dans les moules pendant 10 minutes, puis sur une grille jusqu’à ce qu’ils soient vraiment à température ambiante. Cela peut prendre une bonne heure.
Questions Fréquemment Posées
Puis-je faire des cupcakes avec cette recette ?
Absolument ! Cette pâte fait des cupcakes fantastiques. Garnissez des moules à muffins de caissettes en papier et remplissez-les aux deux tiers environ. Cuisez à la même température (350 °F/175 °C) pendant 18 à 22 minutes, ou jusqu’à ce qu’un cure-dent ressorte propre. Vous devriez obtenir environ 24 à 28 cupcakes. Glacez-les avec le même glaçage au beurre et roulez le dessus dans la noix de coco. Ils sont parfaits pour les fêtes et les pique-niques où les portions individuelles sont plus pratiques.
Pourquoi utilise-t-on du babeurre ? Quel est son rôle ?
Le babeurre est un ingrédient star en pâtisserie. Son acidité réagit avec le bicarbonate de soude dans la recette, créant de minuscules bulles de dioxyde de carbone. Cette réaction donne au gâteau une levée supplémentaire, le rendant incroyablement léger et tendre. L’acidité aide aussi à briser les brins de gluten, contribuant encore à une mie douce. Enfin, le babeurre ajoute une légère touche d’acidité qui équilibre la douceur du chocolat blanc et du sucre, créant un profil de saveur plus complexe et délicieux.
Ma noix de coco râpée ne colle pas au glaçage. Que puis-je faire ?
Cela signifie généralement que le glaçage a formé une petite « peau » ou croûte. Pour corriger cela, vaporisez légèrement le gâteau glacé avec un vaporisateur d’eau – juste une fine brume. L’humidité légère aidera la noix de coco à adhérer. Alternativement, vous pouvez appliquer la noix de coco immédiatement après avoir mis la couche finale de glaçage, pendant qu’il est encore très frais et collant. Si vous êtes dans un climat sec, travailler rapidement est la clé. Appuyer doucement pendant l’application fait aussi une grande différence.
Puis-je préparer ce gâteau la veille ?
Oui, et c’est même une excellente idée ! Cuire les étages un jour à l’avance peut améliorer la saveur et les rendre plus faciles à manipuler. Une fois complètement refroidis, enveloppez chaque étage hermétiquement dans du film alimentaire et conservez-les à température ambiante pendant la nuit. Préparez le glaçage et assemblez le gâteau le jour où vous prévoyez de le servir. Vous pouvez même assembler le gâteau entier la veille ; il suffit de le conserver couvert au réfrigérateur. Laissez-le à température ambiante pendant environ une heure avant de servir pour la meilleure texture et saveur.
Puis-je utiliser de la noix de coco déshydratée au lieu de râpée ?
Vous pouvez, mais la texture sera différente. La noix de coco râpée est plus longue, plus humide et souvent sucrée, donnant au gâteau une texture plus consistante et un bel aspect visuel. La noix de coco déshydratée est très fine, sèche et généralement non sucrée. Elle fonctionnera dans la pâte mais absorbera plus d’humidité. Pour l’enrobage, la noix de coco déshydratée donnera une texture plus fine, semblable à du sable. Je recommande de rester sur la noix de coco râpée pour l’aspect et la sensation classiques de ce Gâteau Coco Chocolat.
Comment empêcher mes pépites de chocolat blanc de couler au fond ?
C’est un problème courant ! L’astuce est de les enrober légèrement dans une cuillère à soupe ou deux de la farine mesurée avant de les incorporer à la pâte. Mélangez simplement les pépites (et même la noix de coco râpée) dans la farine réservée jusqu’à ce qu’elles aient une fine poussière. Cette minuscule couche de farine aide à les suspendre dans la pâte, de sorte qu’elles se répartissent uniformément dans les étages du gâteau au lieu de toutes couler au fond pendant la cuisson.
Y a-t-il un moyen de rendre le glaçage moins sucré ?
Le glaçage au beurre est intrinsèquement sucré, mais vous pouvez l’équilibrer. Utiliser un beurre de style européen de haute qualité avec une teneur en gras plus élevée (environ 82%) donne un goût plus riche et moins écœurant. Vous pouvez aussi ajouter une petite pincée de sel au glaçage – cela rehausse la saveur et coupe le sucré. Une autre option est d’utiliser la moitié de la quantité de sucre glace et d’épaissir le glaçage avec 4 à 6 onces de fromage à la crème ramolli, ajouté avec le beurre. Cela crée une variation glaçage au fromage à la crème qui se marie magnifiquement avec la noix de coco.
Mes étages de gâteau sont bombés au milieu. Comment obtenir des surfaces plates ?
Le bombement est normal mais peut rendre l’empilage délicat. Pour le minimiser, assurez-vous que la température de votre four est précise avec un thermomètre de four. Vous pouvez aussi utiliser des bandes de cuisson uniforme (bake-even strips) – des bandes de tissu que vous trempez dans l’eau et enroulez autour de l’extérieur des moules à gâteau. Cela isole les bords, pour que le gâteau cuise plus uniformément. Si vous avez toujours un dôme, utilisez simplement un long couteau à pain pour couper soigneusement le dessus arrondi une fois les gâteaux complètement froids. Cela crée une surface parfaitement plane pour l’empilage.
Puis-je utiliser un moule de taille différente ?
Oui, mais vous devrez ajuster le temps de cuisson. Pour un gâteau rectangulaire classique de 23 x 33 cm (9×13 pouces), beurrez et farinez le moule et versez-y toute la pâte. Cuisez à la même température, mais commencez à vérifier la cuisson vers 35 à 40 minutes. Pour deux moules ronds de 23 cm, les étages seront légèrement plus fins, donc vérifiez à 22-25 minutes. Utilisez toujours le test du cure-dent comme guide final. Le gâteau est cuit quand il ressorte propre ou avec quelques miettes humides attachées.
Quelle est la meilleure façon de couper ce gâteau proprement ?
Pour des tranches dignes d’une photo, utilisez un long couteau à lame fine. Passez-le sous l’eau très chaude pendant 10 secondes, puis essuyez-le complètement avec un torchon propre. Le couteau tiède glissera à travers le glaçage et les étages du gâteau sans accrocher ni déchirer. Faites votre coupe en un mouvement sûr et fluide. Nettoyez la lame et réchauffez-la pour chaque tranche. Cette méthode vous donne de belles couches nettes dans chaque part servie.
Prêt(e) à Pâtisser Encore Plus de Joie ?
J’espère que ce Gâteau Coco Chocolat Blanc Céleste deviendra une star dans votre maison comme il l’est dans la mienne. Le processus de cuisson est tout aussi joyeux que celui de le partager. Souvenez-vous, le meilleur ingrédient est toujours l’amour que vous remuez dans le bol. Si vous cherchez plus d’inspiration pour satisfaire votre envie de sucré, je vous invite à explorer tout un monde d’idées délicieuses dans notre collection de gâteaux et pâtisseries. Bonne pâtisserie, et n’oubliez pas de vous garder une part !
Equipment
- Mixeur électrique ou mélangeur sur socle
- 3 Moules ronds de 20 cm Beurrez et farinez les moules.
- Bols de mélange Un grand et un moyen.
- Spatule en silicone
- Grilles de refroidissement
Ingrédients
- 312 g farine tout usage
- 1.5 c.c levure chimique
- 0.5 c.c bicarbonate de soude
- 0.5 c.c sel
- 226 g beurre non salé à température ambiante
- 400 g sucre cristallisé
- 4 grands œufs
- 1 c.c extrait de vanille
- 240 ml lait fermenté
- 100 g noix de coco râpée sucrée
- 170 g pépites de chocolat blanc
Instructions
- Préchauffez le four à 175°C (350°F) et préparez trois moules ronds de 20 cm en les beurrant et farinant.
- Dans un bol moyen, mélangez la farine, la levure, le bicarbonate et le sel. Réservez.
- Dans un grand bol, battez le beurre et le sucre jusqu'à obtenir un mélange léger et crémeux, puis ajoutez les œufs un à un et l'extrait de vanille.
- Alternez l'ajout des ingrédients secs et du lait fermenté dans le mélange crémeux, en terminant par les ingrédients secs.
- Incorporez délicatement la noix de coco râpée et les pépites de chocolat blanc.
- Répartissez la pâte dans les moules préparés et faites cuire au four pendant 25-30 minutes.
- Laissez refroidir les gâteaux dans les moules pendant 10 minutes, puis démoulez sur des grilles pour refroidir complètement.
- Pendant ce temps, préparez le glaçage en battant le beurre jusqu'à consistance crémeuse, puis incorporez le sucre en poudre, la crème et la vanille.
- Associez les couches de gâteaux avec le glaçage, puis recouvrez entièrement le gâteau d'une couche finale.
- Recouvrez le gâteau de noix de coco râpée pour une finition décorative.
Notes
Nutrition

Je suis Céline, une véritable passionnée d’ustensiles et de matériel de cuisine ! J’adore tester, comparer et découvrir les meilleurs équipements pour rendre la cuisine plus efficace et agréable. Que ce soit un bon couteau, un robot performant ou une poêle incontournable, je suis toujours à la recherche des outils qui feront la différence. Mon but est de vous guider dans vos choix pour que vous ayez le bon matériel adapté à vos besoins.