
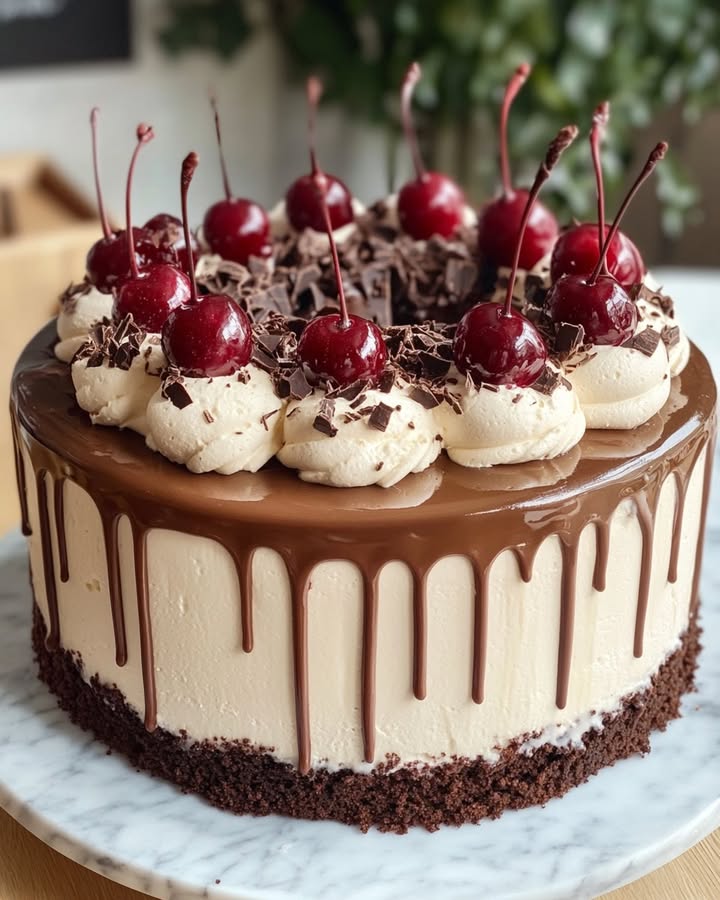
Gâteau Glacé Cerise Chocolat Élégant : Mon Nouveau Dessert de Fête Préféré
Y a-t-il quelque chose de plus joyeux qu’un dessert parfait ? Je me souviens encore de la première fois où j’ai servi ce Gâteau Glacé Cerise Chocolat. C’était pour l’anniversaire de ma nièce. Le soleil brillait, le barbecue fumait, et je voulais quelque chose de frais, spectaculaire et absolument délicieux. Je voulais un moment « waouh ». Laissez-moi vous dire, ce gâteau a tenu ses promesses. Ce n’est pas juste un dessert ; c’est une expérience. La glace à la cerise soyeuse, les éclats sucrés de fruits frais, le croquant des pépites de chocolat, et cette croûte sablée… c’est de l’élégance glacée pure dans une tranche.
La Douce Histoire derrière le Gâteau Glacé
L’idée d’un gâteau glacé, ou gâteau glacé, semble à la fois classique et moderne. Bien que je n’aie pas de recette de famille pour ce gâteau exact, son esprit vient des vieilles tourtes à la glace et de l’amour très français pour les desserts élégants et fruités. J’ai combiné le confort simple d’un sundae à la glace avec la sophistication d’un vrai gâteau. Ce Gâteau Glacé Cerise Chocolat est ma propre version — un chef-d’œuvre sans cuisson qui honore le pic de la saison des cerises. Il est traditionnel dans sa célébration d’ingrédients simples et bons, mais totalement moderne par sa facilité et son look magnifique.
Pourquoi Vous Allez Tomber Amoureux de ce Gâteau Cerise Chocolat
Cette recette est un vrai succès pour tant de raisons ! D’abord, elle est incroyablement facile. Aucun talent de pâtissier pro n’est requis. Ensuite, c’est un rêve de préparation à l’avance. Vous faites le travail des heures avant l’arrivée de vos invités, puis il suffit de le sortir et de le décorer. Troisièmement, et le plus important, la combinaison de saveurs est magique. Le côté acidulé-doux des cerises danse parfaitement avec le chocolat riche et la glace onctueuse. C’est léger mais gourmand, rafraîchissant mais décadent. Tout le monde, des enfants aux grands-parents, en redemande.
Les Occasions Parfaites pour Votre Gâteau Glacé
Ce gâteau est merveilleusement polyvalent. C’est mon choix pour :
- Les Célébrations d’Été : Anniversaires, barbecues, garden-parties. Il défie la chaleur !
- Les Dîners Élégants : Il a l’air bien plus élaboré qu’il ne l’est, impressionnant tous les invités.
- Les Repas Partagés : Il voyage bien au congélateur et est toujours le premier plat à disparaître.
- Pour le Plaisir : Parfois, un mardi soir mérite un dessert spectaculaire.
Ingrédients pour Votre Chef-d’Œuvre Cerise Chocolat
Voici ce dont vous aurez besoin. Des ingrédients simples et de qualité font toute la différence.
Pour la Croûte :
- 1 tasse et demie de miettes de biscuits graham (environ 12 biscuits)
- ⅓ de tasse de sucre en poudre
- 6 c.à.s de beurre non salé, fondu
Pour la Garniture :
- 1 pot (environ 500ml) de glace à la cerise de qualité, ramollie
- 1 tasse de cerises fraîches, dénoyautées et coupées en deux
- ½ tasse de mini pépites de chocolat noir
- 1 tasse de crème fleurette, fouettée en pics souples
Pour la Décoration :
- ½ tasse de cerises fraîches, dénoyautées et coupées en deux
- ¼ de tasse de mini pépites de chocolat
- ¼ de tasse de sauce au chocolat de qualité
Idées de Substitutions Pratiques
Pas de souci s’il vous manque quelque chose ! La cuisine, c’est de la créativité.
- Biscuits Graham : Des biscuits digestifs ou des boudoirs fonctionnent très bien.
- Glace à la Cerise : De la stracciatella (vanille avec éclats de chocolat) ou de la glace à la vanille avec ½ tasse de confiture de cerises mélangée sont d’excellents substituts.
- Cerises Fraîches : En hiver, utilisez des cerises surgelées dénoyautées de qualité. Décongelez-les et épongez-les très soigneusement.
- Pépites de Chocolat : Hachez une tablette de chocolat noir pour une touche de chocolat plus intense et rustique.
Préparons ce Gâteau Glacé Cerise Chocolat Élégant !
Suivez ces étapes simples pour un résultat magnifique et sans stress.
Étape 1 : Réaliser la Croûte Sablée
Commencez par préchauffer votre four à 180°C (350°F). Dans un bol moyen, mélangez les miettes de biscuits et le sucre. Versez le beurre fondu, doré. L’odeur est déjà divine ! Mélangez avec une fourchette jusqu’à ce que chaque miette soit enrobée et que le mélange se tienne quand on le presse. Il devrait ressembler à du sable humide et brillant. Tassez fermement et uniformément ce mélange au fond et sur les côtés d’un moule à tarte de 23 cm (9 pouces). J’utilise le fond d’un verre doseur pour le rendre bien compact. Enfournez pendant 8 à 10 minutes jusqu’à ce qu’il soit parfumé et juste légèrement plus foncé. Laissez-le refroidir complètement sur une grille. Une croûte froide évite que la glace ne fonde au contact.
Astuce de pro : Pour une croûte plus ferme qui se tient bien à la découpe, faites-la cuire pendant les 10 minutes complètes.
Étape 2 : Créer la Garniture Rêveuse Cerise Chocolat
Sortez votre glace à la cerise du congélateur environ 10 à 15 minutes avant de l’utiliser. Vous la voulez assez molle pour être mélangée, pas liquide. Dans un grand bol, incorporez délicatement la glace ramollie avec les moitiés de cerises fraîches, d’un rouge rubis, et les mini pépites de chocolat. Regardez la glace rose vif se parsemer de chocolat noir et de fruits éclatants. C’est si joli ! Une fois combiné, déposez cette garniture magnifique dans votre croûte refroidie. Étalez-la uniformément avec une spatule. Maintenant, couvrez le moule hermétiquement avec du film alimentaire et glissez-le au congélateur. La patience est clé ici — laissez-le congeler pendant au moins 4 heures, ou toute une nuit c’est encore mieux.
Astuce du chef : Pour des tranches nettes et belles, congelez le gâteau jusqu’à ce qu’il soit très ferme, comme une brique.
Étape 3 : Le Grand Final : Décorer Votre Gâteau
C’est la partie amusante ! Juste avant de servir, fouettez la crème fleurette jusqu’à l’obtention de pics souples. Sortez votre gâteau congelé, dur comme un roc, du congélateur. Disposez la crème fouettée légère en tasse sur le dessus, créant de jolis mouvements et volutes. Maintenant, disposez artistiquement les cerises fraîches restantes et parsemez les mini pépites de chocolat sur la crème blanche. Le contraste est saisissant. Enfin, prenez votre sauce au chocolat et versez-la en filets élégants ou en zig-zag joueur. La sauce va durcir légèrement sur la crème froide, créant une texture délicieuse.
Étape 4 : Découper, Servir et Savourer !
Passez un couteau bien aiguisé sous l’eau chaude et séchez-le rapidement pour trancher proprement le gâteau glacé. Sortez une part parfaite. Vous verrez toutes les belles couches : la croûte dorée, la glace tachetée de rose, le nuage de crème et le filet brillant de chocolat. Servez immédiatement et écoutez les soupirs de bonheur. Chaque bouchée est une harmonie parfaite de crémeux, de croquant, de fruité et de chocolaté.
Votre Calendrier pour Réussir
- Temps de Préparation : 20 minutes (travail actif et amusant !)
- Temps de Congélation : Au minimum 4 heures (parfait pour préparer à l’avance)
- Temps Total : 4 heures 20 minutes
- Nombre de Parts : 8 personnes heureuses
Mon Secret pour le Gâteau Glacé Parfait
L’astuce la plus importante est le contrôle de la température. Votre glace doit être juste assez ramollie pour être mélangée, mais votre croûte doit être complètement froide, et la congélation finale doit être absolument solide. Cela garantit des couches nettes et une texture de dégustation parfaite — onctueuse, pas glacée.
Un Petit Fait sur la Cerise à Partager
Saviez-vous qu’il existe plus de 1 000 variétés de cerises ? Pour ce gâteau, j’adore utiliser des cerises Bing ou des cerises douces Chelan pour leur couleur profonde et leur douceur juteuse. Choisir des cerises mûres et de saison élève vraiment ce dessert de très bon à extraordinaire.
Ce dont Vous Aurez Besoin dans Votre Cuisine
- Moule à tarte de 23 cm (métal ou céramique)
- Bol(s) de mélange (moyen et grand)
- Verres et cuillères doseurs
- Fourchette et spatule
- Fouet électrique ou batteur pour la crème
- Film alimentaire
Conserver Votre Chef-d’Œuvre Surgelé
Ce gâteau est fait pour le congélateur ! Une fois décoré, il est préférable de le servir immédiatement. Si vous avez des restes (un événement rare chez moi !), couvrez le moule à tarte hermétiquement avec du film alimentaire ou du papier aluminium. Il se conservera parfaitement jusqu’à 2 semaines.
Pour servir les parts restantes, laissez-les à température ambiante pendant seulement 5 à 7 minutes pour qu’elles ramollissent légèrement. Cela les rend plus faciles à manger et révèle toute la saveur de la glace.
Je ne recommande pas de recongeler un gâteau complètement décongelé, car la texture peut devenir glacée. Il est si délicieux que je suis sûre que vous n’aurez pas à vous en inquiéter !
Mes Meilleurs Conseils et Astuces
- Pour dénoyauter facilement, utilisez un dénoyauteur ou la méthode de la baguette chinoise : poussez la baguette à travers la cerise par le côté pédoncule pour faire sortir le noyau.
- Si votre glace devient trop molle pendant le mélange, remettez le bol au congélateur pendant 10 minutes pour le raffermir avant d’étaler.
- Vous voulez une croûte plus riche ? Ajoutez 2 cuillères à soupe de cacao en poudre au mélange de biscuits.
Idées de Présentation pour Impressionner Vos Invités
- Servez chaque part sur une assiette réfrigérée avec un filet supplémentaire de sauce au chocolat et une seule cerise parfaite sur le dessus.
- Décorez avec des feuilles de menthe fraîche pour une touche de couleur verte.
- Pour une note festive, saupoudrez de poussière d’or comestible ou de vermicelles colorés.
- Servez avec un petit biscotti croquant à côté pour plus de texture.
6 Délicieuses Variantes à Essayer
Vous aimez cette idée ? Voici d’autres façons de profiter de la magie des gâteaux glacés et des desserts délicieux.
1. Classique pour les Amoureux du Chocolat : Remplacez la glace à la cerise par de la glace au chocolat et utilisez une croûte aux biscuits chocolatés. Parsemez de copeaux de chocolat. Pour l’expérience chocolat ultime, essayez ma recette de Gâteau au Chocolat de Matilda, moelleux et profond.
2. Tourbillon Café-Caramel : Utilisez de la glace au café, une croûte de biscuits avec du café instantané mélangé, et parsemez de pépites de caramel croquantes.
3. Explosion de Baies : Utilisez de la glace aux fruits rouges et des framboises et myrtilles fraîches au lieu des cerises. Une version estivale et lumineuse.
4. Évasion Tropicale : Glace à la noix de coco avec une croûte aux noix de macadamia, garnie de copeaux de noix de coco toastés et de tranches de mangue.
5. Caramel Salé et Bretzel : Utilisez de la glace à la vanille, une croûte salée au bretzel, et faites couler de la sauce caramel salé dans la préparation.
6. Agrume Élégant : Pour une option cuite sophistiquée, la combinaison de mon Cheesecake Chocolat-Orange fait toujours l’unanimité. Ou, pour un classique réconfortant et douillet, rien ne vaut un bol chaud de mon Riz au Lait Facile à l’Ancienne.
Erreurs Courantes à Éviter
Erreur 1 : Utiliser de la Glace Fondue et Liquide
C’est tentant de passer la glace au micro-ondes pour la ramollir vite. Cela donne un mélange fondu et aqueux qui va recongeler en glaces et dur. Sortez plutôt la glace du congélateur et laissez-la sur le comptoir pendant 10-15 minutes. Elle doit être malléable et molle, mais tenir sa forme. Si elle commence à fondre, remettez-la simplement au congélateur quelques minutes pour la raffermir.
Erreur 2 : Tasser la Croûte Encore Chaude dans le Moule
Si vous tassez le mélange de miettes dans le moule juste après l’avoir mélangé avec le beurre chaud, il peut devenir gras et ne pas se tenir aussi bien. Laissez le beurre fondu refroidir une minute ou deux avant de mélanger. Et laissez toujours la croûte cuite refroidir complètement avant d’ajouter la glace. Une croûte chaude commencera immédiatement à faire fondre votre garniture.
Erreur 3 : Sauter la Longue Congélation
L’impatience est l’ennemie d’un parfait gâteau glacé ! Quatre heures est le minimum. Le congeler toute une nuit est idéal. Cela garantit que la garniture à la glace est gelée solidement partout, ce qui permet des tranches propres et belles et la texture parfaite, crémeuse mais ferme. Une part brouillonne et fondue est souvent le résultat d’un temps de congélation insuffisant.
Erreur 4 : Trop Mélanger la Garniture
Quand vous incorporez les cerises et les pépites dans la glace, soyez doux ! Un mélange vigoureux fera fondre la glace plus vite et peut écraser les cerises fraîches, donnant à la garniture une couleur boueuse peu appétissante. Utilisez une grande spatule et incorporez juste jusqu’à ce que tout soit réparti uniformément. Quelques stries, c’est OK.
Un Petit Mot sur la Qualité des Ingrédients
Utiliser des ingrédients frais et de qualité rend chaque dessert meilleur. J’essaye toujours de me procurer des cerises mûres et de saison pour la saveur la plus vive. Pour plus de bons conseils sur le choix et la manipulation des ingrédients pour des repas sûrs et délicieux, les ressources fiables en sécurité alimentaire peuvent être très utiles.
Questions Fréquemment Posées (FAQ)
Puis-je faire ce gâteau à l’avance ?
Absolument ! C’est une de ses meilleures caractéristiques. Vous pouvez assembler le gâteau (couche de glace seulement) jusqu’à deux semaines à l’avance. Enveloppez-le bien et congelez-le. Ensuite, juste avant de servir, ajoutez la crème fouettée et les garnitures finales. C’est parfait pour recevoir sans stress.
Que puis-je utiliser à la place des biscuits Graham ?
Beaucoup de biscuits fonctionnent bien. Les biscuits digestifs sont un choix fantastique. Vous pourriez aussi utiliser des boudoirs, des sablés ou même des biscuits chocolatés pour une saveur différente. Assurez-vous simplement d’avoir environ 1 tasse et demie de miettes fines après les avoir réduits en miettes.
Ma glace est trop dure pour mélanger. Que dois-je faire ?
Si votre glace est dure comme un roc, laissez-la dans le réfrigérateur pendant 20-30 minutes au lieu de la laisser sur le comptoir. Le réfrigérateur permet un ramollissement plus doux et uniforme qui empêche les bords de fondre pendant que le centre reste dur.
Puis-je utiliser des cerises surgelées ?
Oui, vous pouvez. C’est une excellente option toute l’année. Décongelez complètement les cerises surgelées dans une passoire au-dessus d’un bol pour récupérer le jus. Ensuite, épongez-les très soigneusement avec du papier absorbant. L’excès d’eau formerait des cristaux de glace dans votre gâteau.
Comment obtenir une tranche parfaite et nette ?
Utilisez un couteau bien aiguisé à lame fine. Passez-le sous l’eau très chaude quelques secondes, essuyez-le avec un torchon, puis effectuez une coupe lisse et assurée. Essuyez et réchauffez le couteau entre chaque tranche pour des parts impeccables à chaque fois.
Dois-je cuire la croûte ?
Vous n’êtes pas obligé, mais je le recommande vivement. Cuire la croûte pendant 8 à 10 minutes aide à la fixer et lui donne une saveur grillée et noisettée qui contraste merveilleusement avec la garniture froide. Une croûte non cuite peut être un peu friable et avoir un goût de farine crue.
Puis-je utiliser un moule à charnière au lieu d’un moule à tarte ?
Oui, un moule à charnière de 23 cm (9 pouces) fonctionne très bien et peut donner une présentation très élégante. Veillez simplement à emballer le fond du moule dans du film alimentaire avant l’assemblage pour éviter toute fuite au congélateur.
Quelle est la meilleure façon de ramollir la glace ?
La méthode la plus sûre est celle du plan de travail : sortez la glace 10-15 minutes avant de l’utiliser. Si vous êtes pressé, vous pouvez passer le pot entier (sans couvercle) au micro-ondes à faible puissance par impulsions de 10 secondes, en vérifiant après chaque impulsion. Mais soyez très prudent, car elle fond vite !
Puis-je utiliser de la crème chantilly en bombe au lieu de la vraie crème fouettée ?
Vous pouvez, mais la vraie crème fouettée a un bien meilleur goût et n’a pas cet arrière-goût artificiel. Pour fouetter votre propre crème, ajoutez simplement une cuillère à soupe de sucre glace et un filet d’extrait de vanille à votre crème fleurette avant de la fouetter. C’est simple et tellement meilleur.
Combien de temps les restes se conservent-ils au congélateur ?
Le gâteau restant, bien emballé, gardera sa meilleure qualité pendant environ 2 semaines au congélateur. Après cela, il pourrait commencer à se dessécher ou la texture pourrait se dégrader légèrement. Mais honnêtement, il est si bon qu’il dure rarement plus de quelques jours !
J’espère que cette recette apportera autant de joie à votre table qu’à la mienne. C’est un merveilleux ajout à toute collection de recettes de gâteaux et pâtisseries préférées.
Dernières Pensées
Ce Gâteau Glacé Cerise Chocolat Élégant est plus qu’une simple recette. C’est un peu de magie que vous pouvez créer dans votre propre cuisine. C’est la joie d’une friandise fraîche par une chaude journée, la fierté de présenter un dessert éblouissant, et le simple plaisir de partager quelque chose de délicieux avec les gens qu’on aime. Alors attrapez ces cerises, ramollissez cette glace, et préparez-vous à recevoir des compliments. Bonne pâtisserie — ou devrais-je dire, bonne congélation !
Equipment
- Plat à tarte de 23 cm (9 pouces)
- Bols à mélanger (moyen et grand)
- Tasses et cuillères à mesurer
- Fourchette et spatule
- Batteur électrique ou fouet
Ingrédients
- 1.5 tasses de miettes de biscuits Graham environ 12 biscuits entiers
- 1/3 tasse sucre granulé
- 6 cuillères à soupe beurre non salé fondu
- 1 pinte glace à la cerise de haute qualité, ramollie
- 1 tasse cerises fraîches dénoyautées et coupées en deux
- 1/2 tasse mini pépites de chocolat semi-sucré
- 1 tasse crème épaisse fouettée en pics souples
- 1/2 tasse cerises fraîches dénoyautées et coupées en deux (pour le dessus)
- 1/4 tasse mini pépites de chocolat (pour le dessus)
- 1/4 tasse sauce au chocolat de bonne qualité (pour le dessus)
Instructions
- Préchauffez votre four à 175°C (350°F).
- Dans un bol moyen, mélangez les miettes de biscuits Graham et le sucre.
- Incorporez le beurre fondu au mélange de biscuits et mélangez jusqu'à ce que les miettes soient bien enrobées.
- Pressez fermement ce mélange dans le fond et sur les côtés d'un plat à tarte de 23 cm (9 pouces).
- Faites cuire 8 à 10 minutes jusqu'à ce que le croûte soit légèrement dorée. Laissez refroidir complètement.
- Sortez la glace à la cerise du congélateur 10-15 minutes avant de l'utiliser pour qu'elle ramollisse.
- Dans un grand bol, incorporez délicatement la glace ramollie avec les cerises coupées en deux et les pépites de chocolat.
- Versez le mélange sur la croûte refroidie et étalez uniformément.
- Couvrez le plat avec du film plastique et placez-le au congélateur pendant au moins 4 heures, ou toute la nuit.
- Juste avant de servir, fouettez la crème épaisse jusqu'à ce qu'elle forme des pics souples.
- Sortez le gâteau du congélateur, ajoutez la crème fouettée sur le dessus et décorez avec les cerises, les pépites de chocolat et la sauce au chocolat.
- Pour servir, passez un couteau sous l'eau chaude et essuyez-le, puis découpez de belles parts.
Notes
Nutrition

Je suis Céline, une véritable passionnée d’ustensiles et de matériel de cuisine ! J’adore tester, comparer et découvrir les meilleurs équipements pour rendre la cuisine plus efficace et agréable. Que ce soit un bon couteau, un robot performant ou une poêle incontournable, je suis toujours à la recherche des outils qui feront la différence. Mon but est de vous guider dans vos choix pour que vous ayez le bon matériel adapté à vos besoins.