
Ma quête du parfait Gâteau Forêt Noire
Vous connaissez ce sentiment quand vous trouvez un dessert qui fait tomber le silence ? La fourchette touche l’assiette, les yeux se ferment, et quelqu’un soupire : « C’est incroyable. » C’est ça, la magie d’un bon Gâteau Forêt Noire. Ce n’est pas juste un gâteau au chocolat. C’est une histoire dans chaque bouchée : une génoise au chocolat légère, des nuages de crème sucrée, et la petite touche acidulée des cerises. Je me souviens avoir tenté de le faire il y a des années pour un anniversaire. Il était un peu de travers, et la crème était… molle. Mais la joie sur le visage de ma famille ? C’est ce qui m’a accrochée. Aujourd’hui, je partage ma recette parfaite et infaillible pour ce classique. Cuisinons un souvenir ensemble.
Une part d’histoire : le récit du Gâteau Forêt Noire
Le Gâteau Forêt Noire, ou ‘Schwarzwälder Kirschtorte’, est originaire de la région allemande de la Forêt-Noire. Son nom vient du kirsch (eau-de-vie de cerise) distillée à partir des griottes de la région. La version traditionnelle est une affaire sérieuse : des couches de génoise au chocolat imbibées de kirsch, de crème chantilly et de cerises. Avec le temps, il a voyagé à travers le monde et s’est installé dans les cuisines familiales. Certaines versions utilisent de l’alcool, d’autres préfèrent juste le jus. Ma version reste fidèle à l’esprit — décadente, fruitée et joliment stratifiée — mais est accessible à tout cuisinier à la maison. C’est un gâteau de fête qui ne se démode jamais.
Pourquoi vous allez absolument adorer cette recette
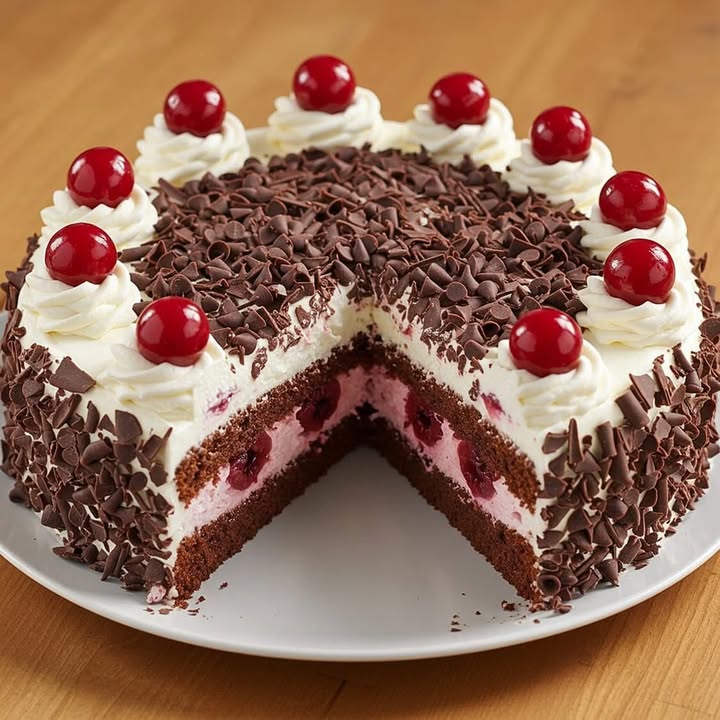
Cette recette est un classique pour tant de raisons. D’abord, le gâteau lui-même est incroyablement léger et aéré, grâce aux œufs battus. Il absorbe les saveurs à merveille sans devenir détrempé. Ensuite, c’est un véritable spectacle visuel. Le contraste entre le gâteau foncé, la crème blanche et les cerises rouges est sublime. Mais le meilleur ? Il est étonnamment simple à assembler. Vous faites cuire trois couches fines, vous fouettez la crème, et vous empilez le tout. Le résultat a le goût d’un gâteau de pâtisserie haut de gamme, comme si vous y aviez passé la journée. C’est mon choix numéro un pour impressionner les invités sans stress.
Les occasions parfaites pour votre Gâteau Forêt Noire
Ce gâteau transforme n’importe quel jour en célébration. Il est parfait pour les anniversaires, les anniversaires de mariage ou les fêtes comme Noël. J’adore le préparer pour un jardin-party d’été — les cerises sont de saison et c’est très festif. C’est aussi un choix fabuleux pour le dessert d’un dîner entre amis. Vous pouvez le préparer à l’avance, laissant les saveurs se marier au frigo. Il suffit de le sortir, d’ajouter les dernières frisures de chocolat, et de voir les yeux de vos invités s’illuminer. C’est plus qu’un dessert ; c’est le grand final que tout le monde attend.
Les ingrédients dont vous aurez besoin pour votre Gâteau Forêt Noire
Préparer votre *mise en place* rend tout plus fluide. Voici ce qu’il vous faut pour ce magnifique gâteau.
Pour la génoise au chocolat :
- 8 gros œufs, à température ambiante
- 300 g de sucre en poudre
- 200 g de farine tout usage
- 50 g de cacao non sucré (amer)
Pour la garniture & la décoration :
- 500 ml de crème fleurette très froide (min. 30% de MG)
- 425 g de sucre glace
- 1 cuillère à café d’extrait pur de vanille
- Environ 500 g de griottes en bocaux ou fraîches dénoyautées (plus leur jus)
- 300 g de chocolat mi-amer, pour râper ou faire des copeaux
- Liqueur de cerise, brandy ou le jus des cerises (facultatif, pour imbiber)
Substitutions intelligentes : remplacements d’ingrédients
Ne vous inquiétez pas s’il vous manque quelque chose ! La pâtisserie est flexible.
- Cerises : Pas de cerises fraîches ? Utilisez des griottes en bocaux de qualité, dans leur sirop. Égouttez-les et gardez le sirop pour imbiber les couches de gâteau.
- Alcool : Pour une version sans alcool, imbibez simplement les couches avec le sirop sucré du bocal de cerises. Cela ajoute une humidité et une saveur merveilleuses.
- Chocolat : Le chocolat mi-amer est idéal, mais le chocolat noir (70%) fonctionne très bien pour une saveur plus intense. Vous pouvez aussi utiliser des copeaux de chocolat à la place du chocolat râpé.
- Farine : Pour une version sans gluten, utilisez un bon mélange de farine sans gluten « 1 pour 1 ». La texture sera un peu plus dense mais toujours délicieuse.
Comment réaliser votre propre Gâteau Forêt Noire : étape par étape
Suivez ces étapes avec soin pour un gâteau impeccable et impressionnant. C’est parti !
Étape 1 : Créer la génoise au chocolat parfaite
Préchauffez d’abord votre four à 180°C. Beurrez et légèrement farinez trois moules ronds de 20 cm de diamètre. Maintenant, prenez vos œufs et votre sucre à température ambiante. À l’aide d’un batteur sur socle ou d’un fouet électrique, battez-les ensemble pendant 8 à 10 minutes. Vous recherchez ce stade magique du « ruban ». Quand vous soulevez les fouets, le mélange doit retomber dans le bol en un ruban épais qui garde sa forme quelques secondes. Cela incorpore de l’air, pour un gâteau magnifiquement léger. Tamisez ensemble la farine et le cacao — cela évite les grumeaux. Ensuite, incorporez-les délicatement au mélange d’œufs à l’aide d’une spatule. Utilisez des mouvements grands, enveloppants et doux pour préserver tout cet air précieux. Répartissez la pâte équitablement dans vos trois moules.
Étape 2 : Cuisson et refroidissement des couches
Placez les moules au centre de votre four préchauffé. Faites cuire environ 15 à 18 minutes. Les gâteaux sont cuits quand ils rebondissent légèrement sous le doigt et qu’un cure-dent inséré au centre en ressort propre. Astuce pro : Évitez d’ouvrir la porte du four trop tôt, un courant d’air peut faire retomber les gâteaux. Une fois cuits, laissez-les refroidir dans leurs moules 5 minutes. Passez ensuite un couteau autour des bords et démoulez-les sur une grille pour qu’ils refroidissent complètement. Des couches de gâteau chaud feraient fondre votre crème, alors la patience est de mise !
Étape 3 : Monter la crème vanillée onctueuse
Pour cette étape, tout doit être froid. Mettez votre bol et vos fouets au congélateur pendant 10 minutes. Versez la crème fleurette bien froide dans le bol froid. Ajoutez l’extrait de vanille et le sucre glace tamisé. Commencez à fouetter à vitesse basse, puis augmentez progressivement jusqu’à haute vitesse. Observez la crème se transformer de liquide en pics mous, puis enfin en pics fermes. Vous saurez qu’elle est prête quand vous pourrez retourner le bol (brièvement !) sans que rien ne bouge. Ce nuage crémeux et sucré est ce qui tiendra votre Gâteau Forêt Noire.
Étape 4 : Assembler votre chef-d’œuvre
C’est la partie amusante ! Placez votre première couche de gâteau sur votre plat de service. Si vous l’utilisez, badigeonnez légèrement la surface avec la liqueur de cerise ou le jus de cerise réservé. Cela ajoute une incroyable humidité et une touche de saveur subtile. Étalez une couche généreuse et uniforme de votre crème fouettée sur le gâteau. Ensuite, placez une poignée de cerises uniformément sur la crème. Appuyez doucement votre deuxième couche de gâteau par-dessus et répétez le processus : badigeonner, crème, cerises. Terminez avec la dernière couche de gâteau. Maintenant, utilisez le reste de la crème pour recouvrir le dessus et les côtés du gâteau entier. Ne vous inquiétez pas pour un aspect parfaitement lisse — c’est un dessert rustique et magnifique.
Étape 5 : La touche finale : la décoration
Maintenant, rendons-le magnifique. Prenez votre chocolat mi-amer. S’il s’agit d’une tablette, utilisez un économe pour créer de jolis copeaux de chocolat. Ou vous pouvez le râper finement. Pressez délicatement les copeaux de chocolat sur les côtés du gâteau. Ajoutez-en quelques-uns de plus sur le dessus. Enfin, disposez artistiquement vos cerises restantes au centre du gâteau. Astuce du chef : Pour plus de brillance, vous pouvez badigeonner les cerises d’un peu de confiture d’abricots chauffée. Elles brillent alors comme des bijoux.
Étape 6 : La patience jusqu’à la perfection
L’étape la plus difficile vient ensuite : l’attente. Transférez soigneusement votre Gâteau Forêt Noire terminé au réfrigérateur. Laissez-le refroidir pendant au moins 4 heures, mais idéalement toute la nuit. Ce temps de repos est non négociable. Il permet aux couches de gâteau de s’attendrir grâce au jus et à la crème, aux saveurs de se marier à merveille, et à l’ensemble de prendre fermement. Quand vous le découperez, vous aurez des strates nettes et belles. Servez-le frais, et préparez-vous aux compliments !
Votre planning pour le Gâteau Forêt Noire
Bien cuisiner, c’est savoir planifier. Voici un guide rapide de votre emploi du temps.
- Temps de préparation : 40 minutes
- Temps de cuisson : 18 minutes
- Temps de refroidissement : 1 heure
- Temps de repos au frais : 4 heures (minimum)
- Temps total : Environ 6 heures (surtout du repos au frais)
Le secret unique pour un gâteau léger comme l’air
Les œufs à température ambiante changent tout. Les œufs froids ne montent pas au même volume incroyable. Sortez vos œufs du frigo au moins une heure avant de commencer. Si vous êtes pressé, placez-les dans un bol d’eau tiède (pas chaude) pendant 10 minutes. Les battre avec le sucre jusqu’à ce qu’ils soient vraiment épais et pâles, c’est ce qui crée cette texture professionnelle de génoise que vous adorez dans un parfait Gâteau Forêt Noire.
Un fait savoureux sur les cerises
Saviez-vous que l’appellation authentique « Gâteau Forêt Noire » est protégée en Allemagne ? Pour qu’un gâteau y soit étiqueté « Schwarzwälder Kirschtorte », il doit contenir du kirsch (eau-de-vie de cerise) de la région de la Forêt-Noire. Si on peut prendre des libertés à la maison, c’est un clin d’œil amusant à la tradition qui inspire ce beau dessert.
Checklist du matériel
Pas besoin d’outils sophistiqués, juste l’essentiel :
- 3 moules à gâteau ronds de 20 cm de diamètre
- Batteur sur socle ou fouets électriques manuels
- Grands bols à mélanger
- Passoire fine (pour tamiser)
- Spatule souple
- Grille de refroidissement
- Porte-gâteau ou assiette plate
- Économe ou râpe (pour le chocolat)
Comment conserver votre Gâteau Forêt Noire
À cause de la crème fraîche, ce gâteau doit être conservé au réfrigérateur. Couvrez-le légèrement d’un dôme ou placez-le dans un grand contenant hermétique. Cela l’empêche d’absorber les odeurs du frigo et garde la crème fraîche.
Il sera à son meilleur dans les 2 à 3 jours. Les couches de gâteau continueront à s’attendrir, rendant chaque part encore plus délicieuse. Si vous devez le conserver plus longtemps, vous pouvez le congeler.
Pour congeler, placez le gâteau assemblé mais non décoré (sans les cerises fraîches sur le dessus) au congélateur jusqu’à ce qu’il soit dur. Ensuite, enveloppez-le bien dans plusieurs couches de film étirable et de papier aluminium. Il peut être congelé jusqu’à un mois. Décongelez-le une nuit au réfrigérateur et décorez-le avec de la crème fraîche et des cerises avant de servir.
Mes meilleurs conseils pour réussir
- Pesez vos ingrédients. La pâtisserie est une science, et utiliser une balance de cuisine pour la farine, le sucre et le cacao garantit une texture parfaite à chaque fois.
- Refroidissez votre crème, votre bol et vos fouets. Des outils froids sont le secret d’une crème qui tient sa forme et ne se transforme pas en beurre.
- Égouttez bien vos cerises. Séchez-les avec du papier absorbant. Un excès de jus rendra vos couches de crème liquides et peut faire glisser le gâteau.
- Utilisez un couteau à pain pour découper. Un mouvement de va-et-vient doux vous donne des parts nettes à travers les copeaux de chocolat et les cerises sans écraser les belles couches.
Présenter votre gâteau comme un pro
La présentation est la dernière touche d’amour. Voici quelques idées :
- Saupoudrez légèrement le dessus de cacao supplémentaire avant d’ajouter les cerises pour un look sophistiqué.
- Servez chaque part avec un peu de compotée de cerises supplémentaire ou un filet de chocolat fondu sur l’assiette.
- Ajoutez quelques feuilles de menthe fraîche à côté des cerises sur le dessus pour une touche de couleur verte.
- Pour une note festive, saupoudrez un peu de poudre d’or comestible sur les copeaux de chocolat.
Vous aimez ce gâteau ? Essayez ces autres desserts sublimes !
Si la joie riche et stratifiée d’un Gâteau Forêt Noire est votre style, vous adorerez explorer d’autres gourmandises. Pour une touche orientale luxueuse, vous devez essayer notre Cheesecake baklava au miel et aux pistaches, qui combine un appareil crémeux à des couches feuilletées et fruitées. Pour une bouchée rapide et citronnée, mes faciles Truffes au citron sont irrésistiblement crémeuses et rafraîchissantes. Quand c’est la saison des pommes, rien ne vaut le charme réconfortant de chaudes Chaussons aux pommes. Et pour un pur bonheur chocolaté, mon classique Gâteau au Chocolat Fondant Simple est une favorite éternelle qui ne déçoit jamais une tablée.
Erreurs courantes à éviter avec votre Gâteau Forêt Noire
Éviter ces écueils classiques garantira un gâteau réussi.
Erreur 1 : Ne pas assez battre les œufs et le sucre
C’est la base de votre gâteau. Si vous arrêtez de battre trop tôt, votre mélange n’atteindra pas le stade du « ruban ». Le résultat sera une génoise dense et plate au lieu d’être légère et aérée. Le gâteau a besoin de cet air emprisonné pour lever correctement sans levure. Battez les œufs et le sucre à vitesse maximale pendant 8 à 10 minutes, jusqu’à ce que le mélange soit très épais, pâle et laisse un ruban persistant à la surface.
Erreur 2 : Mélanger vigoureusement les ingrédients secs
Après tout ce travail pour incorporer de l’air dans les œufs, le faire retomber est un drame. Ajouter la farine et le cacao avec un geste brutal ou un batteur électrique va chasser toutes les bulles. Tamisez toujours vos ingrédients secs directement sur le mélange d’œufs. Ensuite, utilisez une spatule souple et des mouvements lents et délicats, en pliant de bas en haut. Mélangez juste jusqu’à ce que la farine disparaisse. Quelques stries valent mieux qu’un mélange excessif.
Erreur 3 : Utiliser de la crème ou des outils tièdes
La crème fouettée rate quand tout est tiède. La matière grasse de la crème ne retiendra pas les bulles d’air si votre bol, vos fouets ou la crème elle-même sont à température ambiante. Votre crème semblera liquide et n’atteindra jamais les pics fermes. Assurez-vous toujours que votre crème sort directement du frigo, et refroidissez votre bol en métal et vos fouets au congélateur pendant 10 à 15 minutes avant de commencer.
Erreur 4 : Sauter le temps de repos au frais avant de servir
Il est tentant de découper votre belle création tout de suite. Ne le faites pas ! Le gâteau a besoin de temps au frigo pour que les couches absorbent l’humidité de la crème et du jus. Cela les rend tendres et savoureuses. Le repos au frais permet aussi à la crème de prendre, rendant le gâteau assez ferme pour être découpé proprement. Un minimum de 4 heures est essentiel ; une nuit entière est idéale pour la meilleure texture et saveur.
Questions Fréquemment Posées (FAQ)
Puis-je faire ce Gâteau Forêt Noire sans alcool ?
Absolument, et il sera toujours délicieux. Omettez simplement la liqueur de cerise. Utilisez à la place le sirop d’un bocal de cerises pour imbiber les couches de gâteau. Vous pouvez aussi utiliser un peu de jus de cerise ou même un simple sirop de sucre (parts égales d’eau et de sucre, chauffées jusqu’à dissolution). Cette étape garde le gâteau moelleux et ajoute une touche de douceur sans alcool. Les saveurs principales de chocolat, cerise et crème sont plus que suffisantes pour créer un dessert incroyable.
Ma crème fouettée est devenue granuleuse ou beurreuse. Que s’est-il passé ?
Cela signifie que vous avez trop fouetté la crème. C’est une erreur facile. La crème passe rapidement des pics mous aux pics fermes, puis au beurre, surtout avec un batteur puissant. La clé est de commencer doucement et de la surveiller de près une fois qu’elle commence à épaissir. Si elle se sépare et paraît granuleuse, malheureusement, on ne peut pas la rattraper pour ce gâteau. Recommencez avec de la crème froide et neuve. Pour plus de sécurité, fouettez la crème à la main avec un fouet quand vous approchez du stade des pics fermes — cela donne plus de contrôle.
Puis-je utiliser des cerises congelées ?
Vous pouvez, mais avec prudence. Les cerises congelées libèrent beaucoup d’eau en décongelant. Si vous les utilisez directement dans la garniture, elles rendront votre belle crème liquide et peuvent détremper les couches de gâteau. La meilleure méthode est de décongeler complètement les cerises congelées dans une passoire au-dessus d’un bol. Récupérez le jus, puis faites cuire le jus avec un peu de sucre et de maïzena pour faire une compotée épaisse. Laissez-la refroidir complètement avant de l’utiliser. Séchez très soigneusement les cerises décongelées avec du papier absorbant.
Combien de temps à l’avance puis-je assembler le gâteau ?
Ce gâteau est un dessert fantastique à préparer à l’avance. Vous pouvez l’assembler entièrement 24 heures avant de le servir. En fait, c’est encore meilleur car les saveurs ont le temps de se développer. Gardez-le couvert au réfrigérateur. Ajoutez les copeaux de chocolat finaux et la garniture de cerises fraîches quelques heures avant de servir pour qu’ils restent beaux. Le gâteau se conservera parfaitement pendant 2 à 3 jours au frigo.
Quel est le meilleur chocolat pour la garniture ?
Pour la meilleure saveur et une facilité à râper, utilisez une bonne tablette de chocolat mi-amer ou noir (environ 50-70% de cacao). Les pépites de chocolat sont conçues pour ne pas fondre uniformément et sont plus difficiles à râper. Une tablette à température ambiante est plus facile à travailler avec un économe pour de jolis copeaux. Pour râper finement, refroidissez légèrement la tablette d’abord. Utiliser un chocolat que vous aimez manger nature donnera toujours le meilleur résultat.
Pourquoi mes couches de gâteau se sont-elles affaissées au centre ?
Un centre creux signifie généralement que le gâteau n’était pas assez cuit, que la porte du four a été ouverte trop tôt, ou qu’il y avait trop d’humidité. Assurez-vous que votre four est entièrement préchauffé. N’ouvrez pas la porte pendant au moins les 15 premières minutes de cuisson. Testez la cuisson avec un cure-dent — il doit ressortir propre. Assurez-vous aussi que votre farine et votre cacao sont correctement mesurés (utilisez une balance !), car trop peu de farine peut causer un affaissement.
Y a-t-il un moyen de rendre la crème plus stable ?
Oui ! Bien que les puristes puissent protester, un petit stabilisant peut aider, surtout par temps chaud. En commençant à fouetter la crème froide, ajoutez 1 à 2 cuillères à soupe de poudre pour flan à la vanille instantané ou un produit pour crème Chantilly stabilisée. Cela aide la crème à garder sa forme pendant des jours sans rendre de l’eau ou ramollir. Vous pouvez aussi vous assurer que votre sucre glace contient un peu de fécule de maïs, qui agit aussi comme stabilisant.
Puis-je utiliser un autre type de fruit ?
Si les cerises sont traditionnelles, vous pouvez certainement expérimenter. Des framboises ou un mélange de baies iraient merveilleusement avec le chocolat. Gardez à l’esprit que les baies plus fragiles comme les framboises peuvent dégorger plus de couleur. Des mandarines en conserve bien égouttées pourraient aussi faire une variante originale façon « Jaffa ». L’essentiel est d’utiliser des fruits pas trop aqueux et dont la saveur complète le chocolat riche.
Dois-je utiliser trois moules à gâteau séparés ?
Utiliser trois moules est plus facile et assure des couches égales. Si vous n’avez qu’un ou deux moules, vous pouvez cuire la pâte en plusieurs fois. Assurez-vous simplement de laver, re-beurrer et re-fariner le moule entre chaque utilisation. Laissez le moule refroidir complètement avant d’y verser une nouvelle pâte. Sinon, vous pouvez cuire un gâteau plus épais et le couper soigneusement horizontalement en trois couches une fois qu’il est complètement froid — cela demande une main ferme et un long couteau à pain.
Où puis-je en savoir plus sur les aspects nutritionnels de mes ingrédients ?
Choisir des ingrédients de qualité fait une différence tant en saveur qu’en nutrition. Pour une ressource fiable afin de comprendre les valeurs nutritionnelles des différents aliments, du cacao dans votre gâteau aux fruits frais que vous utilisez, vous pouvez consulter des bases de données officielles. Cela peut vous aider à faire des choix éclairés dans toute votre cuisine.
Si vous êtes tombé amoureux de la réalisation de cette pièce maîtresse, vous trouverez bien d’autres idées inspirantes dans notre collection complète de recettes de gâteaux et pâtisseries.
Votre aventure en pâtisserie vous attend
Voilà — les secrets d’un Gâteau Forêt Noire vraiment spectaculaire. Il peut ressembler au chef-d’œuvre d’une pâtisserie professionnelle, mais chaque étape est simple et profondément gratifiante. Souvenez-vous, le filet de liqueur (ou de jus), le nuage de crème sucrée et les copeaux de chocolat noir sont vos touches personnelles. Préparer ce gâteau est un acte d’amour, une promesse d’une fin sucrée partagée avec ceux qui vous sont chers. Alors attachez votre tablier, mettez un peu de musique, et créez quelque chose de merveilleux. J’ai hâte que vous voyiez leurs visages quand vous l’apporterez à table. Bonne pâtisserie !
Equipment
- Mixeur sur socle ou batteurs électriques
- 3 moules à gâteau ronds de 20 cm
- Grands bols de mélange
- Tamis fin
- Spatule en silicone
Ingrédients
- 8 gros œufs œufs, à température ambiante
- 300 g sucre granulé
- 200 g farine tout usage
- 50 g cacao en poudre non sucré
- 500 ml crème épaisse froide minimum 30% de matière grasse
- 425 g sucre glace
- 1 cuillère à café essence de vanille pure
- 500 g cerises griottes dénoyautées en pot ou fraîches (plus le jus)
- 300 g chocolat semi-amer pour râper ou faire fondre
- au goût liqueur de cerise, brandy ou jus de cerise optionnel, pour imbiber
Instructions
- Préchauffez votre four à 180°C (350°F) et graissez trois moules à gâteau de 20 cm.
- Dans un grand bol, battez les œufs et le sucre pendant 8-10 minutes jusqu'à obtenir une consistance de "ruban".
- Tamisez la farine et le cacao ensemble, puis incorporez-les délicatement au mélange d'œufs.
- Répartissez la pâte uniformément dans les moules.
- Faites cuire pendant 15-18 minutes, puis laissez refroidir dans les moules pendant 5 minutes avant de les transférer sur une grille.
- Pour la crème, refroidissez un bol et des batteurs au congélateur pendant 10 minutes, puis battez la crème, le sucre glace et la vanille jusqu'à obtenir des pics fermes.
- Montez le gâteau en alternant les couches de gâteau, crème et cerises, en imbibant chaque couche de jus de cerise ou liqueur.
- Recouvrez le gâteau avec la crème restante et décorez avec des copeaux de chocolat et des cerises.
- Réfrigérez le gâteau pendant au moins 4 heures, idéalement toute la nuit.
Notes
Nutrition

Je suis Céline, une véritable passionnée d’ustensiles et de matériel de cuisine ! J’adore tester, comparer et découvrir les meilleurs équipements pour rendre la cuisine plus efficace et agréable. Que ce soit un bon couteau, un robot performant ou une poêle incontournable, je suis toujours à la recherche des outils qui feront la différence. Mon but est de vous guider dans vos choix pour que vous ayez le bon matériel adapté à vos besoins.