
Le Gâteau au Chocolat Moelleux Simple : Votre Nouvelle Recette Fétiche
Vous connaissez ce sentiment quand vous avez envie de quelque chose de chocolaté, de riche et de merveilleusement simple ? Cette petite voix qui chuchote « gâteau » à votre oreille ? Je l’entends aussi, et pendant des années, j’ai cherché la recette parfaite. Après de nombreuses tentatives « bonnes mais pas géniales », j’ai enfin trouvé la bonne. Ce gâteau au chocolat moelleux simple est maintenant mon incontournable pour les anniversaires, les dîners du dimanche et les moments « juste comme ça ». C’est le genre de gâteau qui fait que tout le monde vous demande la recette. Laissez-moi vous montrer pourquoi.
Une Tranche d’Histoire : Des Débuts Simples
Si les origines exactes du gâteau au chocolat sont un peu floues, son évolution est une histoire délicieuse. Les premières recettes ressemblaient plus à des pains secs. La vraie magie s’est produite lorsque les pâtissiers ont commencé à ajouter des ingrédients comme le babeurre, l’huile et, surtout, de l’eau bouillante pour créer des textures incroyablement moelleuses. La recette que nous réalisons aujourd’hui est un classique moderne, témoin de ce processus de perfectionnement. C’est l’incarnation du réconfort—pas besoin de techniques sophistiquées, juste une saveur pure et décadente qui semble à la fois intemporelle et merveilleusement gourmande.
Pourquoi Cette Recette de Gâteau au Chocolat Moelleux Va Vous Séduire
Qu’est-ce qui rend ce *gâteau chocolat moelleux* si spécial ? D’abord, il est incroyablement indulgent. La pâte se prépare dans un seul saladier ! Ensuite, la texture est vraiment à part. Cette tasse d’eau bouillante est le secret derrière une mie super moelleuse et tendre qui le reste pendant des jours. Enfin, il est extrêmement polyvalent. Habillez-le pour une fête avec le glaçage luxueux, ou dégustez une simple tranche humble avec votre café de l’après-midi. C’est un gâteau qui promet du bonheur à chaque bouchée.
Les Occasions Parfaites pour Ce Gâteau Classique
Ce gâteau est votre allié culinaire pour presque tous les événements. C’est la star d’un anniversaire quand vous le décorez avec des sprinkles. C’est le héros du repas partagé, garanti de disparaître en premier. C’est le cadeau ultime « Je suis désolé que tu aies eu une mauvaise journée », déposé sur une jolie assiette. Un dessert en semaine ? Absolument. Un déjeuner familial le dimanche ? C’est parfait. Une version simple, sans glaçage, fait un merveilleux cake pour le goûter. Honnêtement, tout jour qui se termine par une tranche de cela est un bon jour.
Rassembler Vos Ingrédients
Rassemblons nos ingrédients simples, facilement trouvables dans le placard. Avoir tout mesuré et prêt rend le processus très simple.
Pour le Gâteau au Chocolat Moelleux :
- 1 3/4 tasses de farine tout usage
- 2 tasses de sucre en poudre
- 3/4 de tasse de cacao en poudre non sucré
- 1 1/2 cuillères à café de levure chimique
- 1 1/2 cuillères à café de bicarbonate de soude
- 1 cuillère à café de sel
- 2 gros œufs
- 1 tasse de lait entier
- 1/2 tasse d’huile végétale
- 2 cuillères à café d’extrait de vanille
- 1 tasse d’eau bouillante
Pour le Glaçage au Chocolat :
- 1 tasse de beurre doux, ramolli
- 3 1/2 tasses de sucre glace
- 1/2 tasse de cacao en poudre non sucré
- 1/2 tasse de crème liquide entière
- 2 cuillères à café d’extrait de vanille
Substitutions Pratiques Selon Votre Placard
Ne vous inquiétez pas si il vous manque un ingrédient ! Ce gâteau est assez adaptable.
- Lait : Tout lait que vous avez fonctionne—demi-écrémé, écrémé, ou même un lait végétal neutre comme l’avoine ou l’amande.
- Huile végétale : L’huile de colza ou même l’huile de coco fondue (refroidie) sont des substituts convenables.
- Cacao en poudre : Utilisez du cacao naturel non sucré. Le cacao hollandais fonctionnera mais peut légèrement modifier la levée.
- Crème pour le glaçage : Vous pouvez utiliser de la crème fraîche épaisse pour un glaçage plus acidulé ou plus de lait pour une version moins riche.
- Œufs : Pour une version sans lait, de la compote de pommes ou un substitut d’œuf du commerce peuvent fonctionner, bien que la texture puisse changer légèrement.
Créer Votre Gâteau au Chocolat Moelleux Parfait : Un Guide Étape par Étape
Suivez ces étapes simples pour un *gâteau chocolat moelleux* infaillible et incroyablement moelleux.
Étape 1 : Préparation & Mélange des Ingrédients Secs
D’abord, préchauffez votre four à 180°C (350°F). Beurrez et farinez deux moules à gâteau ronds de 23 cm. Maintenant, prenez votre plus grand saladier. Tamisez ensemble la farine, le sucre, le cacao en poudre, la levure chimique, le bicarbonate de soude et le sel. Tamiser n’est pas juste pour l’esthétique ; cela aère les ingrédients secs et les combine uniformément, évitant les grumeaux dans votre pâte. Vous verrez le riche cacao brun foncé se mêler à la farine blanche—c’est un beau départ !
Étape 2 : Incorporer les Ingrédients Humides
Faites un puits au centre de votre mélange sec. Cassez-y les œufs, versez le lait, l’huile et la vanille. À l’aide d’un batteur électrique ou d’un fouet robuste, battez le tout à vitesse moyenne pendant 2 bonnes minutes. C’est crucial pour la structure ! La pâte sera épaisse, brillante et sentira déjà bon. Astuce de pro : Si vous n’avez pas de batteur, fouettez vigoureusement à la main pendant environ 3-4 minutes pour assurer un bon mélange.
Étape 3 : L’Eau Bouillante Magique
Voici le secret ! Avec le batteur à basse vitesse, versez lentement l’eau bouillante. La pâte deviendra très liquide et presque aqueuse—c’est tout à fait normal et exactement ce que vous voulez ! Ne paniquez pas. Ça semble étrange, mais c’est cette eau chaude qui « réveille » le cacao, approfondit sa saveur, et crée cette fameuse texture moelleuse à la cuisson. Mélangez juste jusqu’à ce que ce soit lisse.
Étape 4 : Cuire à la Perfection
Versez soigneusement la pâte liquide de manière égale dans vos moules préparés. Glissez-les dans le four préchauffé. Le temps de cuisson est de 30 à 35 minutes. Vous saurez que c’est prêt quand le dessus rebondit légèrement sous le doigt et qu’un cure-dent inséré au centre en ressort avec juste quelques miettes humides, et non de la pâte crue. Votre cuisine sentira le rêve chocolaté.
Étape 5 : Refroidir et Préparer le Glaçage
Laissez les gâteaux refroidir dans leurs moules pendant exactement 10 minutes. Cela leur permet de se raffermir légèrement pour ne pas se casser. Puis, passez un couteau autour des bords et retournez-les sur une grille de refroidissement pour qu’ils refroidissent complètement. Pour le glaçage, battez le beurre ramolli à haute vitesse jusqu’à ce qu’il soit pâle et crémeux. Incorporez progressivement le sucre glace, le cacao, la crème et la vanille à basse vitesse, puis passez à haute vitesse et battez pendant 3 minutes. Il se transformera en un nuage léger, aérien et tartinable de chocolat.
Étape 6 : Assemblez Votre Chef-d’Œuvre
Placez un cercle de gâteau complètement refroidi sur votre assiette ou votre présentoir. Étalez une quantité généreuse de glaçage sur le dessus. Posez délicatement le second cercle par-dessus. Astuce de chef : Pour des tranches impeccables, faites une « couche de masquage ». Étalez une couche très fine de glaçage sur tout le gâteau pour piéger les miettes, placez au frais pendant 15 minutes, puis recouvrez avec le reste du glaçage aérien. Lissez les côtés, faites des tourbillons sur le dessus, et reculez pour admirer votre beau *gâteau au chocolat moelleux*.
Chronologie de Votre Succès en Pâtisserie
Temps de préparation : 20 minutes
Temps de cuisson : 35 minutes
Temps de refroidissement : 1 heure (essentiel pour un glaçage facile !)
Glaçage & Assemblage : 15 minutes
Temps total actif : Environ 55 minutes
Le Secret du Chef pour un Moelleux Ultime
Voici ma règle d’or : ne zappez jamais l’eau bouillante. C’est l’étape la plus importante pour obtenir cette fameuse mie légendairement moelleuse et tendre. L’eau chaude hydrate complètement le cacao et la farine, créant une pâte qui cuit de manière incroyablement douce et le reste pendant des jours. Faites confiance au processus !
Un Fait Gourmand et Amusant
Saviez-vous que le nom « devil’s food cake » (gâteau du diable) est apparu en contrepoint du gâteau angélique, blanc et léger ? Ce gâteau au chocolat foncé, riche et décadent était considéré comme délicieusement pécheur. Notre simple gâteau au chocolat moelleux est un descendant direct et céleste de cette tradition gourmande !
Les Ustensiles de Cuisine Essentiels
- Deux moules à gâteau ronds de 23 cm
- Grand saladier
- Batteur électrique ou robot pâtissier
- Grille de refroidissement
- Spatule
- Tasses et cuillères à mesurer
- Tamis (optionnel mais utile)
Conserver Votre Délicieux Gâteau
Une fois glacé, votre gâteau se conserve mieux couvert légèrement à température ambiante fraîche pendant une journée. Si votre cuisine est chaude, ou pour un stockage plus long, placez-le au réfrigérateur. Le froid raffermira le glaçage à merveille.
Pour un stockage au-delà d’un jour, le frigo est votre ami. Couvrez le gâteau avec un dôme ou retournez un grand saladier dessus pour le protéger. Il restera frais et moelleux jusqu’à 5 jours. Laissez les tranches revenir à température ambiante pendant environ 20 minutes avant de servir pour retrouver cette texture douce.
Vous pouvez aussi congeler ce gâteau ! Emballez les cercles de gâteau refroidis et non glacés serrés dans du film alimentaire puis du papier aluminium. Ils se conserveront jusqu’à 3 mois. Décongelez une nuit au réfrigérateur, puis glacez comme d’habitude.
Conseils Supplémentaires pour un Plaisir Pâtissier
- Pour une saveur chocolat plus profonde, utilisez du café chaud au lieu de l’eau bouillante.
- Assurez-vous que vos œufs et votre lait soient à température ambiante pour une pâte plus lisse.
- Ne surcuisez pas ! Vérifiez une minute ou deux avant la fin du temps indiqué.
- Pour une variation, essayez d’ajouter une cuillère à café de poudre de café expresso aux ingrédients secs.
Idées de Présentation pour Épater Vos Invités
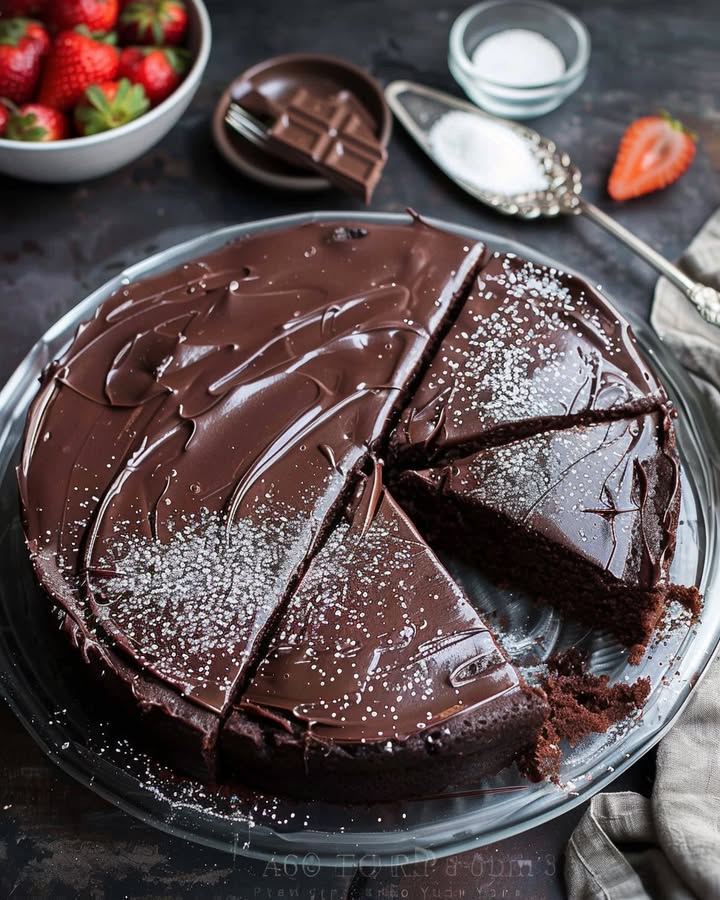
- Décorez avec des baies fraîches et une touche de sucre glace pour une note élégante.
- Agrémentez de copeaux de chocolat, de sprinkles ou de feuille d’or comestible pour une célébration.
- Servez chaque tranche avec une noix de crème chantilly ou une boule de glace à la vanille.
- Pour un aspect rustique, utilisez une fourchette ou une cuillère pour créer de jolis tourbillons dans le glaçage.
Découvrez d’Autres Délicieux Desserts
Si vous aimez ce classique, pourquoi ne pas essayer quelques variations créatives ? Le monde des desserts est plein de merveilleuses surprises. Pour un dessert roulé spectaculaire, vous pourriez adorer un roulé au chocolat et à la noix de coco. Si vous avez envie d’audace gustative, un cheesecake baklava au miel et pistaches combine textures crémeuse et craquante. Pour une petite douceur acidulée, ces truffes au citron faciles sont parfaites. Et quand c’est la saison des pommes, rien ne vaut la joie simple de chaussons aux pommes tout chauds.
Erreurs Courantes à Éviter pour Votre Gâteau Chocolat Moelleux
Éviter ces pièges courants garantit un gâteau parfait à chaque fois.
Erreur 1 : Ne Pas Préparer Correctement les Moules
Simplement beurrer les moules conduit souvent à un gâteau qui colle et se déchire. Pour éviter cela, après avoir beurré ou huilé, ajoutez une cuillère à soupe de farine. Inclinez et tapotez le moule pour enrober le fond et les bords uniformément, puis secouez l’excédent. Cela crée une barrière antiadhésive qui assure que vos beaux cercles de gâteau se démoulent proprement et en un seul morceau.
Erreur 2 : Zapper l’Étape du Tamisage
Il est tentant de tout verser et mélanger, mais la poudre de cacao a tendance à faire des grumeaux. Tamiser les ingrédients secs ensemble (farine, cacao, agents levant) est non négociable. Cela casse les grumeaux, aère la farine pour une mie plus légère et distribue uniformément la levure et le bicarbonate. Cette étape contribue directement à une levée uniforme et à une pâte lisse et sans grumeaux.
Erreur 3 : Ajouter l’Eau Bouillante Trop Vite ou l’Oublier
Verser l’eau bouillante trop rapidement peut cuire les œufs dans la pâte. Ajoutez-la toujours en un filet lent et régulier avec le batteur à basse vitesse. Et ne la zappez jamais ! Ce liquide chaud est la clé de la texture moelleuse signature et de la saveur chocolatée profonde. Il fluidifie beaucoup la pâte, ce qui est exactement ce que vous voulez.
Erreur 4 : Glacer un Gâteau Encore Tiede
L’impatience est l’ennemi d’un beau gâteau. Glacer un gâteau encore légèrement tiède fera fondre le glaçage au beurre, qui glissera et s’imbibera dans les miettes. Laissez toujours, *toujours* vos gâteaux refroidir complètement sur une grille. Cela peut prendre une bonne heure. Astuce de pro : Vous pouvez accélérer cela en plaçant les cercles de gâteau refroidis au réfrigérateur pendant 20 minutes avant de glacer.
Erreur 5 : Trop Mélanger Après l’Ajout de la Farine
Une fois vos ingrédients secs combinés aux humides, mélangez seulement jusqu’à ce que vous ne voyiez plus de stries de farine. Trop mélanger développe le gluten de la farine, ce qui peut conduire à un gâteau dense et caoutchouteux au lieu de la mie tendre et moelleuse que nous recherchons. Un geste léger à ce stade fait toute la différence.
Questions Fréquemment Posées
Puis-je faire ce gâteau dans un moule différent, comme un moule 23×33 cm ?
Absolument ! Cette recette s’adapte parfaitement à un moule rectangulaire à gâteau de 23×33 cm. Il suffit de beurrer et fariner le moule, d’y verser toute la pâte et d’ajuster le temps de cuisson. Commencez à vérifier vers 40-45 minutes avec un cure-dent. Le gâteau sera cuit quand le cure-dent ressort propre. C’est une option fantastique pour un gâteau plus simple, de type « sheet cake », facile à transporter.
Ma pâte était très liquide. Ai-je fait quelque chose de mal ?
Non, vous avez tout fait parfaitement ! La pâte de ce gâteau au chocolat moelleux est réputée pour être liquide, presque comme une soupe épaisse. C’est exactement comme cela qu’elle doit être à cause de la grande quantité de liquide, dont l’eau bouillante cruciale. Cette pâte liquide est le secret pour obtenir une mie exceptionnellement moelleuse et tendre. Ne vous alarmez pas—versez-la simplement avec précaution dans vos moules et faites confiance au processus.
Puis-je faire des muffins avec cette recette ?
Oui, cette recette fait des merveilleux muffins au chocolat moelleux. Garnissez vos moules à muffins de caissettes en papier. Remplissez chaque caissette aux 2/3 avec la pâte. Cuisez à la même température (180°C) pendant environ 18 à 22 minutes, ou jusqu’à ce qu’un cure-dent ressorte propre. Cela devrait donner environ 24 à 28 muffins. Ils sont parfaits pour être glacés avec le même glaçage au beurre chocolaté ou votre glaçage préféré.
Que puis-je utiliser si je n’ai pas de cacao en poudre ?
Le cacao en poudre est essentiel pour la saveur profonde et la structure de ce gâteau. Si vous n’en avez plus, vous ne pouvez pas simplement l’omettre. Un substitut possible est de faire fondre du chocolat pâtissier noir non sucré, mais vous devriez alors ajuster significativement la matière grasse et le sucre dans la recette, ce qui est complexe. Pour de meilleurs résultats, il vaut la peine d’acheter une nouvelle boîte de cacao en poudre non sucré. C’est un ingrédient de base du placard qui se conserve longtemps.
Comment savoir quand le gâteau est parfaitement cuit ?
Le meilleur test est le test du cure-dent. Insérez un cure-dent ou une fine pique en bois au centre du gâteau. S’il ressort avec quelques miettes humides collées, c’est cuit. S’il ressort avec de la pâte crue et collante, il a besoin de plus de temps. Aussi, les bords du gâteau commenceront à se décoller légèrement des parois du moule, et le dessus sera élastique au toucher léger.
Puis-je préparer ce gâteau la veille ?
Oui, et il est souvent encore meilleur le lendemain ! Les saveurs ont plus de temps pour se marier. Cuisez et laissez refroidir complètement les cercles de gâteau. Enveloppez-les bien dans du film alimentaire et conservez-les à température ambiante toute la nuit. Préparez le glaçage et conservez-le couvert au réfrigérateur. Le lendemain, laissez le glaçage revenir à température ambiante et fouettez-le brièvement avant d’assembler et de glacer votre gâteau.
Pourquoi mon gâteau a-t-il creusé au milieu ?
Un enfoncement au centre est généralement causé par une sous-cuisson ou par l’ouverture trop précoce de la porte du four pendant la cuisson, provoquant une chute soudaine de la température. Assurez-vous que votre four est complètement préchauffé et évitez d’ouvrir la porte pendant au moins les 25 premières minutes de cuisson. Vérifiez que vos agents levant (levure et bicarbonate) ne sont pas périmés, car des anciens ne fourniront pas la levée nécessaire.
Y a-t-il un moyen de faire un glaçage plus léger ?
Si vous préférez un glaçage moins sucré ou plus léger, vous pouvez faire une simple ganache au chocolat montée. Faites chauffer 1 tasse de crème liquide entière jusqu’à ce qu’elle fume, puis versez-la sur 230 g de chocolat mi-sucré haché. Laissez reposer 5 minutes, puis fouettez jusqu’à consistance lisse. Réfrigérez jusqu’à ce qu’elle soit suffisamment épaisse pour être montée, puis battez-la jusqu’à ce qu’elle soit mousseuse. Vous pouvez aussi utiliser une base de glaçage au fromage à la crème avec du cacao ajouté pour une option plus acidulée.
Puis-je ajouter des ingrédients comme des pépites de chocolat ou des noix ?
Bien sûr ! C’est un excellent moyen de personnaliser votre gâteau. Incorporez jusqu’à 1 tasse d’ingrédients comme des pépites de chocolat, des noix concassées (noix ou pécan sont fantastiques), ou même des cerises séchées dans la pâte juste avant de la verser dans les moules. Enrobez-les d’un peu de farine avant de les incorporer pour les empêcher de tomber au fond pendant la cuisson.
Quelle est la meilleure façon d’assurer la sécurité alimentaire avec les pâtisseries ?
Bien que les gâteux comme celui-ci présentent généralement un faible risque, il est toujours bon de suivre des pratiques sûres. Utilisez des ingrédients frais et de qualité et conservez le gâteau terminé correctement. Pour des informations détaillées sur la manipulation des ingrédients pour prévenir les maladies d’origine alimentaire, vous pouvez consulter les ressources des autorités de sécurité alimentaire. Par exemple, assurez-vous toujours que vos œufs sont frais et lavez-vous soigneusement les mains ainsi que vos ustensiles avant de commencer.
J’espère que cette recette deviendra un incontournable chéri chez vous comme elle l’est chez moi. Pour plus d’inspiration, des pâtisseries simples aux festives, explorez notre collection complète de délicieuses recettes de gâteaux et pâtisseries.
À Vous de Coudre un Souvenir
Et voilà—le secret du gâteau au chocolat le plus merveilleusement simple et fiablement moelleux. C’est une recette conçue pour le succès, le partage et le pur plaisir. Alors enfilez votre tablier, préchauffez ce four et préparez-vous à remplir votre maison de la meilleure odeur du monde. Faites-le pour un anniversaire, faites-le pour un ami, ou faites-le juste pour vous. Chaque tranche est une petite célébration. Maintenant, allez chercher un saladier et préparez quelque chose de délicieux !
Equipment
- Deux moules à gâteau ronds de 9 pouces
- Grand bol à mélanger
- Batteur à main ou batteur sur socle
- Grille de refroidissement
- Spatule
Ingrédients
- 220 g farine tout usage
- 400 g sucre granulé
- 75 g cacao en poudre non sucré
- 6 g levure chimique
- 6 g bicarbonate de soude
- 5 g sel
- 2 œufs
- 240 ml lait entier
- 120 ml huile végétale
- 10 ml extrait de vanille
- 240 ml eau bouillante
Instructions
- Préchauffez votre four à 180°C (350°F) et graissez deux moules à gâteau ronds de 9 pouces.
- Dans un grand bol, tamisez ensemble la farine, le sucre, le cacao, la levure, le bicarbonate et le sel.
- Faites un puits au centre du mélange et ajoutez les œufs, le lait, l'huile et la vanille.
- Batteez le mélange à vitesse moyenne pendant 2 minutes avec un batteur électrique.
- Ajoutez lentement l'eau bouillante en mélangeant à basse vitesse jusqu'à obtenir une consistance lisse.
- Versez la pâte dans les moules préparés et enfournez pendant 30-35 minutes.
- Laissez refroidir les gâteaux dans les moules pendant 10 minutes, puis démoulez sur une grille pour refroidir complètement.
- Pour le glaçage, battez le beurre ramolli jusqu'à obtenir une consistance crémeuse. Ajoutez le sucre glace, le cacao, la crème et la vanille.
- Étalez le glaçage sur un gâteau refroidi, puis placez le deuxième gâteau dessus et recouvrez-le également de glaçage.
Notes
Nutrition

Je suis Céline, une véritable passionnée d’ustensiles et de matériel de cuisine ! J’adore tester, comparer et découvrir les meilleurs équipements pour rendre la cuisine plus efficace et agréable. Que ce soit un bon couteau, un robot performant ou une poêle incontournable, je suis toujours à la recherche des outils qui feront la différence. Mon but est de vous guider dans vos choix pour que vous ayez le bon matériel adapté à vos besoins.