
Gâteau Triple Mousse au Chocolat : Le Héros des Fêtes Qui Ne Fait Jamais Défaut !
Vous connaissez ce sentiment quand vous avez besoin d’un dessert qui crie simplement « WOUAH » ? J’organisais l’anniversaire de ma nièce et je voulais quelque chose d’inoubliable. Je me suis souvenue d’un superbe Gâteau Mousse Chocolat que j’avais vu dans une pâtisserie parisienne. Haut, brillant, avec des couches de chocolats différents. J’ai décidé de le recréer à la maison. Après quelques essais (et quelques testeurs heureux !), j’ai peaufiné ce Gâteau Triple Mousse au Chocolat. Il est devenu mon « gâteau de fête » signature. Chaque part est de la pure joie crémeuse et onirique. Laissez-moi vous montrer comment réaliser ce rêve chocolaté.
Une Part d’Histoire du Chocolat
La classique mousse au chocolat est un trésor français, qui remonte à plusieurs siècles. C’était un mets luxueux pour l’aristocratie. Ce gâteau prend cette mousse aérienne et riche et la transforme en un spectacle à étages. La touche moderne, qui superpose chocolat noir, au lait et glaçage, crée un beau voyage de textures et de saveurs. C’est comme manger trois desserts exquis en une seule part parfaite. Ma version garde l’esprit élégant mais rend le processus accessible aux cuisiniers à la maison. Pas besoin de compétences de chef étoilé !
Pourquoi Vous Allez Adorer Cette Recette
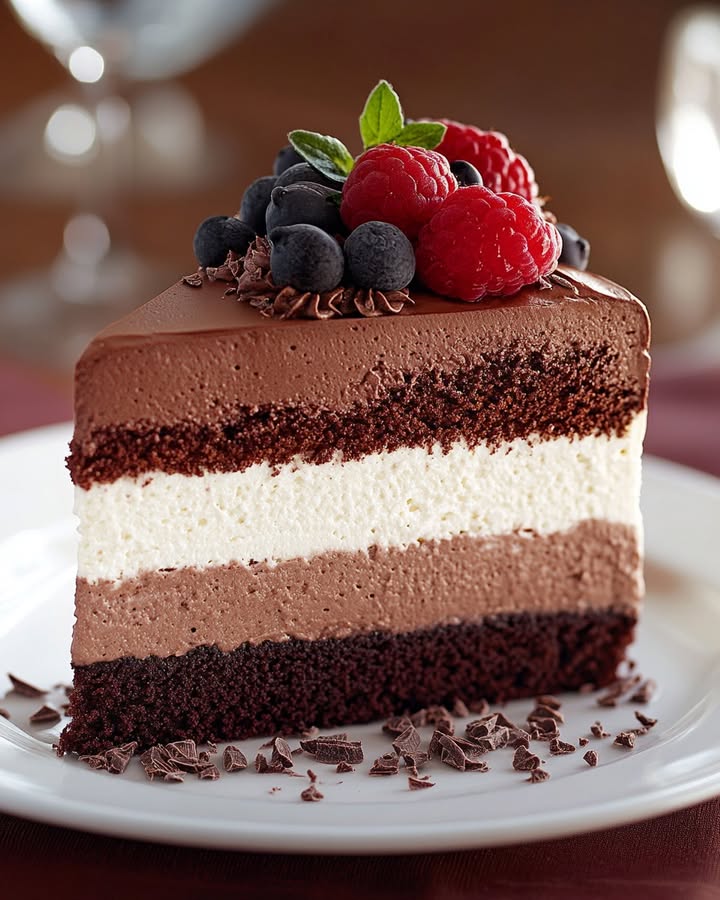
Premièrement, c’est un chef-d’œuvre visuel. On dirait qu’il sort d’une pâtisserie professionnelle. Deuxièmement, la saveur est profonde, complexe et incroyablement satisfaisante. La base au chocolat noir est intense. La mousse au chocolat au lait est douce et crémeuse. Le glaçage chocolat noir scelle le tout d’une coque brillante et légèrement amère. C’est aussi étonnamment indulgent. Les couches de mousse cachent les petites fissures de la base. C’est une recette flatteuse et généreuse qui garantit les applaudissements.
Les Occasions Parfaites pour Ce Rêve Chocolaté
Ce gâteau est votre arme secrète pour les moments spéciaux. Il est parfait pour les anniversaires, les anniversaires de mariage ou les dîners de fête comme Noël. Il fait aussi sensation lors des repas partagés — on me demande toujours la recette ! La Saint-Valentin ? Rien ne dit « je t’aime » mieux qu’un triple chocolat. Je l’ai même préparé pour une réception chic de club de lecture. Cela a transformé un simple rendez-vous en événement gourmet. Chaque fois que vous voulez montrer un peu plus d’attention et de célébration, ce gâteau est là.
Ce Dont Vous Aurez Besoin : La Liste des Ingrédients
Rassembler vos ingrédients est la première étape vers le succès. Voici tout ce qu’il vous faut.
- 1 tasse de farine tout usage
- 1 tasse de cacao en poudre non sucré
- 1 c. à café de levure chimique
- 1/2 c. à café de sel
- 1/2 tasse de beurre doux, ramolli
- 1 tasse de sucre en poudre
- 2 gros œufs
- 1 c. à café d’extrait de vanille
- 1/2 tasse de lait
- 200g de chocolat noir, haché
- 200g de chocolat au lait, haché
- 600ml de crème liquide entière, divisée
- 2 c. à café de gélatine en poudre neutre
- 4 cuillères à soupe d’eau
- 100g de chocolat noir pour le glaçage, haché
- 100ml de crème liquide entière pour le glaçage
- Des copeaux ou frisures de chocolat pour la décoration
- Quelques feuilles de menthe fraîche pour la garniture
Substitutions Astucieuses Si Nécessaire
Pas de panique s’il vous manque quelque chose. Voici des échanges faciles. Pour la base du gâteau, vous pouvez utiliser un mélange de farine sans gluten. Le cacao en poudre doit être non sucré, mais n’importe quelle marque convient. Si vous n’avez pas de gélatine, vous pouvez l’omettre, mais la mousse sera plus molle et devra être servie rapidement. Pour une version sans lactose, utilisez du beurre, du lait et de la crème végétale. Le chocolat est la clé — utilisez la meilleure qualité que vous puissiez trouver, même si c’est une tablette que vous aimez déguster.
Construire Votre Gâteau Triple Mousse : Étape par Étape
Étape 1 : Les Fondations du Gâteau au Chocolat
Commencez par préchauffer votre four à 180°C. Beurrez bien votre moule à charnière de 20 cm. Dans un bol, mélangez la farine, le cacao, la levure et le sel. Cela ressemblera à une montagne poudreuse et sombre. Dans un autre bol, battez le beurre ramolli et le sucre jusqu’à obtenir un mélange léger, mousseux et pâle. Ajoutez les œufs et la vanille, et mélangez jusqu’à ce que ce soit lisse et brillant. Alternez maintenant l’ajout du mélange sec et du lait. La pâte va devenir un liquide épais, onctueux et brun foncé. Versez-la dans le moule. Ça sent déjà la pâtisserie au chocolat ! Astuce pro : Tapotez doucement le moule sur le plan de travail pour chasser les bulles d’air et obtenir un gâteau bien uniforme.
Étape 2 : Cuisson et Refroidissement de la Base
Placez le moule au four. Faites cuire pendant 20 à 25 minutes. La magie opère ici. Le gâteau va gonfler et remplir votre cuisine d’un arôme chaud et chocolaté. Vérifiez la cuisson avec la pointe d’un couteau — elle doit ressortir sèche. Laissez le gâteau refroidir complètement dans son moule, sur une grille. Cette patience est cruciale. Un gâteau tiède ferait fondre la mousse plus tard. Il va légèrement retomber et devenir ferme, prêt à supporter les couches moelleuses.
Étape 3 : Création de la Couche de Mousse Chocolat Noir
C’est là que la texture onirique commence. Faites gonfler la gélatine en la saupoudrant sur l’eau dans un petit bol. Laissez reposer 5 minutes — elle va former une gelée ferme. Faites fondre les 200g de chocolat noir au bain-marie. Il doit être lisse et brillant. Faites tiédir légèrement la moitié de la crème prévue pour cette couche, puis incorporez la gélatine gonflée jusqu’à dissolution complète. Combinez ce mélange crème-gélatine au chocolat noir fondu. Laissez refroidir un peu — il doit être tiède. Montez le reste de la crème de cette couche en chantilly (pic mous). Incorporez délicatement la chantilly au mélange chocolaté. Vous allez le voir se transformer en un nuage léger et aérien. Étalez-le sur votre base de gâteau refroidie.
Étape 4 : Ajout de la Couche de Mousse Chocolat au Lait
Répétez exactement le même processus pour le chocolat au lait. Faites gonfler une autre cuillère à café de gélatine, faites fondre le chocolat au lait, combinez, laissez refroidir et incorporez la chantilly. Cette couche sera plus claire et plus douce en goût. Étalez-la soigneusement sur la couche de mousse chocolat noir. Votre gâteau a maintenant deux étages distincts et magnifiques. Mettez le gâteau au frais pendant environ 30 minutes pour laisser les mousses prendre légèrement avant le glaçage. Cela empêche le glaçage de s’enfoncer.
Étape 5 : La Finition au Glaçage Chocolat Brillant
Pour la couronne finale et brillante, mettez les 100g de chocolat noir et les 100ml de crème du glaçage dans un bol résistant à la chaleur. Faites-les fondre ensemble au bain-marie. Mélangez jusqu’à obtenir un liquide parfaitement lisse, fluide et brillant. Laissez refroidir une minute pour qu’il épaississe légèrement. Versez-le au centre du gâteau mousseux refroidi. Utilisez une spatule pour le guider doucement sur les bords, laissant couler des filets artistiques sur les côtés. Cela crée une belle coque brillante. Astuce de chef : Versez le glaçage depuis le centre et laissez-le couler naturellement pour un effet « drip » le plus pro possible.
Étape 6 : Le Dernier Réfrigérage et la Garniture
Maintenant, la patience est votre meilleur ingrédient. Réfrigérez le gâteau entier pendant au moins 4 heures, ou toute une nuit. Cela permet à toutes les couches de se figer parfaitement. La mousse devient ferme mais crémeuse, et le glaçage une coque lisse. Juste avant de servir, décorez avec des frisures de chocolat et des feuilles de menthe fraîche. La menthe ajoute une couleur vive et un arôme frais qui complète le chocolat profond. Découpez avec un couteau propre et chaud pour des parts impeccables.
Gestion du Temps pour Votre Chef-d’Œuvre
Planifiez votre temps judicieusement pour une expérience sans stress. Temps de préparation : 30 minutes de travail actif. Temps de cuisson : 25 minutes pour la base. Temps de repos/réfrigération : minimum 4 heures de prise. Temps total : Environ 4 heures 30 du début au service. Parfait pour le préparer l’après-midi pour un dîner. Le gâteau sert 12 personnes heureuses. Chaque part contient environ 450 calories — c’est une gourmandise riche et festive qui vaut chaque bouchée !
Le Secret d’une Chef pour la Meilleure Mousse
Mon secret, c’est la **température de la crème à fouetter**. Fouettez toujours votre crème bien froide, sortie directement du frigo. Une crème tiède ne retiendra pas l’air et rendra votre mousse plate. Ensuite, incorporez la chantilly au mélange chocolaté avec délicatesse. Utilisez une spatule et la main légère. Vous voulez garder un maximum de bulles d’air pour cette texture nuageuse. Trop mélanger fait retomber votre rêve de mousse.
Une Petite Histoire Amusante sur le Chocolat
Saviez-vous que le mot « mousse » signifie « écume » en français ? C’est la description parfaite. La technique qui consiste à incorporer de la crème fouettée dans une base crée cette texture légère, bulleuse et mousseuse. Cette méthode a été perfectionnée dans les cuisines françaises au 18ème siècle. Elle a transformé le chocolat solide en un dessert aérien et élégant. Chaque fois que vous la réalisez, vous faites un petit bout d’histoire culinaire !
Le Matériel Dont Vous Aurez Besoin
Pas besoin d’outils professionnels. Quelques bases suffiront.
- Moule à charnière de 20 cm (les parois amovibles sont essentielles)
- Deux bols (un grand, un moyen)
- Un batteur électrique ou un fouet pour monter la crème
- Un bain-marie ou un bol résistant à la chaleur sur une casserole
- Une spatule pour incorporer et étaler
- Une grille de refroidissement
Conservation de Votre Beau Gâteau
Ce gâteau se conserve très bien grâce à la mousse stable. Après le réfrigération finale, vous pouvez le garder couvert au réfrigérateur jusqu’à 3 jours. Les saveurs se marient et s’améliorent même après une nuit. Couvrez-le légèrement de film alimentaire ou gardez-le dans une boîte à gâteau pour protéger le glaçage.
Pour une conservation plus longue, la congélation est une option. Congelez le gâteau entier (après glaçage) pendant un mois maximum. Décongelez-le au réfrigérateur pendant au moins 8 heures avant de servir. La texture reste excellente. Je le prépare souvent la veille des fêtes pour réduire le stress.
Ne laissez jamais le gâteau à température ambiante longtemps. La mousse contenant de la crème, elle va ramollir. Servez-le toujours frais. Des restes ? C’est un heureux petit déjeuner avec un café !
Trucs et Conseils pour une Réussite Garantie
- Qualité du Chocolat : Utilisez du chocolat que vous aimez manger. Cela fait une énorme différence de goût.
- Refroidissement de la Base : Cette étape ne peut pas être bâclée. Une base tiède fera fondre la mousse.
- Bol Bien Froid : Placez votre bol au frais avant de fouetter la crème. Cela aide la crème à monter plus vite et plus haut.
- Découpe Propre : Trempez votre couteau dans de l’eau chaude et essuyez-le entre chaque part pour une présentation parfaite.
Idées de Présentation pour Épater Vos Invités
La présentation transforme un bon gâteau en un « clou du spectacle ». Saupoudrez l’assiette d’un peu de cacao avant d’y déposer la part. Ajoutez une quenelle de chantilly fraîche sur le côté. Servez avec quelques framboises ou fraises — le fruit coupe bien la richesse. Pour une touche de fête, utilisez des paillettes alimentaires dorées ou argentées sur les copeaux de chocolat. Posez le gâteau sur un présentoir à gâteaux. Il devient la pièce maîtresse de votre table.
Variations Plus Légères & Créatives
Vous adorez ce Gâteau Mousse au Chocolat mais vous voulez essayer des variantes ? Voici six idées inspirées. Chacune garde le concept de mousse en couches mais joue avec les saveurs.
1. Gâteau Mousse Chocolat Framboise : Ajoutez une couche de purée de framboises fraîches entre les couches de mousse au chocolat. Cela apporte une explosion fruitée et acidulée.
2. Gâteau Mousse Moka : Infusez la mousse au chocolat noir avec une cuillère à soupe de café instantané en poudre. Cela crée une profondeur café-chocolat merveilleuse.
3. Gâteau Mousse Chocolat Blanc & Fruits Rouges : Remplacez la mousse au chocolat au lait par une mousse au chocolat blanc. Surmontez d’un coulis de fruits rouges au lieu du glaçage noir.
4. Gâteau Mousse Praliné : Ajoutez une couche croustillante de praliné maison (noix caramélisées) entre le gâteau et la première mousse.
5. Mousse Chocolat au Zeste d’Orange : Ajoutez le zeste d’une orange dans la mousse au chocolat au lait. L’arôme d’agrume est divin avec le chocolat.
6. Gâteau Mousse Chocolat Végan à l’Avocat : Pour une version végétale, utilisez de l’avocat mixé avec du cacao et du sirop d’érable pour les couches de mousse. C’est étonnamment crémeux et riche.
Si vous adorez les desserts à étages, vous pourriez aussi aimer explorer d’autres classiques. Pour une option fruitée d’été, essayez ma Tarte aux Fraises à l’Ancienne. C’est un succès garanti avec ses baies juteuses. Ou, pour une envie de chocolat plus simple, ce Gâteau au Chocolat à l’Eau Chaude est incroyablement moelleux. Pour un équilibre citronné face à tout ce chocolat, le légendaire Gâteau au Citron Ritz Carlton est du pur soleil. Et pour un plaisir sans cuisson, cette Tarte Smores Facile apporte la joie du feu de camp à votre table.
Erreurs Courantes à Éviter
Erreur 1 : Utiliser de la Crème Tiède pour la Monter
C’est l’erreur la plus fréquente. Si votre crème liquide entière n’est pas bien froide sortie du frigo, elle ne montera pas correctement. Vous obtiendrez un mélange liquide et plat au lieu de pics mousseux. Votre mousse sera dense et lourde, pas légère et aérienne. Assurez-vous toujours que votre crème, et même votre bol, soient bien froids. Astuce pro : Placez votre bol au congélateur pendant 10 minutes avant de commencer à fouetter.
Erreur 2 : Ajouter du Chocolat Chaud à la Chantilly
Après avoir fait fondre votre chocolat, il est trop chaud. Si vous l’incorporez directement dans la chantilly, il va la faire fondre et faire retomber tout votre travail. Le résultat est une couche de mousse liquide et qui ne prend pas. Laissez toujours le mélange chocolaté refroidir jusqu’à être tiède. Testez en touchant le bol — il doit être chaud mais pas brûlant. Cela préserve les bulles d’air dans la crème.
Erreur 3 : Sauter l’Étape du Gonflement de la Gélatine
La gélatine a besoin de « fleurir » dans l’eau froide pour s’activer. La saupoudrer simplement dans un mélange chaud créera des grumeaux qui ne se dissoudront jamais. Vous aurez des morceaux gélatineux irréguliers dans votre mousse lisse. Saupoudrez toujours la poudre sur de l’eau froide dans un petit bol. Laissez reposer 5 minutes jusqu’à ce que ce soit une masse gélatineuse solide. Ensuite, dissolvez-la dans un liquide *tiède*. Cela garantit une prise lisse et stable.
Erreur 4 : Ne Pas Laisser le Gâteau Refroidir Complètement
L’impatience ici gâche les couches. Une base de gâteau tiède, même un peu, commencera à faire fondre la mousse délicate quand vous l’étalerez. La mousse peut s’infiltrer dans le gâteau, créant une base détrempée et des couleurs floues. Laissez le gâteau refroidir dans son moule sur une grille jusqu’à ce qu’il n’y ait plus aucune chaleur. Cela peut prendre une heure. C’est une étape cruciale pour l’intégrité structurelle.
Erreur 5 : Trop Mélanger la Mousse
Quand vous incorporez la chantilly au chocolat, l’enthousiasme peut être un problème. Remuer ou battre vigoureusement fait retomber la crème. La mousse perd sa texture aérienne et mousseuse. Incorporez doucement avec une spatule, en faisant des mouvements en « 8 », juste jusqu’à ce que ce soit homogène. Arrêtez dès qu’il n’y a plus de stries blanches. Une main légère vous donnera cette consistance rêveuse et nuageuse.
Un Mot sur les Ingrédients de Qualité
L’âme de cette mousse au chocolat est dans ses ingrédients. Utiliser du chocolat de haute qualité n’améliore pas seulement la saveur ; cela affecte la texture et la brillance du gâteau final. Pour plus de conseils sur le choix d’ingrédients sains, vous pouvez explorer les guides sur une alimentation saine et son influence sur vos résultats en cuisine.
Plus d’Inspirations Desserts
Si ce Gâteau Triple Mousse au Chocolat a enflammé votre passion pour la pâtisserie, vous trouverez tout un monde d’inspiration qui vous attend. J’ai beaucoup d’autres recettes appréciées pour toutes les occasions. Découvrez une variété d’autres gâteaux et pâtisseries superbes dans ma collection de gâteaux et pâtisseries. Des pâtisseries simples du week-end aux réalisations de fête élaborées, il y en a pour tous les cuisiniers.
Vos Questions sur le Gâteau Triple Mousse au Chocolat Répondues
Puis-je faire ce gâteau sans gélatine ?
Oui, vous pouvez omettre la gélatine. La mousse sera toujours délicieuse, mais elle sera plus molle et moins stable. Elle prendra un peu grâce à la crème seule, mais elle ne tiendra pas sa forme en couches aussi fermement, surtout dans une pièce chaude. Servez-la immédiatement après assemblage, ou réfrigérez-la plus longtemps (6h+) pour l’aider à durcir. La texture sera plus proche d’une crème fouettée très légère que d’une mousse ferme.
Pourquoi faut-il utiliser un moule à charnière ?
Le moule à charnière a des parois amovibles. C’est essentiel parce que vous construisez les couches directement dans le moule et le faites prendre. Pour retirer le gâteau terminé sans détruire les hautes couches délicates de mousse, vous déverrouillez simplement le côté. Il s’enlève proprement. Essayer de démouler un tel gâteau d’un moule à bords fixes est presque impossible et ruinerait la présentation.
Puis-je utiliser de la crème ou du lait allégé pour cette recette ?
Je recommande fortement d’utiliser de la crème liquide entière. La crème allégée ne monte pas correctement. Elle manque de matière grasse pour former des pics stables. Votre mousse serait fine et pourrait se séparer. Le lait de la base peut être allégé, mais le gâteau pourrait être un peu moins moelleux. Pour la meilleure texture et saveur, respectez les ingrédients indiqués.
Comment éviter que le glaçage ne craquelle quand je coupe le gâteau ?
Un glaçage qui craque signifie généralement qu’il a été versé trop chaud ou qu’il est trop épais. Laissez le mélange de glaçage refroidir et épaissir légèrement après fonte. Il doit être fluide mais pas liquide. De plus, utilisez un couteau très tranchant et chaud pour découper. Trempez le couteau dans l’eau chaude, essuyez-le et coupez franchement. La lame chaude traverse doucement le glaçage sans le faire éclater.
Ma couche de mousse semble trop liquide. Qu’ai-je mal fait ?
Une mousse liquide pointe généralement deux problèmes. Premièrement, la crème fouettée était peut-être pas assez montée (pas de pics mous). Deuxièmement, le mélange au chocolat était probablement trop chaud lorsqu’il a été incorporé à la crème, la faisant fondre. Assurez-vous que votre crème est montée en une chantilly épaisse et gonflée avant l’incorporation. Et vérifiez que votre mélange de chocolat fondu est tiède, pas chaud, avant de combiner.
Puis-je congeler ce Gâteau Triple Mousse au Chocolat ?
Absolument ! Ce gâteau se congèle très bien. Une fois le glaçage final pris, enveloppez le gâteau entier serré dans du film alimentaire, puis dans de l’aluminium. Congelez jusqu’à un mois. Pour servir, décongelez-le au réfrigérateur toute une nuit. La texture reste excellente. Ne décongelez pas à température ambiante, la mousse pourrait devenir trop molle.
Quelle est la meilleure façon de décorer ce gâteau, à part les copeaux de chocolat ?
Vous avez de nombreuses belles options. Des baies fraîches comme des framboises ou fraises ajoutent de la couleur et de la fraîcheur. Une feuille d’or ou d’argent alimentaire donne une touche luxueuse. Une simple neige de cacao en poudre ou de sucre glace est élégante. Vous pouvez aussi dresser de petites rosettes de chantilly autour du bord. Ou saupoudrer de noisettes ou amandes grillées et concassées pour un contraste croquant.
Comment savoir quand la crème fouettée est à « pic mou » ?
Quand vous fouettez la crème avec un batteur ou un fouet, arrêtez et soulevez les fouets. La crème doit monter et former un pic qui garde sa forme un instant, puis dont la pointe se courbe doucement. Elle ne doit pas être raide et pointue (pic ferme), ni liquide et plate. Cela ressemble à un nuage doux et duveteux dont le sommet retombe un peu. C’est le stade parfait pour incorporer à une mousse.
Puis-je préparer la base du gâteau la veille ?
Oui, c’est une excellente stratégie pour gagner du temps. Préparez la base du gâteau au chocolat la veille. Laissez-la refroidir complètement, puis enveloppez-la bien dans du film alimentaire et conservez-la à température ambiante. Le lendemain, poursuivez avec les couches de mousse et le glaçage. La base sera peut-être même plus facile à travailler car bien stabilisée et ferme.
Y a-t-il un moyen de rendre ce gâteau moins sucré ?
Pour ajuster le sucre, concentrez-vous sur le chocolat que vous choisissez. Utilisez un chocolat noir avec un pourcentage de cacao plus élevé (70% ou plus) pour la mousse et le glaçage. La base du gâteau a une quantité de sucre fixe, mais vous pouvez la réduire d’1/4 de tasse si vous préférez. La mousse au chocolat au lait est naturellement plus sucrée ; vous pourriez la remplacer entièrement par une autre couche de chocolat noir pour un gâteau globalement moins sucré.
La Dernière Part
Faire ce Gâteau Triple Mousse au Chocolat est un voyage d’amour. Chaque couche raconte une histoire — la base solide, le nuage sombre et moelleux, le doux rêve au lait, et la couronne brillante du glaçage. C’est plus qu’un dessert ; c’est une célébration dans l’assiette. J’ai vu les sourires qu’il apporte à ma famille et mes amis. C’est le gâteau qui transforme un simple repas en un souvenir. Alors rassemblez vos ingrédients, prenez votre temps, et savourez le processus. Vous êtes sur le point de créer quelque chose de véritablement magique. Et quand vous couperez dans cette beauté parfaite et bien stratifiée, vous saurez — ce rêve chocolaté est absolument, délicieusement réel.
Equipment
- Mixeur électrique
- Moule à charnière de 20 cm
- Bain-marie
- Spatule
- Grille de refroidissement
Ingrédients
- 1 tasse farine tout usage
- 1 tasse poudre de cacao non sucré
- 1 c. à café levure chimique
- 1/2 c. à café sel
- 1/2 tasse beurre non salé, ramolli
- 1 tasse sucre granulé
- 2 grands œufs
- 1 c. à café extrait de vanille
- 1/2 tasse lait
- 200 g chocolat noir, haché
- 200 g chocolat au lait, haché
- 600 ml crème épaisse, divisée
- 2 c. à café poudre de gélatine non aromatisée
- 4 c. à soupe eau
- 100 g chocolat noir pour le glaçage, haché
- 100 ml crème épaisse pour le glaçage
- 1 rouleaux ou copeaux de chocolat pour la décoration
- quelques feuilles de menthe fraîches pour la garniture
Instructions
- Préchauffez votre four à 175°C (350°F) et graissez un moule à charnière de 20 cm.
- Dans un bol, mélangez la farine, la poudre de cacao, la levure chimique et le sel.
- Dans un autre bol, crémez le beurre ramolli avec le sucre jusqu'à obtenir un mélange léger et crémeux.
- Ajoutez les œufs et l'extrait de vanille au mélange de beurre, en mélangeant jusqu'à obtenir une consistance lisse.
- Incorporez alternativement le mélange sec et le lait jusqu'à obtention d'une pâte homogène.
- Versez la pâte dans le moule et enfournez pendant 20-25 minutes. Vérifiez la cuisson avec un cure-dent.
- Laissez le gâteau refroidir complètement dans le moule sur une grille.
- Pour la mousse au chocolat noir, faites fleurir la gélatine dans l'eau, puis faites fondre le chocolat noir au bain-marie.
- Chauffez une partie de la crème et incorporez-y la gélatine jusqu'à dissolution complète.
- Combinez ce mélange avec le chocolat noir fondu et laissez refroidir légèrement.
- Fouettez le reste de la crème jusqu'à obtenir des pics souples et incorporez-la délicatement au mélange chocolat.
- Étalez la mousse au chocolat noir sur le gâteau refroidi.
- Répétez le même processus pour la mousse au chocolat au lait et étalez-la sur la mousse au chocolat noir.
- Réfrigérez le gâteau pendant 30 minutes pour que les mousses prennent.
- Pour le glaçage, faites fondre le chocolat noir et la crème pour obtenir un mélange lisse.
- Laissez refroidir légèrement, puis versez sur le gâteau en laissant couler sur les bords.
- Réfrigérez le gâteau au moins 4 heures ou toute la nuit.
- Décorez avec des copeaux de chocolat et des feuilles de menthe avant de servir.
Notes
Nutrition

Je suis Céline, une véritable passionnée d’ustensiles et de matériel de cuisine ! J’adore tester, comparer et découvrir les meilleurs équipements pour rendre la cuisine plus efficace et agréable. Que ce soit un bon couteau, un robot performant ou une poêle incontournable, je suis toujours à la recherche des outils qui feront la différence. Mon but est de vous guider dans vos choix pour que vous ayez le bon matériel adapté à vos besoins.