
Vous connaissez cette sensation quand votre cuisse plonge dans quelque chose d’une onctuosité impossible, puis rencontre une base sucrée et friable ? C’est du bonheur pur. Maintenant, imaginez que ce rêve crémeux est entrelacé avec la fraîcheur acidulée et vibrante du kiwi frais. Cela, mes amis, n’est pas juste un dessert ; c’est un jour d’été capturé dans une part. Les visages de mes enfants ont été mon test ultime—la première bite de ce cheesecake kiwi a été accompagnée de grands yeux et de petits doigts joyeux et collants. C’est un spectacle qui est trompeusement facile à faire !
L’histoire lumineuse de mon Cheesecake Kiwi Fraîcheur
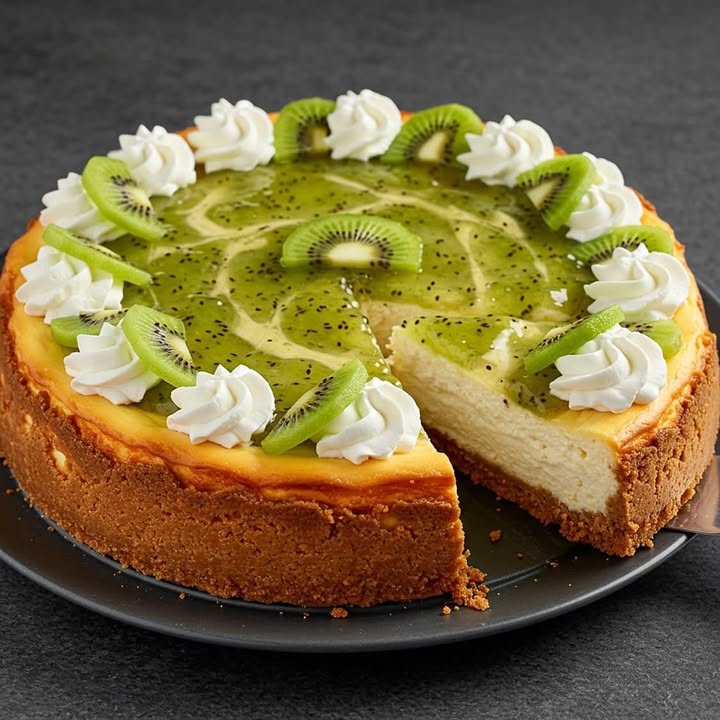
Le cheesecake a voyagé depuis la Grèce antique jusqu’aux delis de New York. Mais ma version ? Elle est née lors d’un après-midi ensoleillé quand mon panier à fruits débordait de kiwis marron et duveteux. Je voulais quelque chose léger, pas trop dense. Le cheesecake classique mijoté semblait la toile crémeuse parfaite. J’ai simplement invité le kiwi à la fête—directement dans la garniture et ensuite, brillant et caramélisé, sur le dessus. Le résultat est une belle alliance d’un cœur riche et velouté et de l’explosion de fraîcheur que le kiwi apporte. Il semble traditionnel et merveilleusement moderne.
Les raisons pour lesquelles vous tomberez amoureux de cette recette de cheesecake
Ce n’est pas juste un cheesecake ordinaire. Premièrement, la couleur verte vibrante de la purée de kiwi est naturellement superbe. Deuxièmement, le goût est parfaitement équilibré. La sucrosité de la garniture est coupée par l’acidité naturelle du kiwi, rendant chaque mordée légère. Troisièmement, la texture est divine—une crème soyeuse rencontre une croquance butyreuse. C’est suffisamment impressionnant pour les invités mais suffisamment simple pour un plaisir du weekend. Vous l’adorerez pour son pied de fraîcheur revisitant un classique bien-aimé.
Les occasions parfaites pour une part de soleil
Ce cheesecake est votre arme secrète ! Il est parfait pour un dîner d’été en jardin ou un dessert léger après un gros repas familial. J’adore l’amener aux repas-partage—il se démarque toujours. C’est aussi une façon fantastique de célébrer un anniversaire pour quelqu’un qui adore les desserts fruités. Honnêtement, tout jour nécessitant un peu de lumière est un bon jour pour ce Cheesecake Kiwi.
Les ingrédients magiques pour votre Cheesecake Kiwi Fraîcheur
Recueillons notre soleil ! Voici ce que vous aurez besoin :
Pour la base :
- 200 g de biscuits Digestives (ou biscuits Grahams)
- 100 g de beurre non-salé, fondus
Pour la garniture :
- 500 g de cream cheese plein gras, à température ambiante
- 200 ml de crème liquide (crème à fouetter, 30% de gras min.)
- 150 g de sucre granulaire
- 3 gros œufs, à température ambiante
- 2 kiwis mûris, pelés et écrasés en purée
- 1 cuillère à café d’extrait de vanille pur
Pour le dessus :
- 2 kiwis mûris mais fermes, pelés et coupés en tranches
- 50 g de sucre
- 1 cuillère à café de jus de citron
Substitutions sans stress
Vous n’avez exactement ces ingrédients ? Pas de problème ! Les biscuits Digestives peuvent être substitués par des biscuits Grahams ou des biscuits sucrés simples. Pas de kiwis frais ? Une purée de kiwi de bonne qualité (~½ tasse) fonctionne dans la garniture. Pour une variante nuttée, vous pouvez ajouter 50g d’amandes broyées à la base biscuitée. L’objectif est de se relaxer et s’amuser dans la cuisine.
Élaboration de votre Cheesecake Kiwi Fraîcheur : Pas par pas
Pas 1 : Création de la base butyreuse
Premièrement, créons cette fondation croquante irrésistible. Écrasez vos biscuits en miettes fines. Je utilise un processeur alimentaire, mais un sac plastique et un roulement fonctionnent aussi bien—idéal pour un soulagement du stress ! Mélangez les miettes dorées avec le beurre fondus jusqu’à ressembler à du sable mouillé. Presser ce mélange fermement et uniformément dans le fond d’une moule à charnière. Faites-le cuire pour seulement 10 minutes à 180°C (350°F) pour le fixer. Cette courte cuisson donne à la base un délicieux goût toasté et prévient l’humidité. Astuce de pro : Utiliser le fond d’un verre pour presser les miettes pour une couche uniforme.
Pas 2 : Élaboration de la garniture rêveuse de kiwi
Maintenant pour la magie ! Dans un grand bol, fouetter le cream cheese assoupli avec le sucre jusqu’à être complètement lisse et sans bosses. Ajouter les œufs, un à un, fouetter bien après chaque. Cette patience prévient une texture caillée. Maintenant, verser la crème liquide et la vanille, suivie par cette belle, vibrante, verte purée de kiwi. Mélangez doucement tout jusqu’à avoir un mélange homogène, verdâtre pale. Le aroma est déjà incroyable—crémeux avec une touche de zest tropical.
Pas 3 : La cuisson douce et la descente en température
Versez votre garniture verte luxueuse sur la pré-cuite base. Placez-le dans une oven préchauffée à 160°C (320°F). Cuire pour ~50 minutes. Les bordures devraient être fixées, mais le centre devrait encore avoir un slight, doux tremblement quand vous bougez la moule. C’est le clé à la onctuosité ! Une fois fait, tournez l’oven off, crack la porte ouverte avec une spoon de bois, et laissez le cheesecake cool inside pour une heure. Cette descente de température lent prévient des cracks dramatiques.
Pas 4 : Élaboration du dessus brillant de kiwi
Pendant que le cheesecake cools, faites le dessus jewel-like. Dans un petit saucepan, combinez les tranches de kiwi, le sucre, et le jus de citron. Cuire sur medium-low heat pour 5-7 minutes. Le sucre dissolvera et créera un light syrup, et les tranches de kiwi devenir slightly translucent et glazed. Laisser ce mélange cool complètement avant utilisation. Astuce de pro : Ne surcuire les kiwis, or ils deviendront mushies. Nous voulons qu’ils retiennent leur shape.
Pas 5 : La finale grande assemblage
Patience est votre meilleur ami ici. Une fois le cheesecake est complètement cold—Je souvent chill it overnight—arrangez les tranches glazed de kiwi artistically sur dessus. Versez toute syrup restante sur eux pour extra shine. Le contraste entre la garniture crémeuse verte et les tranches brillantes de kiwi est simplement stunning. Coupez avec un hot, clean knife pour perfect pièces.
Le timeline de votre cheesecake
Voici un aperçu rapide de votre schedule:
- Temps de préparation: 25 minutes
- Temps de cuisson: 50 minutes (plus 10 pour la base)
- Temps de repos : 1 heure dans l’oven, plus 4+ heures dans le fridge
- Total temps : Environ 6.5 heures (principalement hands-off chilling)
Le secret du chef pour l’onctuosité ultime
Mon secret non négociable absolu ? Ingrédients à température ambiante. Retirez votre cream cheese, œufs, et even la crème hors du fridge au moins 2 heures avant commencer. Cold cream cheese ne blendera jamais smoothly, leading à une batter lumpy. Les ingrédients à température ambiante emulsify perfectly, vous donnant cette texture soyeuse, professional que nous tous crave dans un baked cheesecake.
Un petit fun fact sur le kiwi
Saviez-vous que le kiwi est aussi appelé la groseille chinoise ? Il a originé en Chine mais a obtenu son nom populaire de l’oiseau national de la Nouvelle-Zélande, le kiwi, due à sa peau duveteuse marron. Il est rempli avec vitamine C—even more qu’une orange ! Intégrer de tels fruits nutritieux dans desserts est une wonderful way to ajouter une boost vitaminique. Pour plus sur le choix d’ingrédients de qualité, des ressources comme celles de Manger Bouger offrent great guidance sur une approche équilibrée.
Les outils de cuisine dont vous aurez besoin
- Moule à charnière 20-22 cm (8-9 pouces)
- Robot culinaire ou sac plastique + rouleau à pâtisserie (pour les miettes)
- Grands bols de mélange
- Mixeur électrique à main ou mixeur sur socle
- Spatule
- Petit saucepan
Garder votre cheesecake frais
Une fois assemblé, ce cheesecake doit vivre dans le refrigerator. Couvrez-le loosely avec film alimentaire ou gardez-le dans un porte-cake. L’humidité du dessus kiwi signifie qu’il est mieux apprécié 2-3 jours. La texture et le flavour sont à leur pic dans les premières 48 heures.
Vous pouvez le freezer ? Yes, but je recommande freezing it without le dessus kiwi frais. Wrappez le chilled, plain cheesecake tightly dans film alimentaire puis dans foil d’aluminium. Il gardera pour jusqu’à 2 mois. Thawez-le overnight dans le fridge et ajoutez le dessus frais juste avant servir.
Utilisez toujours un container hermétique pour toute reste pour prévenir le cheesecake from absorbing other fridge odors. Pour servir, laissez une part sit à température ambiante pour 10 minutes; cela révèle la full onctuosité.
Mes meilleures astuces pour réussir
- Prévenir les Cracks : Ne overbeat la batter après adding les œufs, et utilisez la méthode water bath (envelopper le fond de la moule à charnière dans foil et placer dans une roasting pan avec hot water) pour ultimate douce, even heat.
- Coupes Clean : Trempez votre knife dans hot water et wipez-le clean entre chaque coupe.
- Kiwis Ripe : Pour la purée, utilisez des kiwis very ripe, soft pour max sweetness et flavor. Pour le dessus, choisissez slightly fermer ones so they hold leur shape quand cooked.
Le rendre brillant : Idées de présentation
- Ajoutez une dusting de sucre glace juste before servir pour un effet snowy.
- Accompagnez avec feuilles de menthe fraîche pour un pop de couleur et aroma frais.
- Servez chaque part avec une petite dollop de crème légère fouettée ou un drizzle de coulis de fruit de la passion.
- Placez le whole cheesecake sur un stand de cake surrounded par whole, frais kiwis pour une piece centrale dramatique.
Plus de cakes délicieux à explorer
Si vous loved ce pied fruité, notre kitchen a so much more à offer ! Why not essayez un stunning Cheesecake rafraîchissant Melon et Menthe pour votre next gathering d’été ? Pour la season de holiday, vous can’t go wrong avec le sweet et salty crunch de notre fameux Christmas Crack Cookies. Si pure, unadulterated onctuosité est votre goal, le classic Ultra Creamy Cheesecake est un rêve accompli. Et pour un treat nutty, riche qui est facile à share, ces Pecan Pie Bars sont toujours un hit. Vous pouvez trouver tout cela et plus d’ideas wonderful dans notre collection de gateaux et patisseries.
Les erreurs communes à éviter avec votre cheesecake
Erreur 1 : Utiliser des ingrédients froids
Ceci est la raison number one pour un cheesecake lumpy, dense. Cold cream cheese ne incorpore smoothly avec sucre et œufs. Il peut conduire à overmixing comme vous essayez de battre les bosses, qui incorpore too much air et peut causer cracking. Comment éviter it: Plan ahead ! Retirez le cream cheese, œufs, et crème hors du fridge au moins 1-2 heures avant commencer baking. Ils devraient feel cool à la touch, pas cold.
Erreur 2 : Surcuire le cheesecake
Un cheesecake perfectly baked devrait encore wobble slightly dans le centre quand vous gently shake la moule. Si vous attendez pour qu’il look complètement firm comme un cake, il sera overbaked et dry. Il continue à cuire comme il cools dans l’oven turned-off. Comment éviter it: Définissez votre timer pour 5-10 minutes less que la recipe suggère. Commencez checking early. Les bordures devraient être puffed et set, mais un cercle 2-3 inches dans le middle devrait jiggle comme soft jelly.
Erreur 3 : Sauter la descente en temperature lent
Pulling un hot cheesecake hors vers le cool kitchen air est un shock. Le drastic temperature change cause le centre à sink et la surface à crack dramatiquement. Comment éviter it: Utilisez toujours la méthode « cool dans l’oven ». Tournez l’oven off, crack la door ouverte avec une spoon de bois, et laissez-le sit pour une heure. Cela permet une descente progressive de température, protégeant sa surface smooth.
Erreur 4 : Ne pas sceller la moule à charnière pour un bain d’eau
Si vous choisissez utilisez un water bath (que je highly recommande pour la texture creamy), un pan leaky est un disaster. Water seeping dans votre crust ruine la texture. Comment éviter it: Wrappez le outside de votre springform pan tightly dans un double layer de foil d’aluminium heavy-duty, making sure it goes toute way up les côtés. Cela crée un waterproof shield pour votre precious cheesecake.
Vos questions sur le cheesecake kiwi, répondues !
Je peux utiliser du kiwi frozen pour cette recette ?
Vous pouvez utiliser du kiwi frozen pour la purée dans la garniture, mais je ne recommande pas it pour le dessus. Thaw le kiwi frozen complètement et drainer tout excess liquid très bien avant crushing it. Excess water from frozen fruit peut rendre votre garniture runny et affecter la baking. Pour le dessus shiny sur dessus, les tranches de kiwi frais sont essential comme elles retiennent leur shape et caramelize beautifully.
Pourquoi mon cheesecake a crack sur dessus ?
Le cracking usually happens from rapid temperature changes ou overbeating/overbaking. Beating too much air dans la batter ou baking it jusqu’à it’s complètement firm dans le centre sont common culprits. La descente lent dans l’oven est votre meilleur defense. Remember, un small crack n’est pas un failure ! C’est un signe de un homemade, delicious dessert, et votre dessus kiwi glossy couvrira it perfectly.
Comment savoir quand le cheesecake est done baking ?
Look pour le « test de tremblement ». Around le marque de 45-50 minutes, gently shake le rack d’oven. Les bordures du cheesecake devraient look puffed et set. Le centre (~size d’un small jar lid) devrait avoir un slight, gentle jiggle—like soft-set jelly, pas liquid. Il firmira up comme il cools. Si le centre look complètement liquid, give it more time. Si la whole surface est firm et ne move pas, it might être overdone.
Je peux préparer ce cheesecake le jour avant ?
Absolument, et je highly recommande it ! Le cheesecake needs time à set et pour les flavors à meld. Baking it le jour avant, laisser cool complètement, puis chilling it overnight dans le fridge est ideal. Just ajoutez le dessus cooked kiwi quelques heures avant servir pour qu’il ne rend pas le dessus soggy. Cela rend it un dessert stress-free pour entertaining.
Ce que je peux utiliser instead de biscuits Digestives ?
Les biscuits Grahams sont le substitute plus commun et fonctionnent perfectly. Vous pouvez aussi utiliser cookies shortbread simples, speculoos (pour un pied spiced), ou even biscuits oat simples. L’objectif est une base plain, slightly sweet, crumbly qui hold ensemble avec butter. Avoid cookies avec strong flavors comme chocolate chips, comme ils might clash avec le kiwi.
Ma garniture split ou look curdled. Qu’est-ce qui went wrong ?
Une garniture curdled est presque toujours due à des ingrédients being too cold ou being added too quickly. Si les cold œufs hit le mixture cream cheese trop fast, cela peut causer le fat à séparer. Pour fixer it next time, ensure tous ingrédients sont à room temp et ajoutez les œufs un à un, mixing juste jusqu’à incorporated après chaque. Ne overmix une fois les œufs sont in.
Il y a une way pour faire cette recipe without baking ?
Vous pouvez faire une version no-bake, mais la texture sera différente. Pour un cheesecake kiwi no-bake, vous aurez besoin de utiliser gelatin ou un autre agent de setting dans la garniture, et la base ne serait pas pré-cuite—just chilled. Le flavour serait encore lovely et fresh, mais vous perdrez cette texture unique, dense-yet-creamy d’un baked cheesecake.
Je peux utiliser other fruits avec cette même méthode ?
Yes, ceci est une fantastic base recipe ! Pour la purée dans la garniture, vous pouvez substituer la même quantité de purée de mango, strawberry, ou raspberry (filtrée des seeds si desired). Pour le dessus, choisissez fruits qui hold up à light cooking, comme tranches de peach, pineapple, ou berries. Adjustez sugar dans le dessus basé sur le fruit’s natural sweetness.
Combien de temps je devrais le laisser chill avant slicing ?
Patience est clé. Pour coupes clean, perfect, le cheesecake needs être fully set. Une minim de 4 heures dans le fridge est nécessaire, mais overnight est best. Cela permet la structure à firm up complètement. Si vous slice dans un warm ou seulement partially chilled cheesecake, il sera messy et runny.
Je dois peler les kiwis pour la purée ?
Yes, toujours peeler les kiwis avant utiliser them dans la garniture ou dessus. La peau duveteuse n’est pas pleasant à manger dans une purée smooth. Simply coupez off both ends et utilisez une spoon pour scoop la flesh hors de la peau—c’est quick et facile ! Pour les tranches de dessus, peeler them avec un vegetable peeler ou un knife.
Prêt à apporter le soleil à votre table ?
Voilà donc—mon ultimate recipe pour un Cheesecake Kiwi Fraîcheur qui est autant joyful à faire qu’à manger. C’est une belle blend de comfort crémeux et fraîcheur acidulée. Ne soyez pas intimidated par la baking; simplement suivrez les pas simples et trustez le process. Je promets, le moment où vous presentez ce masterpiece glistening, green-topped, vous feelerez comme une superstar. Recueillez vos ingrédients, préchauffez votre oven, et preparez-vous pour les compliments. Happy baking !
Equipment
- Moule à charnière de 20-22 cm
- Robot culinaire ou sachet en plastique + rouleau à pâtisserie
- Grands bols de mélange
- Batteur électrique ou mixeur sur socle
- Spatule
- Petite casserole
Ingrédients
- 200 g biscuits digestive
- 100 g beurre non salé fondu
- 500 g fromage à la crème entier, à température ambiante
- 200 ml crème liquide 30% de matière grasse minimum
- 150 g sucre granulé
- 3 grands oeufs à température ambiante
- 2 unités kiwis mûrs pelés et écrasés en purée
- 1 c.s extrait de vanille pure
- 2 unités kiwis mûrs fermés, pelés et tranchés pour le dessus
- 50 g sucre pour le dessus
- 1 c.s jus de citron
Instructions
- Émietter les biscuits en fines miettes et les mélanger avec le beurre fondu.
- Presser ce mélange dans le fond d'un moule à charnière et cuire à 180°C pendant 10 minutes.
- Dans un grand bol, battre le fromage à la crème avec le sucre jusqu'à ce que le mélange soit lisse.
- Ajouter les œufs un par un, en battant bien après chaque ajout.
- Ajouter la crème liquide, la vanille et la purée de kiwi, puis mélanger délicatement.
- Verser le mélange sur la croûte précuite et cuire à 160°C pendant environ 50 minutes.
- Laisser refroidir le cheesecake dans le four éteint avec la porte entrouverte pendant 1 heure.
- Dans une petite casserole, cuire les tranches de kiwi avec le sucre et le jus de citron pendant 5-7 minutes, puis laisser refroidir.
- Disposer les tranches de kiwi sur le cheesecake refroidi et verser un peu de sirop restant sur le dessus.
- Réfrigérer pendant au moins 4 heures, idéalement toute une nuit, avant de servir.
Notes
Nutrition

Je suis Céline, une véritable passionnée d’ustensiles et de matériel de cuisine ! J’adore tester, comparer et découvrir les meilleurs équipements pour rendre la cuisine plus efficace et agréable. Que ce soit un bon couteau, un robot performant ou une poêle incontournable, je suis toujours à la recherche des outils qui feront la différence. Mon but est de vous guider dans vos choix pour que vous ayez le bon matériel adapté à vos besoins.