
Mini Pies Cerises Crémeux Irrésistibles : Votre Nouveau Pêché Mignon !
Avez-vous déjà ouvert votre four pour y découvrir une fournée de mini-pâtisseries parfaites qui embaument toute la cuisine d’une odeur de boulangerie divine ? C’est la joie que procurent ces Mini Pies Cerises Crémeux. Je les ai préparées pour la première fois pour l’anniversaire de ma nièce, et je vous assure qu’elles ont disparu plus vite que les bougies n’ont été soufflées ! Ces petits délices allient une croûte beurrée, une couche de cream cheese onctueuse et une explosion de cerises sucrées-acidulées à chaque bouchée. Ils sont aussi amusants à préparer qu’à déguster, et aujourd’hui, je partage tous mes secrets avec vous.
Une Petite Histoire Derrière Nos Mini Pies Cerises Crémeux
L’idée du mini-pie est tout simplement géniale. Elle reprend le réconfort d’une tarte classique et le transforme en une portion individuelle, parfaite pour le partage. Ma version de ces Mini Pies Cerises Crémeux s’inspire de mes étés chez ma grand-mère. Elle avait un cerisier, et nous passions nos après-midi à dénoyauter les cerises pour sa confiture célèbre. Cette recette est mon hommage moderne et nomade à ces saveurs d’enfance. Si l’association cream cheese et fruit est un classique des diners américains, la présenter dans une mini-croûte à tarte avec un dessin en treillis apporte une touche à la fois nostalgique et délicieusement fraîche.
Pourquoi Vous Allez Absolument Adorer Cette Recette
Laissez-moi vous compter les raisons ! Premièrement, elle est incroyablement facile. Utiliser une pâte à tarte toute prête réduit le travail sans rogner sur le goût. La garniture crémeuse ne nécessite aucune cuisson et se prépare en quelques minutes. Deuxièmement, le contraste des saveurs est magique. Le cream cheese riche et acidulé équilibre parfaitement les cerises juteuses et lumineuses. Enfin, ce sont les ultimes facilitateurs de sourires. Que ce soit pour un brunch chic ou une surprise dans la lunchbox des enfants, ces mini-pies cerises cream cheese suscitent toujours des sourires et des demandes de recette.
Occasions Parfaites pour Ces Mini Pies Cerises Crémeux
Ces petites tartes sont votre arme secrète pour toutes les occasions. Elles sont assez élégantes pour un baby-shower ou un bridal shower, présentées sur un étagère à gâteaux. Elles sont portables et sans bavures pour les pique-niques et les repas partagés. J’adore en glisser dans les lunchs de mes enfants pour une douceur spéciale. Elles constituent également un dessert magnifique pour les repas de fête comme Thanksgiving ou Noël, offrant une option fruitée et plus légère aux côtés des classiques riches. Franchement, chaque journée semble un peu plus festive avec un mini-pie à la main.
Ingrédients pour Vos Mini Pies Cerises Cream Cheese
- 2 tasses de cerises fraîches ou en conserve, dénoyautées et coupées en morceaux
- 1 tasse de cream cheese, ramolli à température ambiante
- 1/4 de tasse de sucre en poudre
- 1 cuillère à café d’extrait de vanille pur
- 1 paquet de pâte à tarte réfrigérée (contient 2 pâtes)
- 1 œuf, battu (pour la dorure)
- 2 cuillères à soupe de confiture d’abricot (facultatif, pour une glaçage brillant)
Options de Substitution Intelligentes
Pas de panique si il vous manque un ingrédient ! Voici quelques échanges faciles :
- Cerises : Pas de cerises fraîches ? Utilisez de la garniture à tarte aux cerises en conserve pour plus de facilité, ou essayez d’autres fruits rouges comme des myrtilles ou des framboises.
- Cream Cheese : Pour une touche plus légère, le mascarpone fonctionne à merveille et est tout aussi crémeux.
- Pâte à tarte : N’hésitez pas à utiliser votre recette de pâte maison préférée. Pour une touche de noisette, vous pourriez même utiliser des biscuits Graham écrasés mélangés avec du beurre pour la croûte.
- Confiture d’abricot : Toute gelée claire (comme la pêche ou la pomme) peut être utilisée pour le glaçage, ou saupoudrez simplement de sucre glace pour une finition sucrée.
Préparons Ces Mini Pies Cerises Crémeux !
Prêts à cuisiner ? Enfilez votre tablier préféré et créons un peu de magie. Suivez ces étapes pour des petits pies parfaits à chaque fois.
Étape 1 : Préparez Votre Four et Vos Moules
Commencez par préchauffer votre four à 190°C (375°F). Cela garantit qu’il soit parfaitement chaud lorsque vos pies entreront. Graissez légèrement un moule à muffins standard de 12 cavités. Pas besoin de caissettes fantaisie ; la pâte à tarte formera son propre joli récipient. L’odeur de la pâte cuite remplira bientôt votre cuisine, promettant quelque chose de délicieux.
Étape 2 : Créez les Croustillants
Déroulez vos pâtes à tarte sur un plan de travail légèrement fariné. À l’aide d’un emporte-pièce rond ou d’un verre (d’environ 10 cm de diamètre), découpez des cercles. Pressez délicatement chaque cercle dans un creux de moule à muffins, en vous assurant qu’il épouse bien le fond et les côtés. Vous verrez se former une jolie petite coupe. Astuce de pro : Réutilisez les chutes de pâte pour obtenir les 12 fonds. Un peu de rapiéçage par-ci par-là est tout à fait normal !
Étape 3 : Mélangez la Garniture Crémeuse Onirique
Dans un saladier moyen, placez le cream cheese ramolli, le sucre et l’extrait de vanille. Utilisez un batteur électrique ou une cuillère robuste pour fouetter le tout jusqu’à ce que le mélange soit parfaitement lisse et crémeux. Pas de grumeaux autorisés ! Cette garniture riche et pâle est la base luxueuse de nos mini-pies cerises.
Étape 4 : Garnissez et Superposez
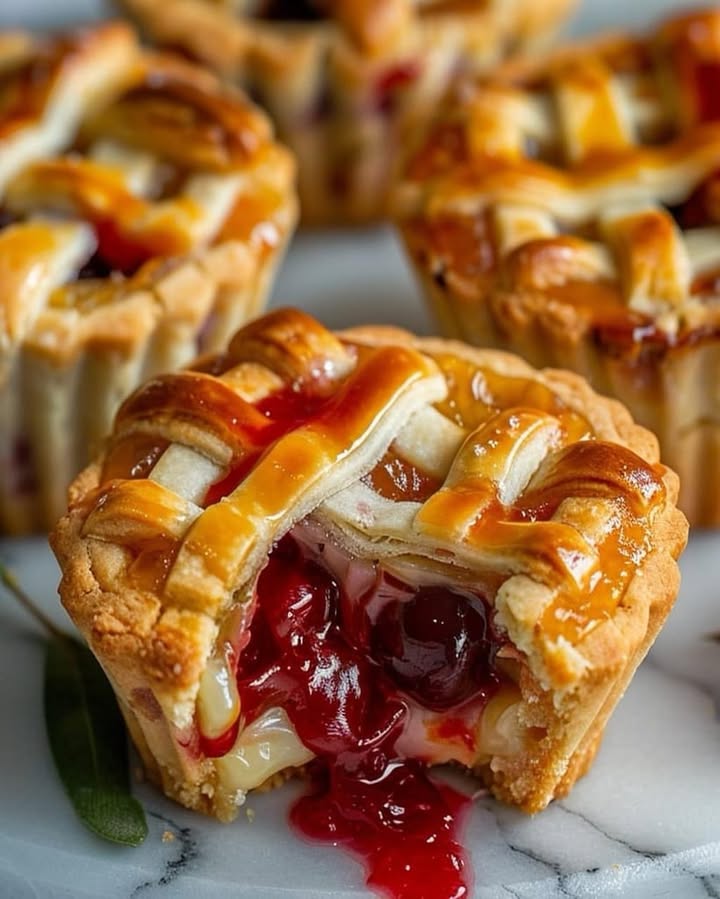
Place à la partie amusante ! Déposez environ une cuillère à soupe du mélange de cream cheese au fond de chaque croûte. Vous voulez les remplir à moitié environ. Ensuite, prenez une petite portion de vos cerises coupées et pressez-les doucement dans le cream cheese. Les cerises d’un rouge vif qui dépassent rendent déjà les pies si appétissants.
Étape 5 : Ajoutez le Dessus en Treillis
Prenez la seconde pâte à tarte (ou votre pâte restante) et coupez-la en fines bandes régulières. Tressez-les sur le dessus de chaque pie pour créer un simple motif en treillis. Ne vous stressez pas pour la perfection – le charme rustique est la clé ! Pincez les bords pour les sceller à la croûte du bas. Cette étape ajoute ce look classique et magnifique de tarte.
Étape 6 : La Cuisson Dorée
Badigeonnez le dessus de vos mini pies avec l’œuf battu. C’est le secret pour obtenir cette croûte brillante et d’un brun doré profond. Placez soigneusement le moule à muffins au centre de votre four préchauffé. Enfournez pour 20 à 25 minutes. Vous saurez qu’ils sont prêts lorsque la croûte est d’un magnifique brun doré et que la garniture bout légèrement sur les bords.
Étape 7 : La Touche Brillante Finale (Facultative)
Si vous utilisez la confiture d’abricot, faites-la chauffer au micro-ondes pendant environ 15 secondes jusqu’à ce qu’elle soit liquide. Dès que les pies sortent du four, badigeonnez délicatement la confiture tiède sur les dessus en treillis. Cela leur donne une finition professionnelle et brillante, avec une pointe de douceur supplémentaire. C’est mon petit secret de chef pour une présentation éblouissante.
Le Timing, C’est Tout
Une bonne planification rend la pâtisserie sans stress. Voici le déroulé pour vos mini-pies irrésistibles :
| Activité | Durée |
|---|---|
| Temps de Préparation | 20 minutes |
| Temps de Cuisson | 25 minutes |
| Temps de Refroidissement | 15 minutes |
| Temps Total | Environ 1 heure |
Mon Secret de Chef pour des Mini Pies Parfaits
Voici mon astuce infaillible : assurez-vous toujours que votre cream cheese est vraiment mou. Sortez-le du réfrigérateur au moins une heure avant de commencer. Si vous essayez de le mélanger froid, vous obtiendrez une garniture grumeleuse et difficile à travailler. Le cream cheese à température ambiante se fouette en un nuage soyeux et onirique qui cuit uniformément et fond dans la bouche.
Un Fait sur les Cerises
Saviez-vous que les cerises sont plus que délicieuses ? Elles sont riches en antioxydants et sont l’une des rares sources alimentaires naturelles de mélatonine, qui peut aider à réguler les cycles du sommeil. Ainsi, déguster un de ces mini pies le soir pourrait bien être une douce voie vers de beaux rêves ! Pour des informations nutritionnelles plus détaillées sur les fruits et autres ingrédients, des ressources comme ce guide sur comprendre les glucides et la qualité des aliments peuvent être très utiles.
Matériel Dont Vous Aurez Besoin
- Moule à muffins standard de 12 cavités
- Rouleau à pâtisserie (si nécessaire pour les chutes de pâte)
- Emporte-pièce rond ou verre (d’environ 10 cm de diamètre)
- Saladier moyen
- Batteur électrique ou fouet
- Pinceau de pâtisserie
- Petit bol pour la dorure à l’œuf
Conservation de Vos Mini Pies Cerises Cream Cheese
Ces pies sont meilleures dégustées le jour même, lorsque la croûte est à son maximum de friabilité. Si vous avez des restes, laissez-les refroidir complètement d’abord. Ensuite, placez-les en une seule couche dans un contenant hermétique. Vous pouvez les conserver à température ambiante pendant une journée.
Pour une conservation plus longue, le réfrigérateur est votre ami. Ils se conserveront bien pendant 3 à 4 jours. La croûte ramollira un peu, mais les saveurs seront toujours merveilleuses. Je les préfère parfois froids – la garniture au

Je suis Céline, une véritable passionnée d’ustensiles et de matériel de cuisine ! J’adore tester, comparer et découvrir les meilleurs équipements pour rendre la cuisine plus efficace et agréable. Que ce soit un bon couteau, un robot performant ou une poêle incontournable, je suis toujours à la recherche des outils qui feront la différence. Mon but est de vous guider dans vos choix pour que vous ayez le bon matériel adapté à vos besoins.